EMPTY
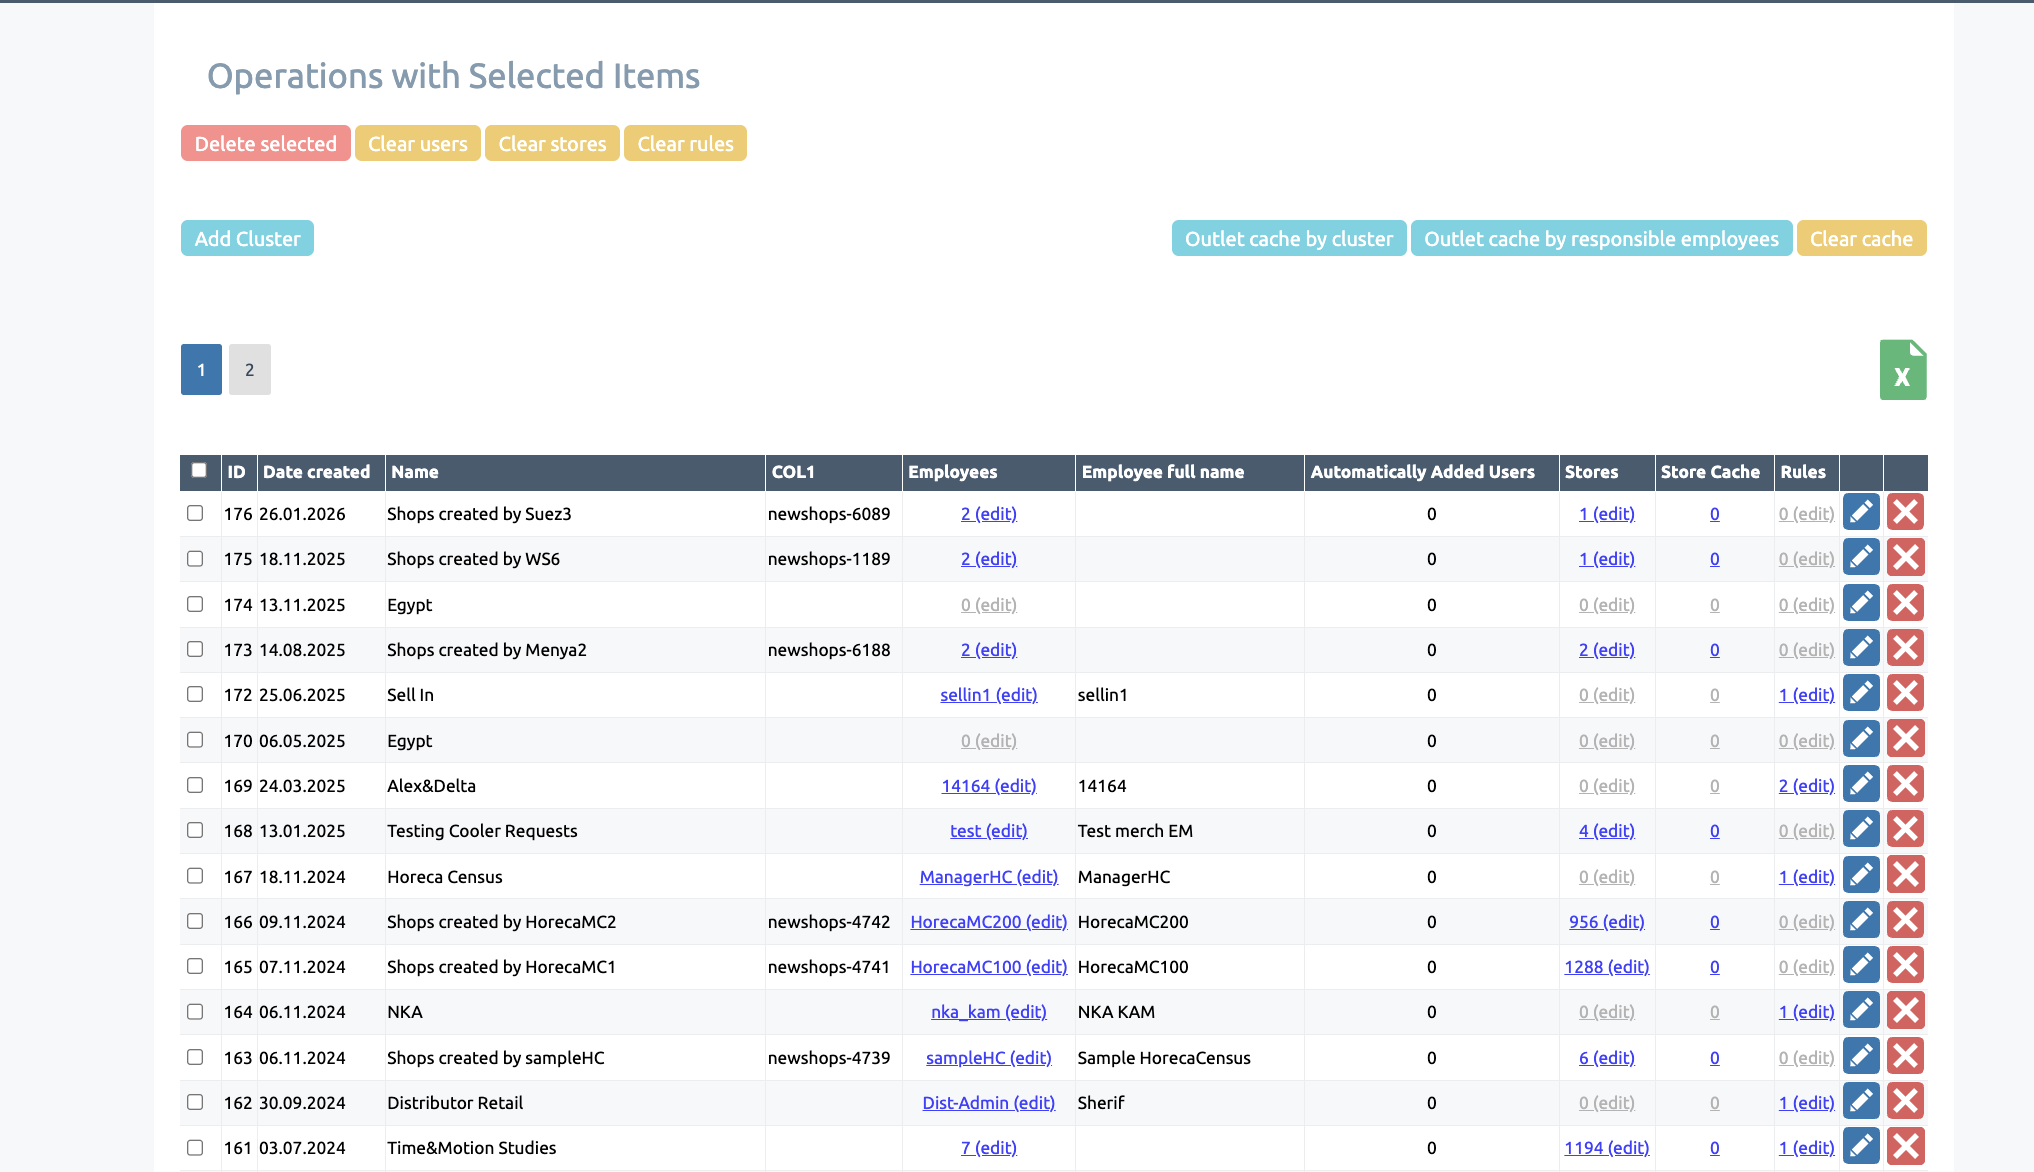
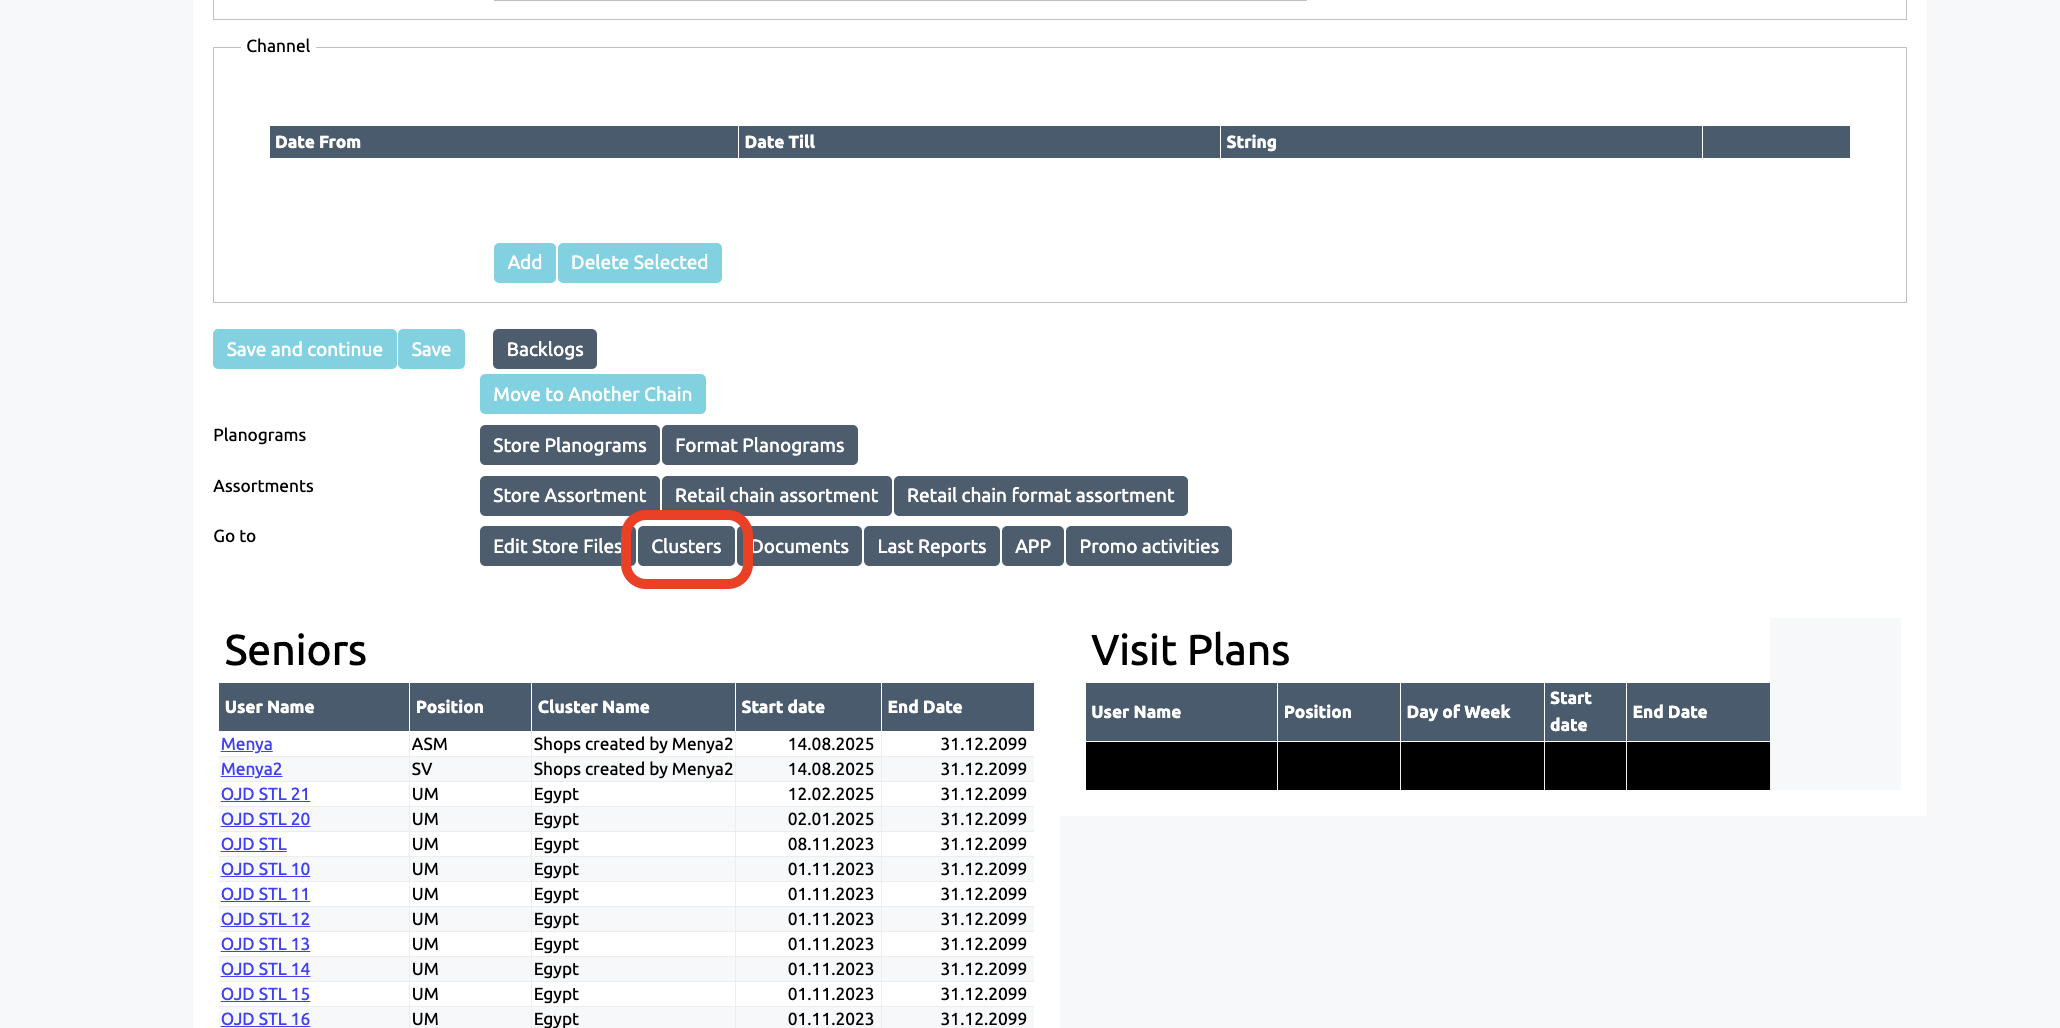
Clusters
Clusters can be used to manage shops. Clusters allow shops to be assigned to employees independently of their visit schedules, making them responsible for the shops. Stores can be assigned according to predefined rules to one or more employees
If an employee has a shops in their cluster, they can view all reports generated for that outlet by employees in the same role or lower down the hierarchy
In addition, clusters allow you to update the assignment of outlets to users in bulk: adding a shops to a cluster will display it for all employees who have that cluster
Employees, rules, and shops
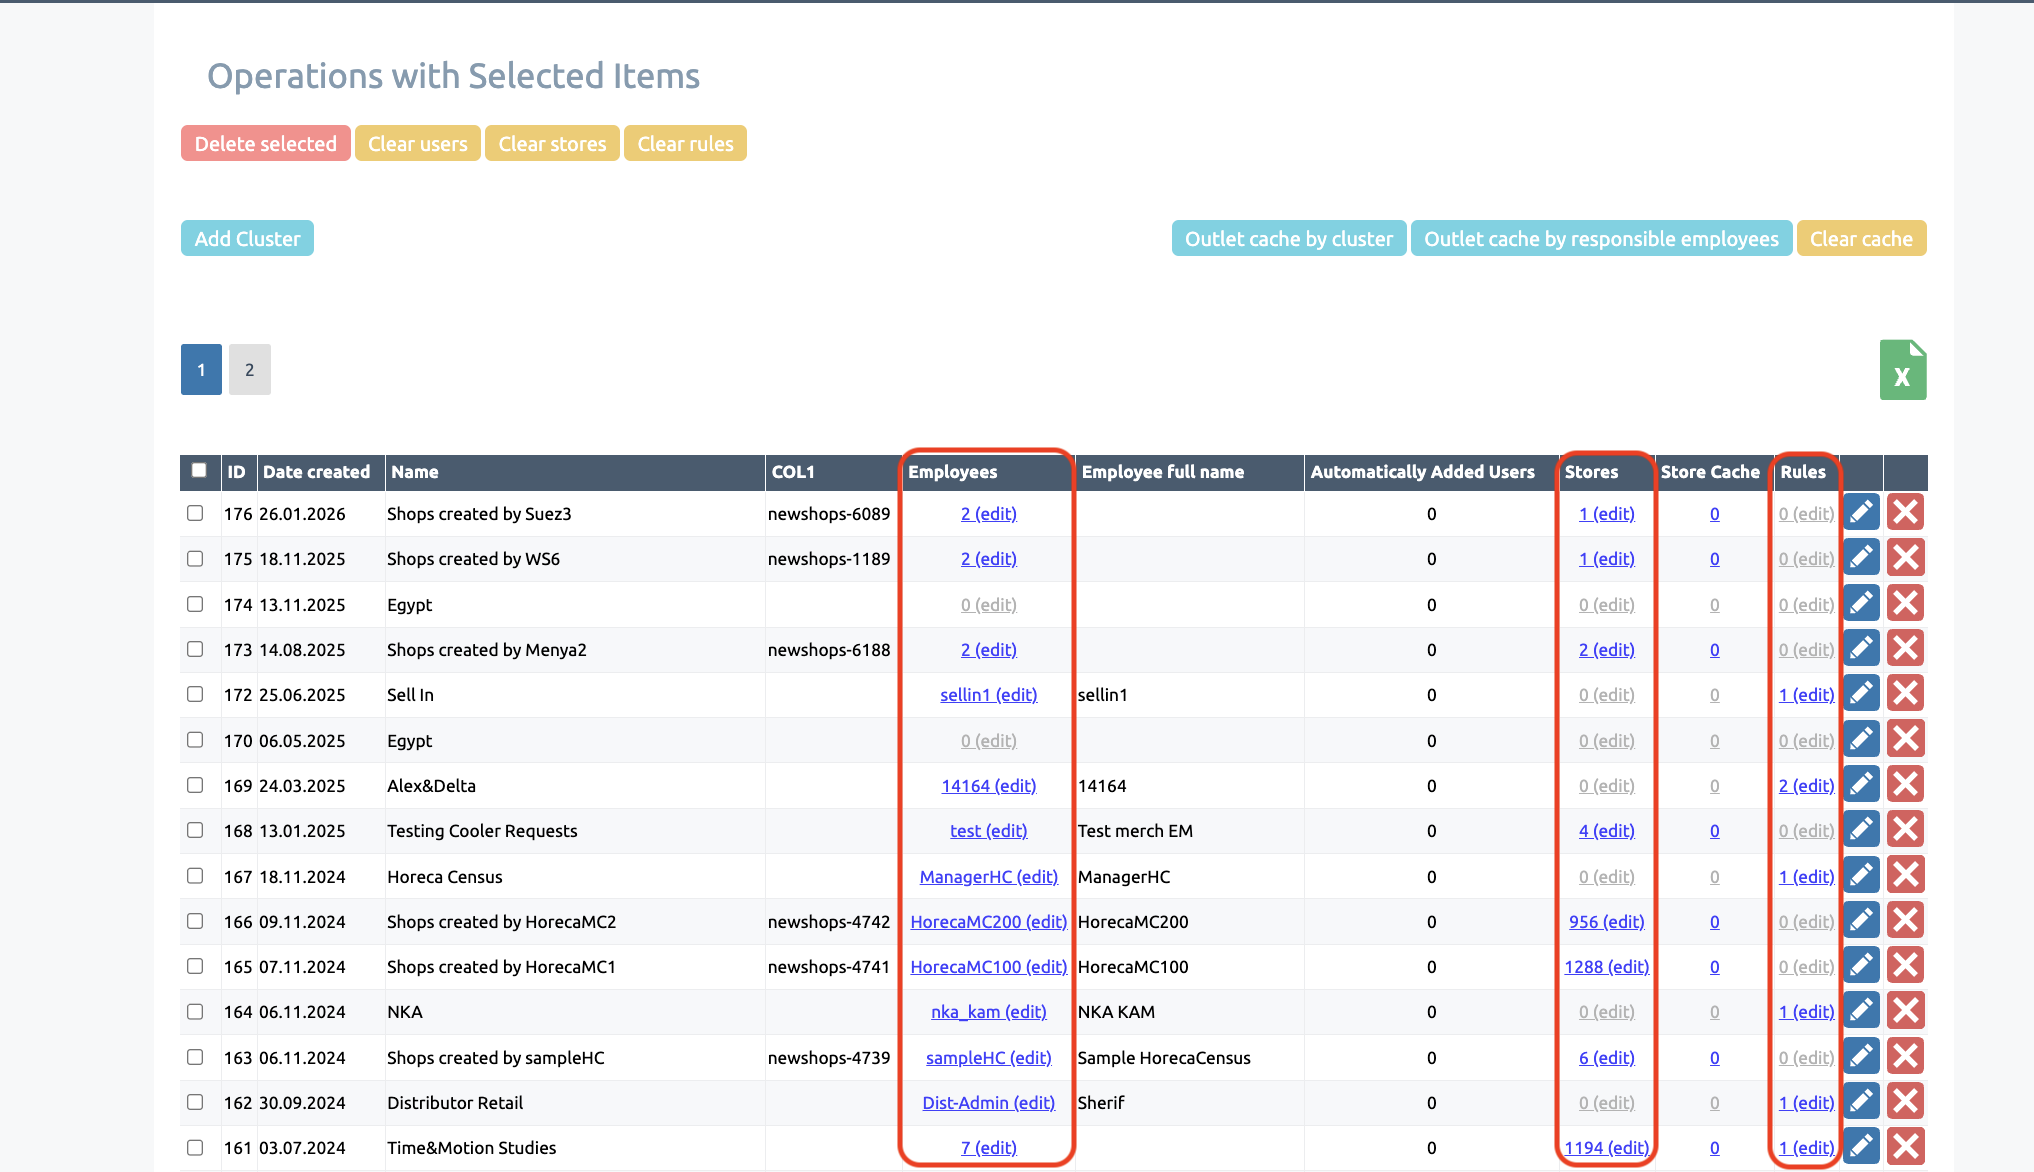
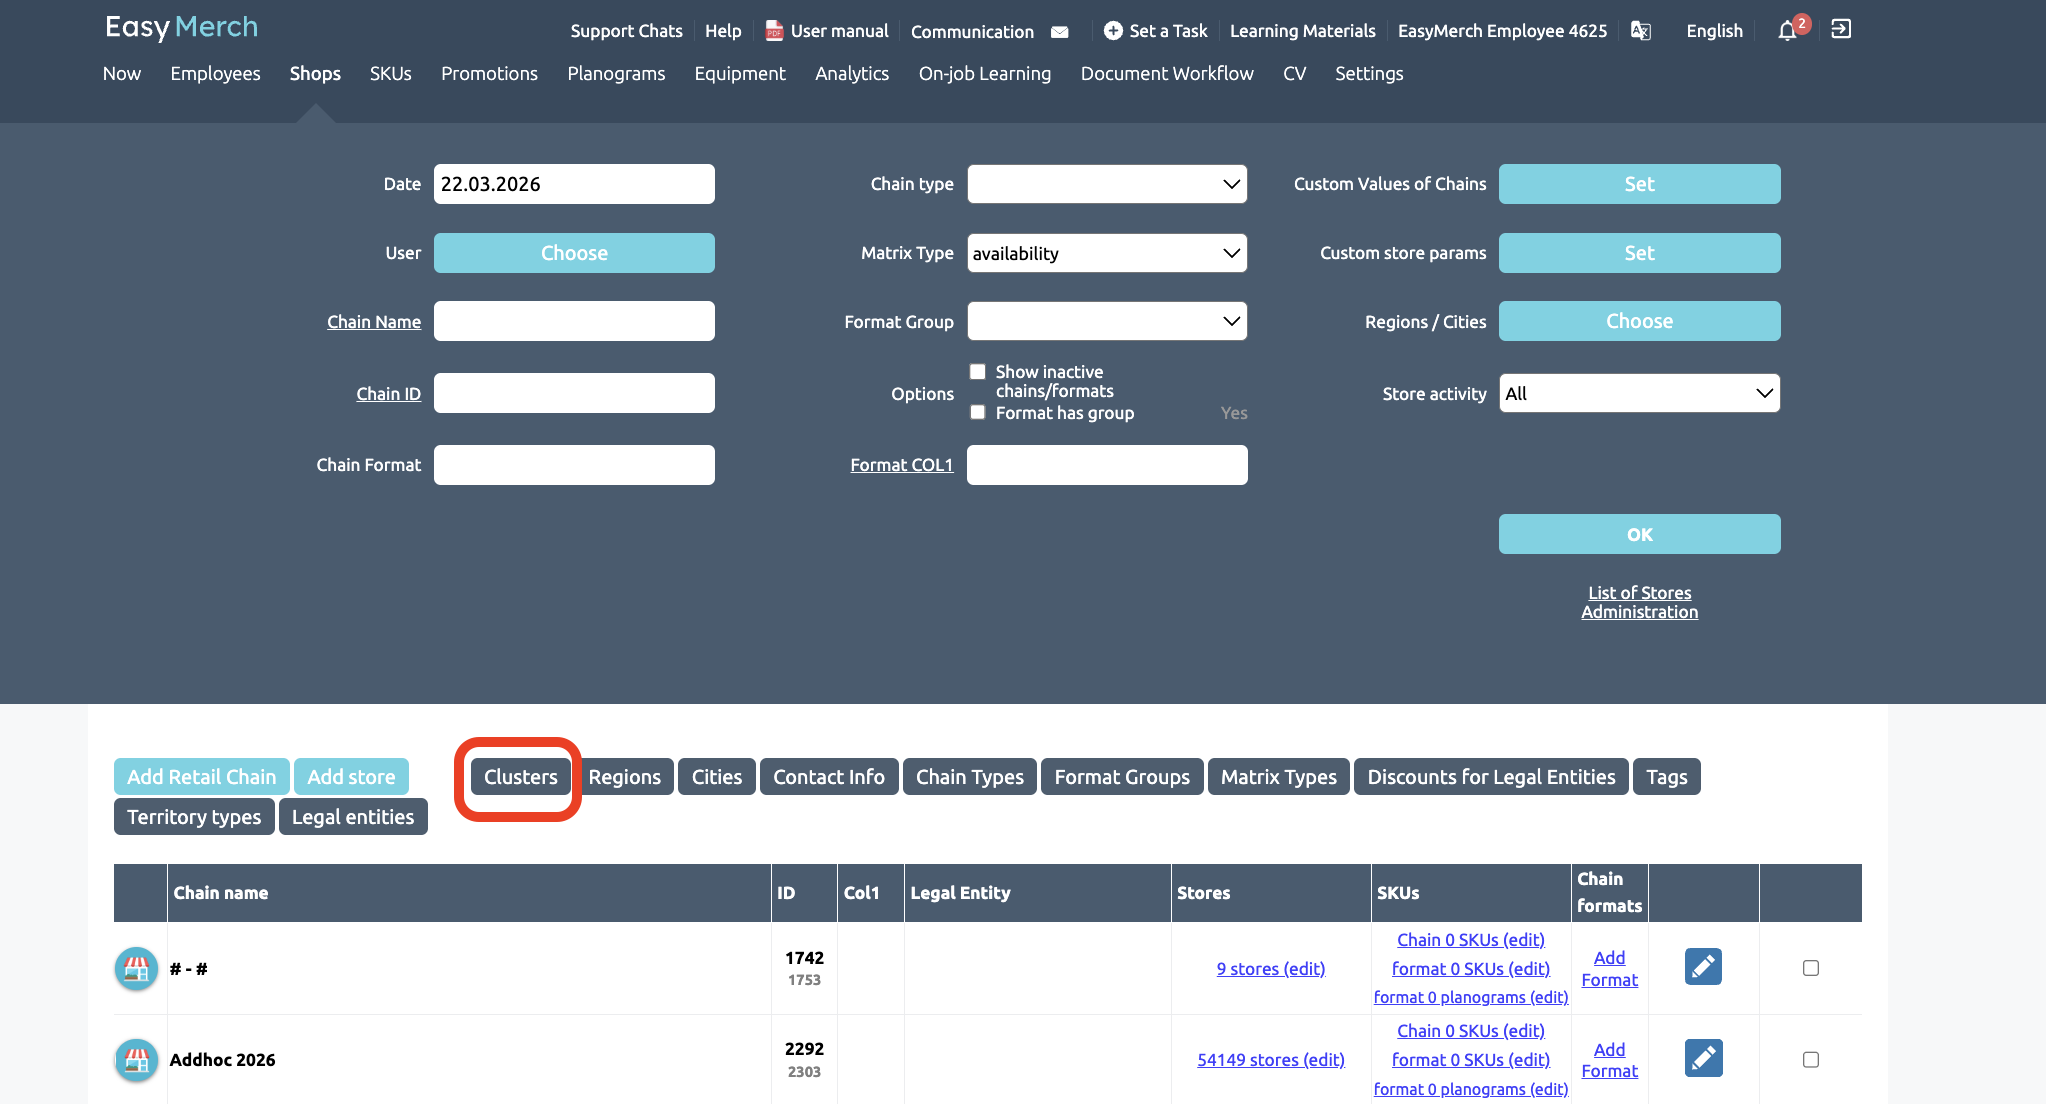
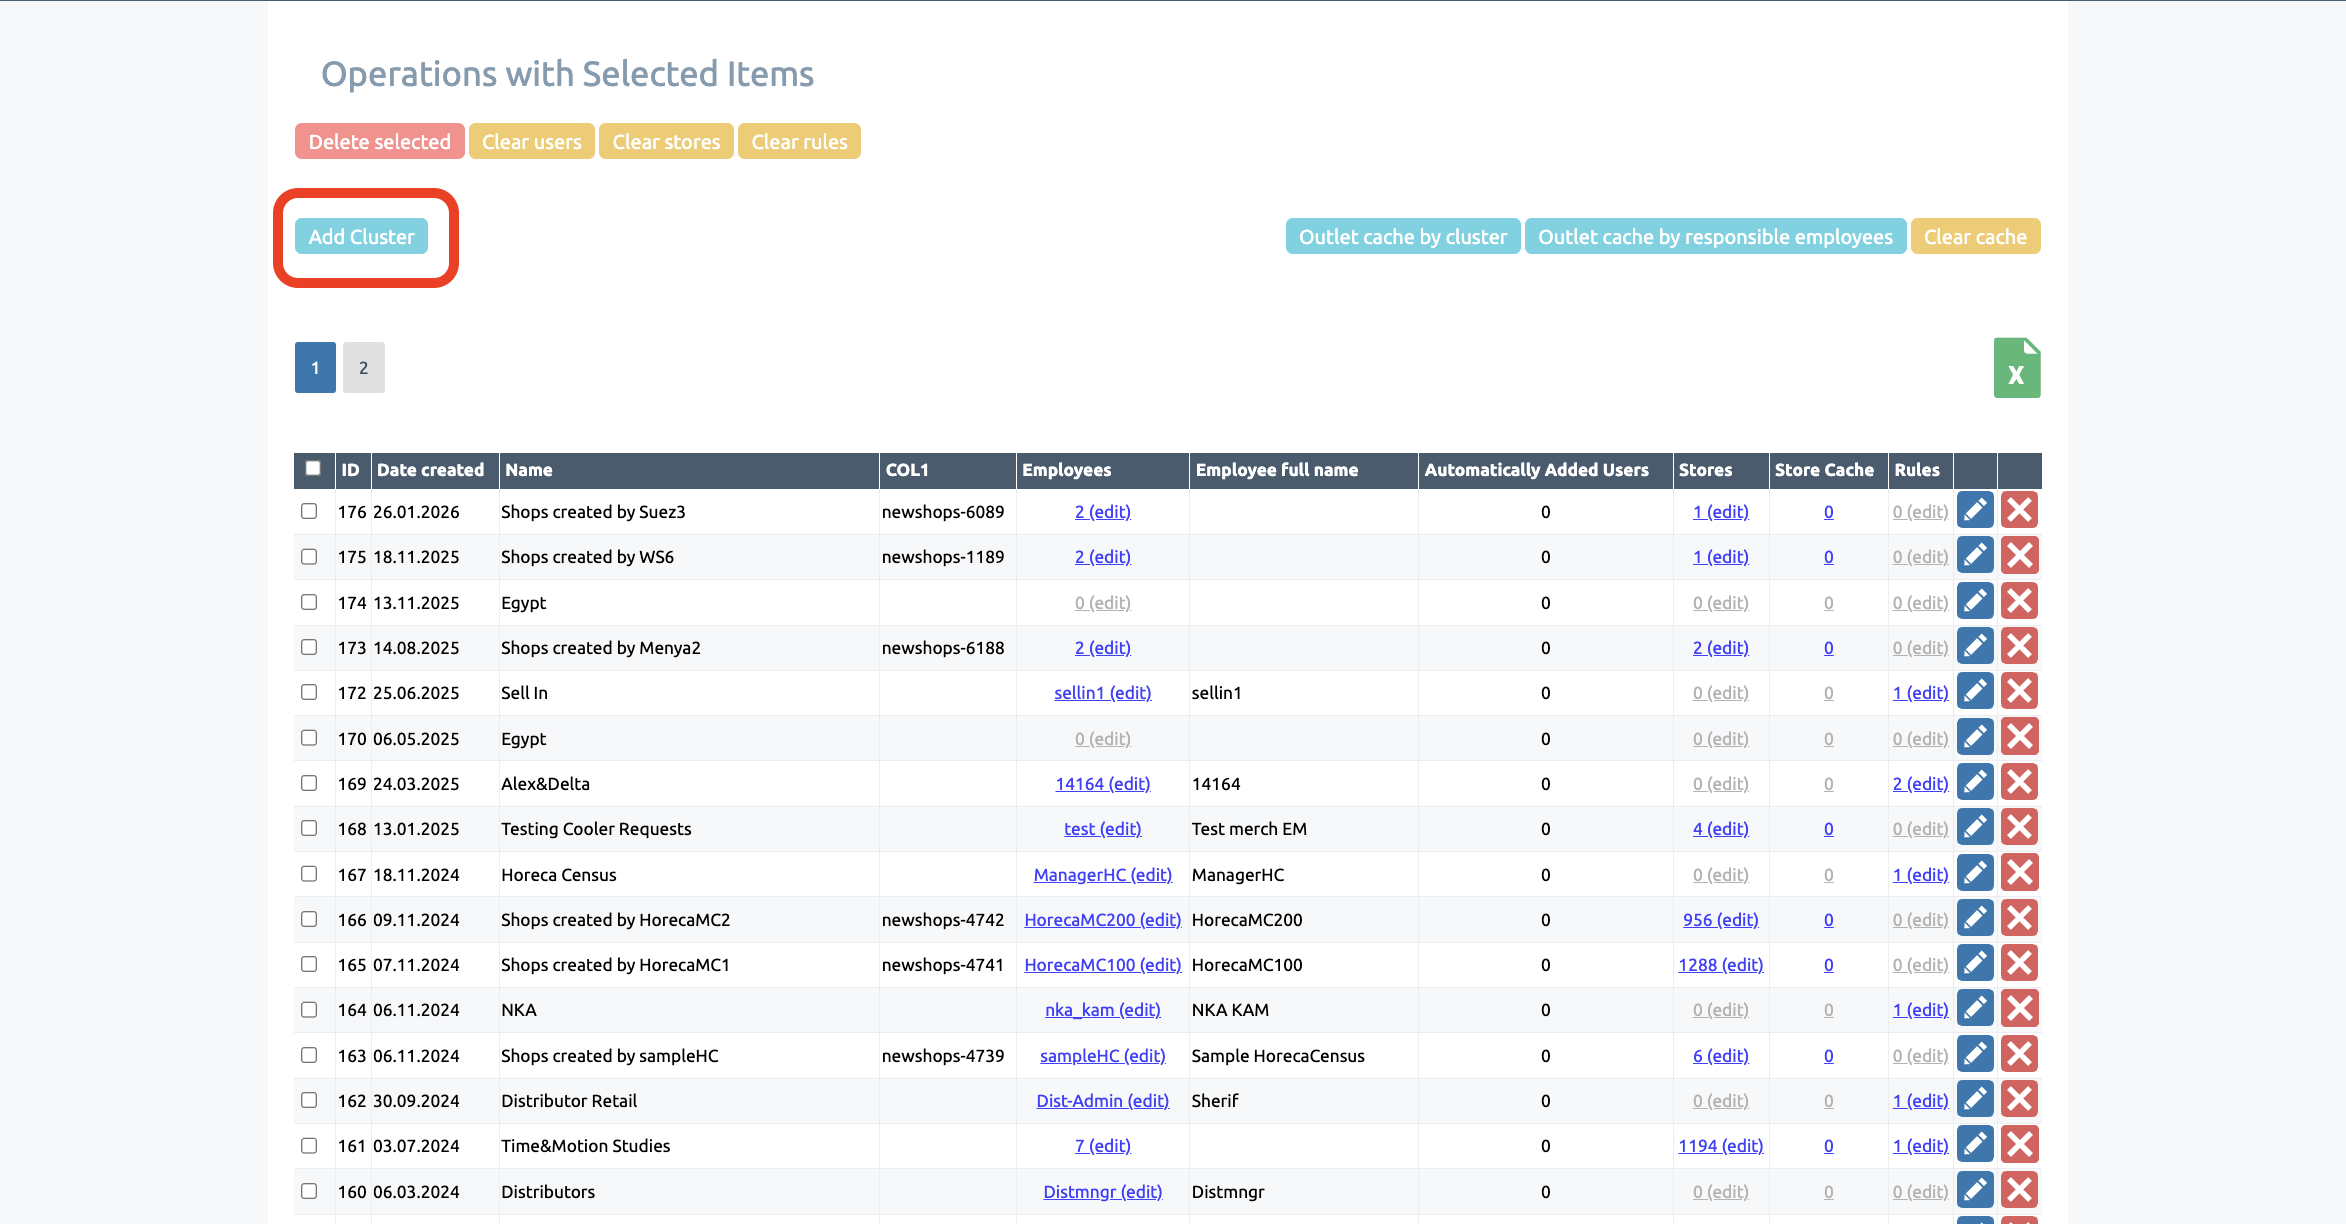
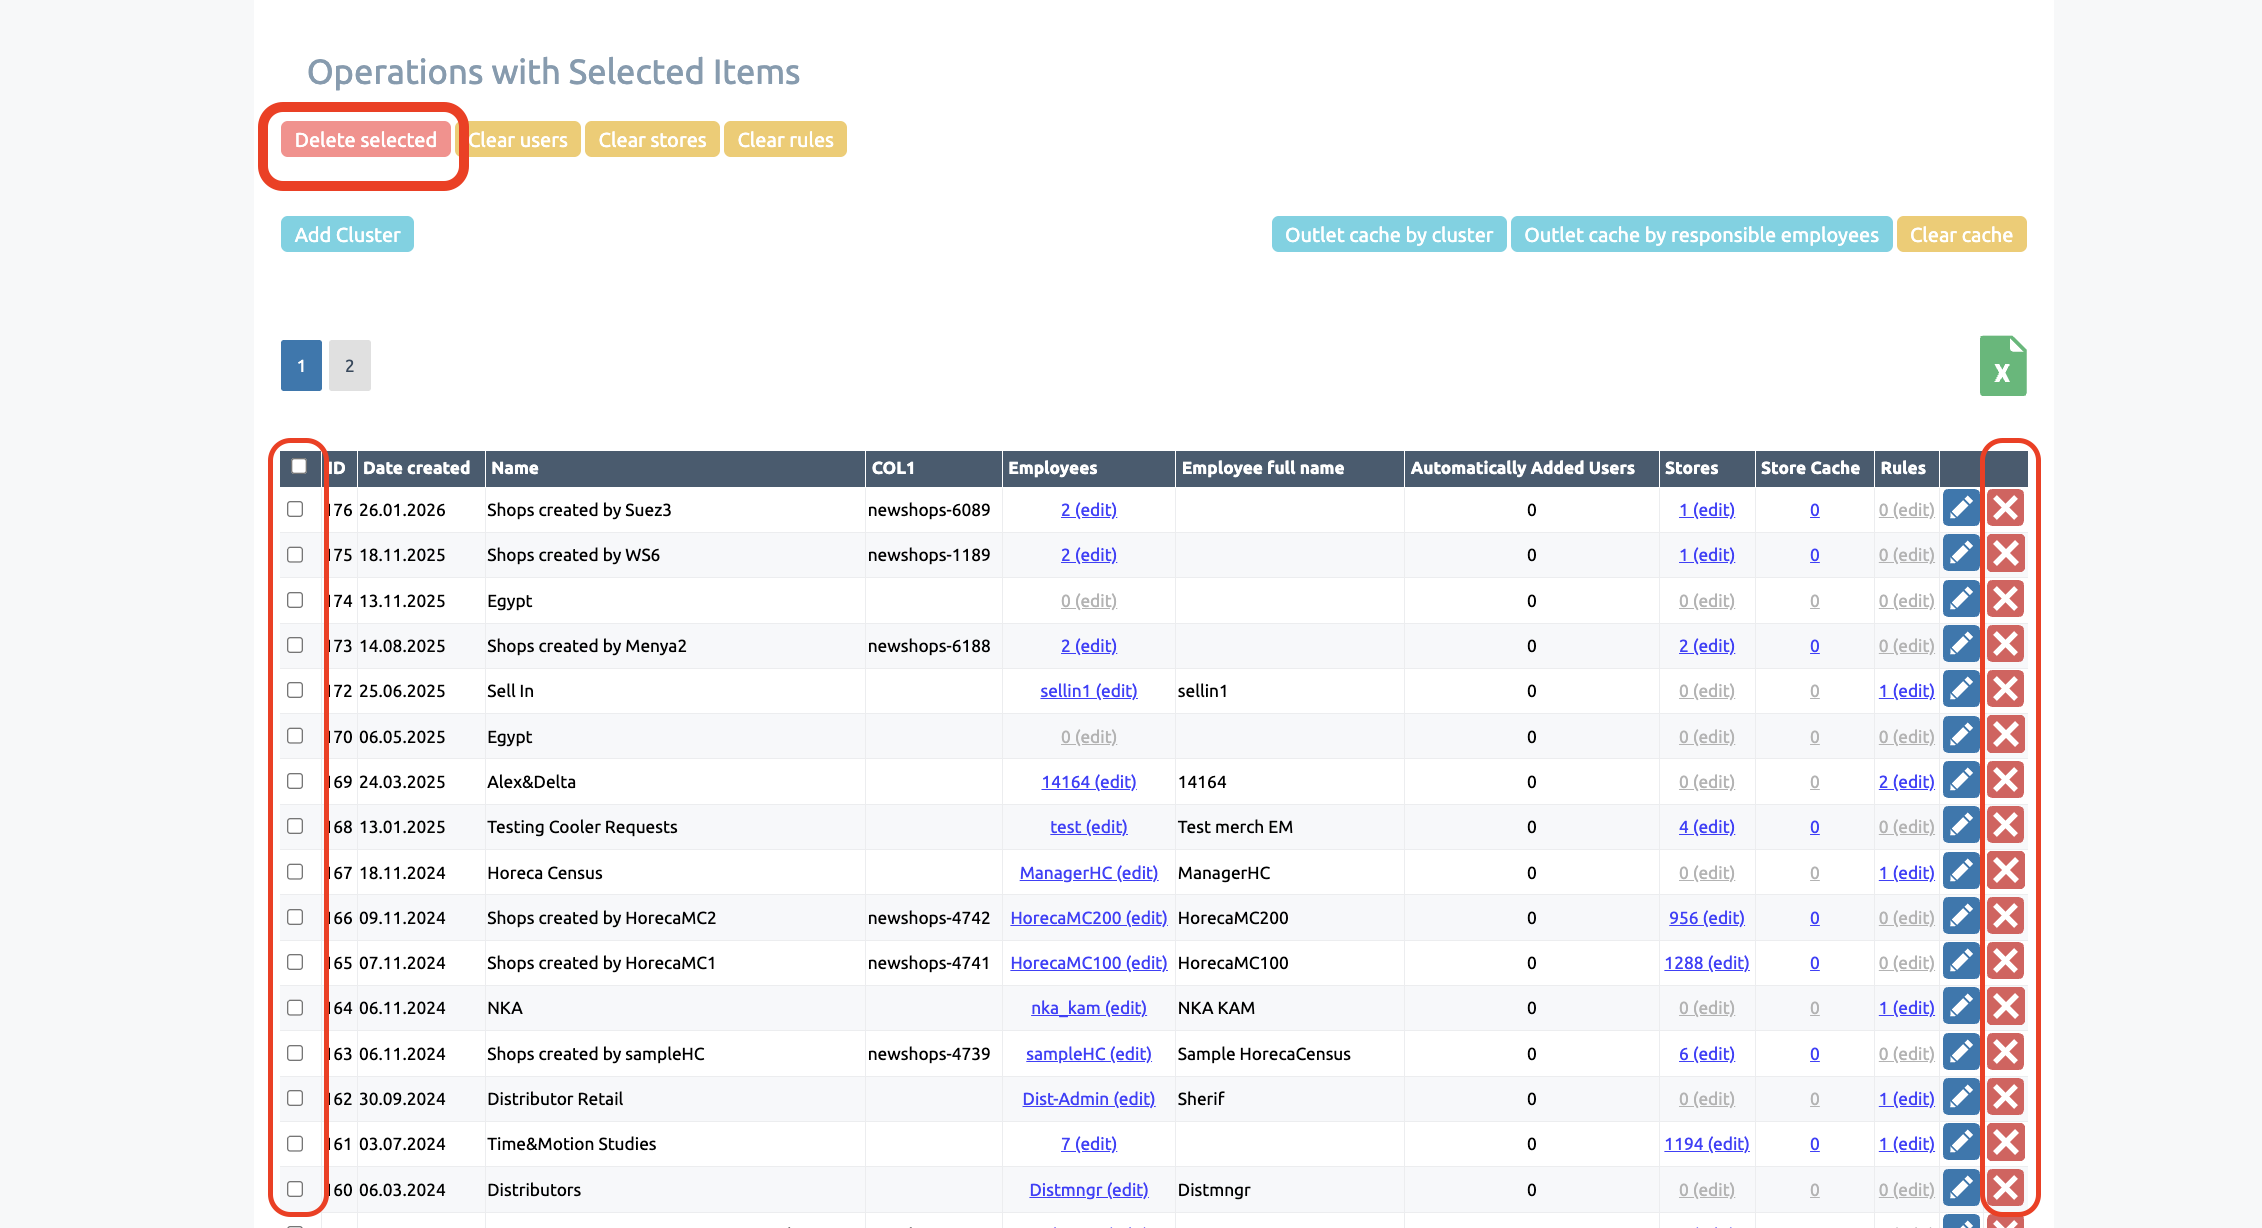
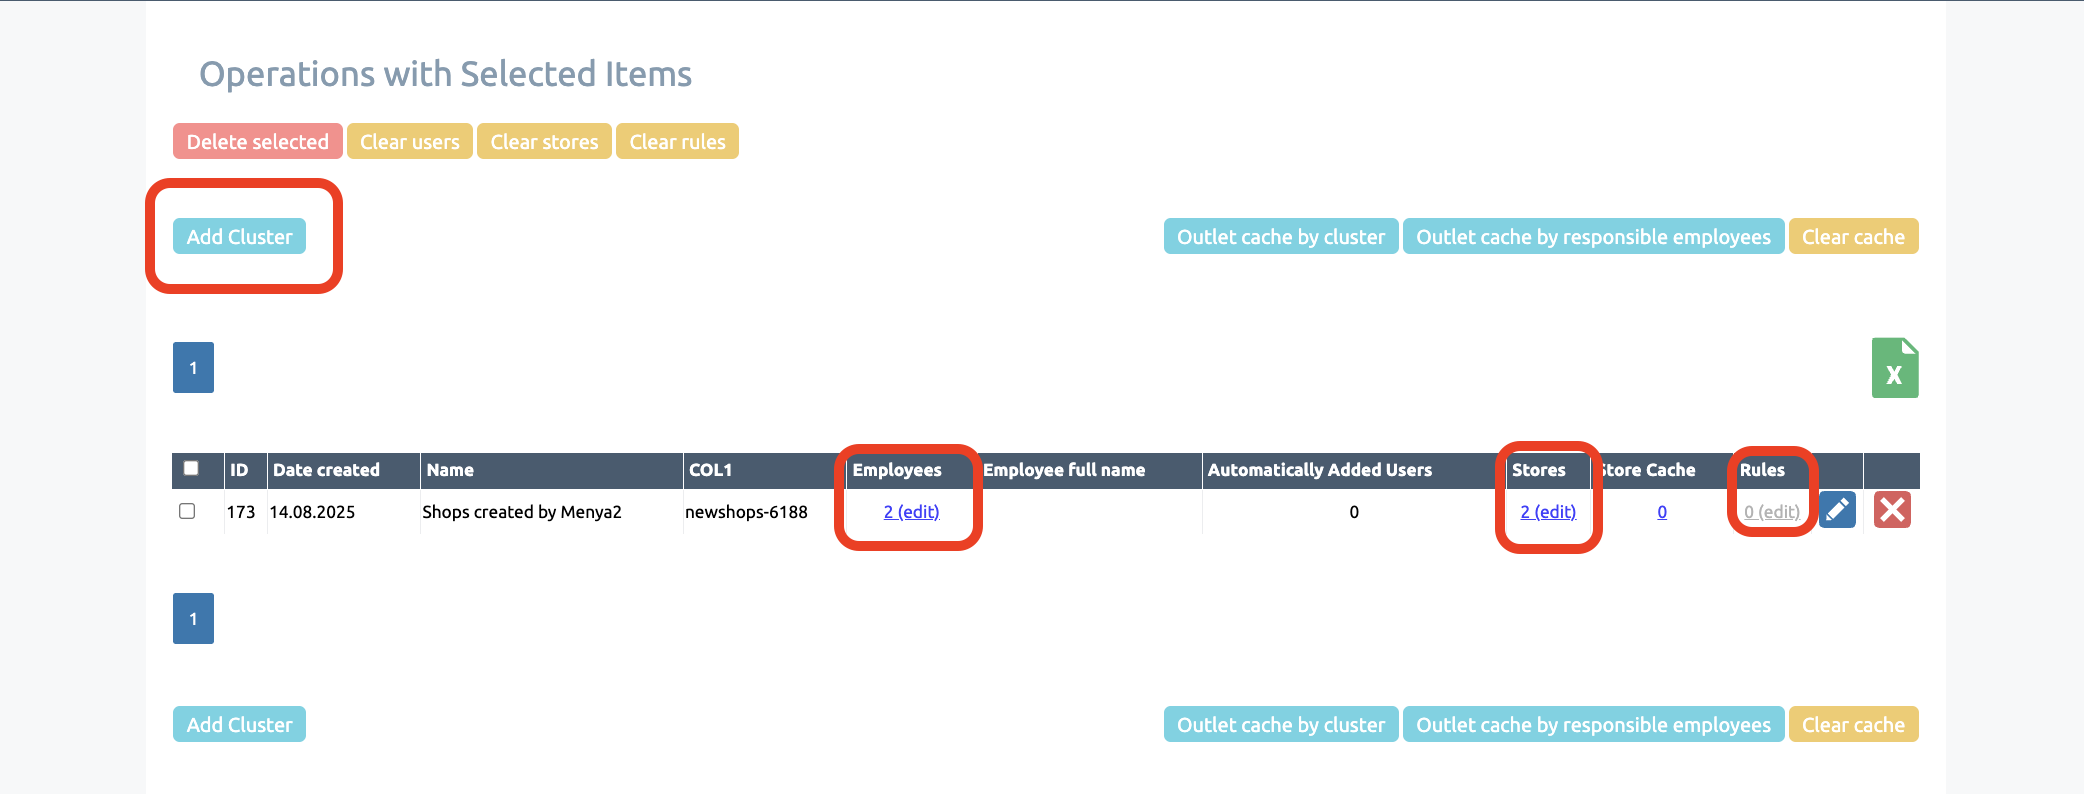
You can access the ‘Clusters’ section via ‘Shops’ or by editing clusters on the user page. All key information about clusters is displayed here
Within this section, you can view the rules governing the automatic addition of stores
You can also view the list of employees assigned to clusters in the ‘Clusters’ section
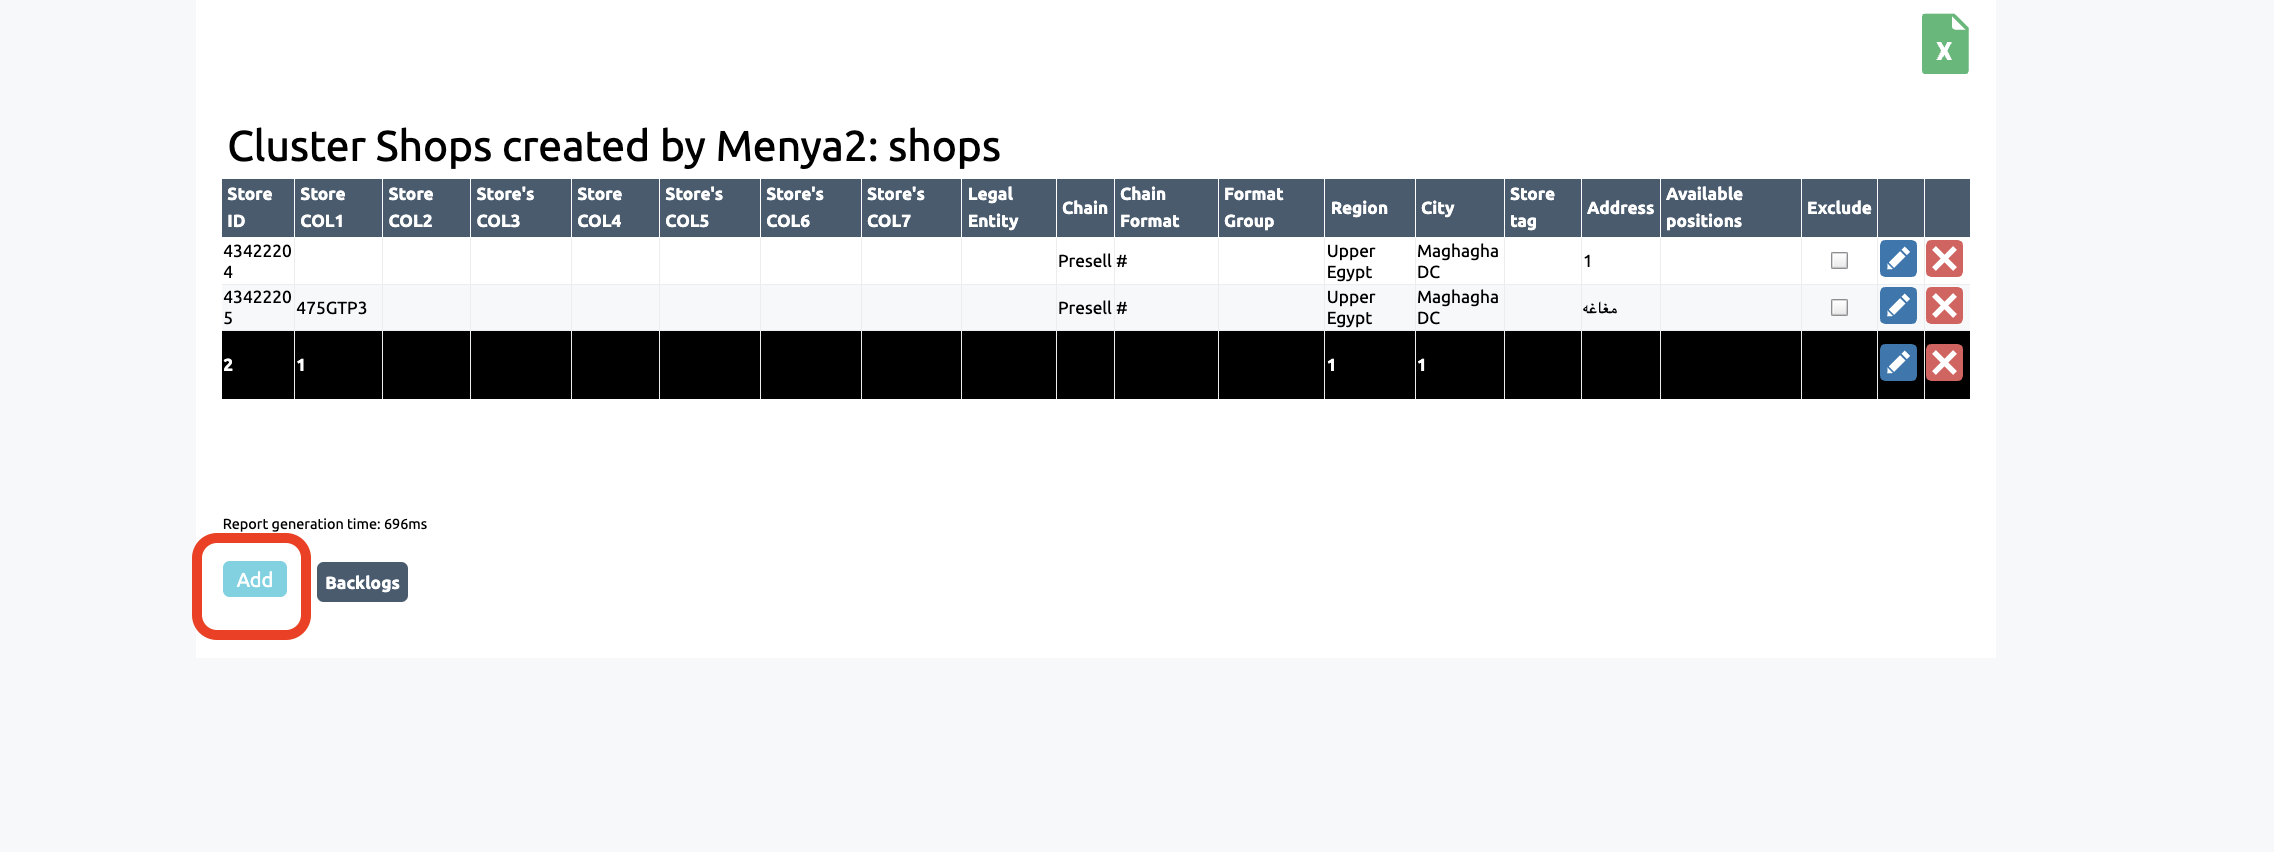
In addition, in the ‘Clusters’ section, you can view the list of shops for a specific cluster
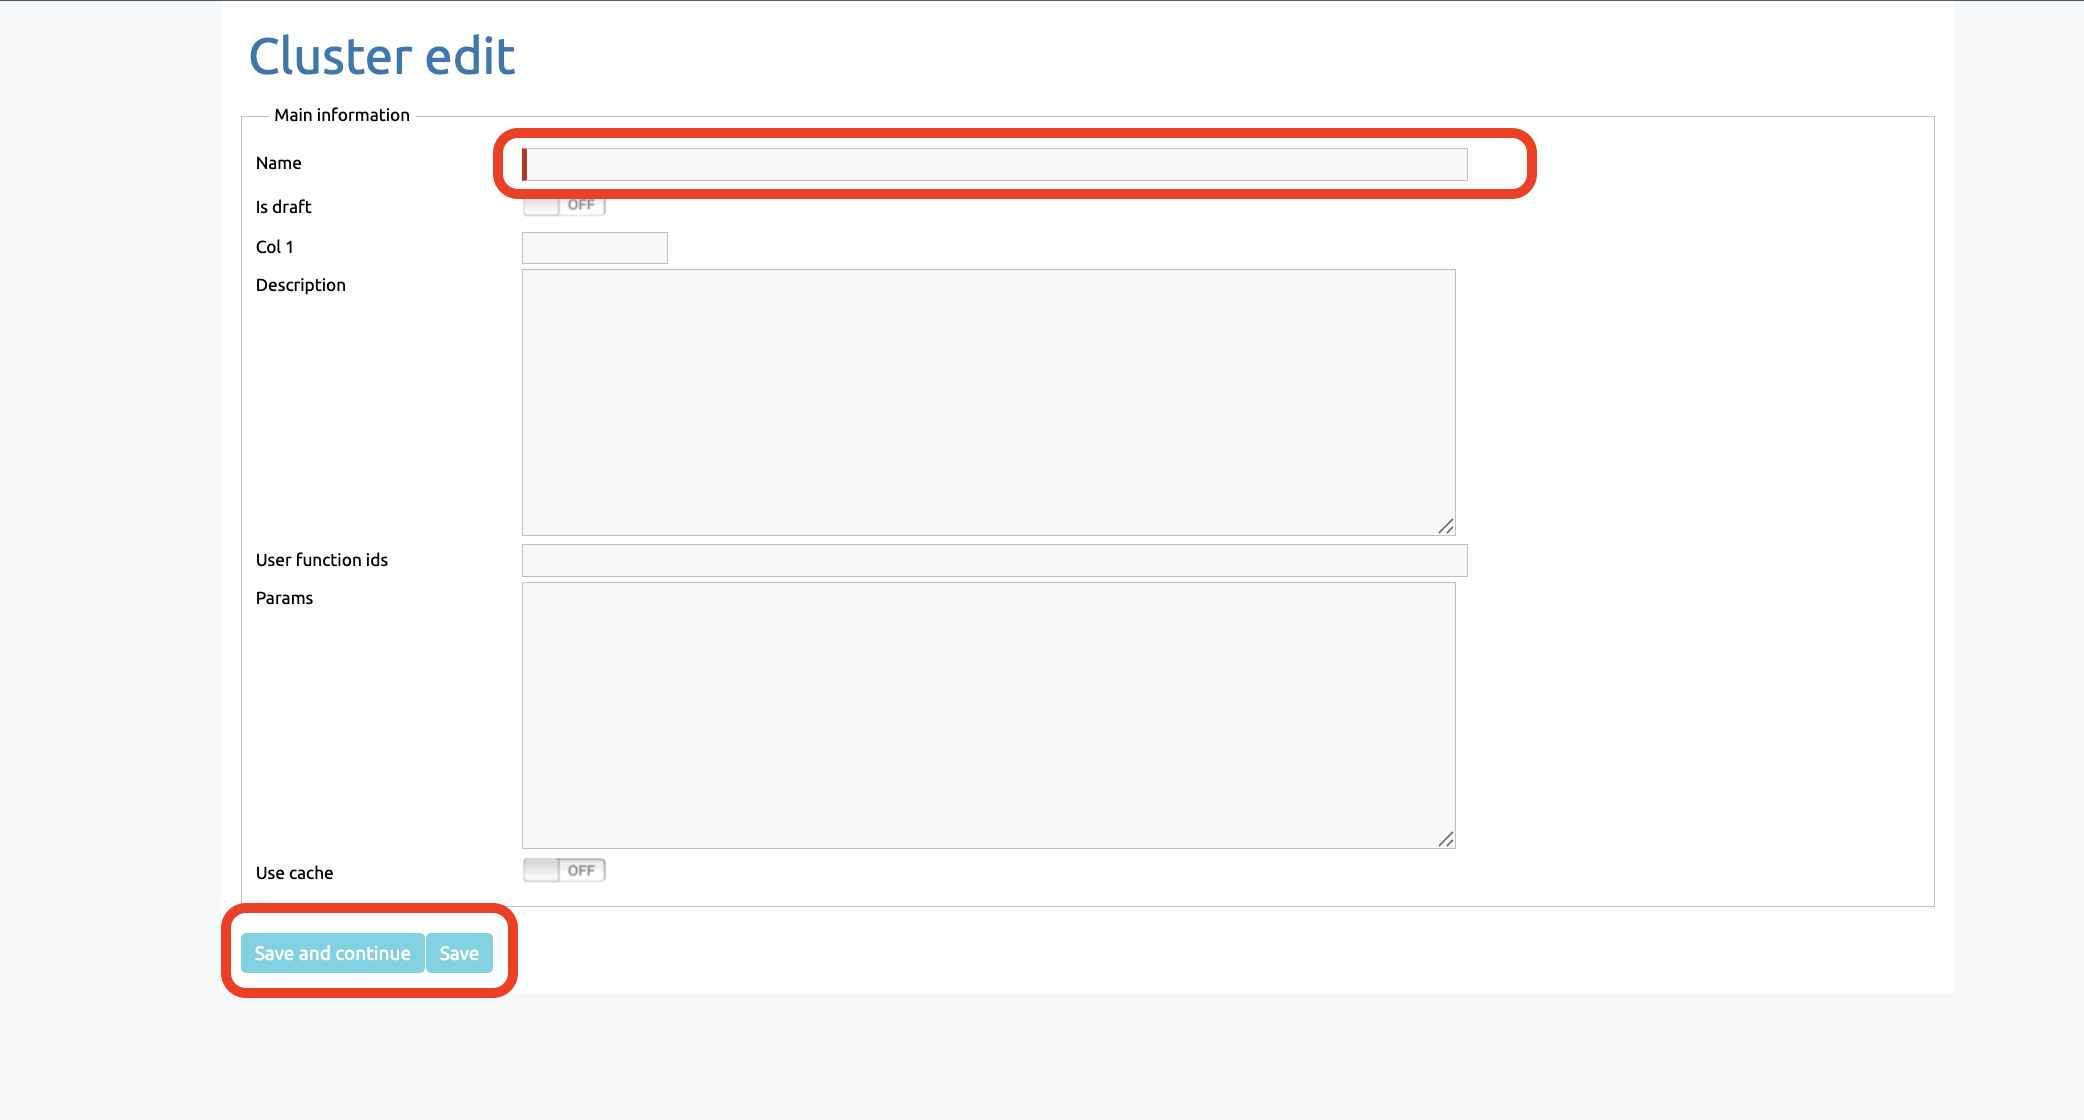
When editing the cluster, enter a name and fill in the other fields as required
The ‘use cache’ option allows you to enable cluster caching (see the ‘Cluster Caching’ section of this guide for more details)
Click ‘Save’
You can also edit an existing cluster.
To do this, return to the previous page (the ‘Clusters’ section) and click on the pencil icon to edit
Once you have finished editing, click ‘Save’
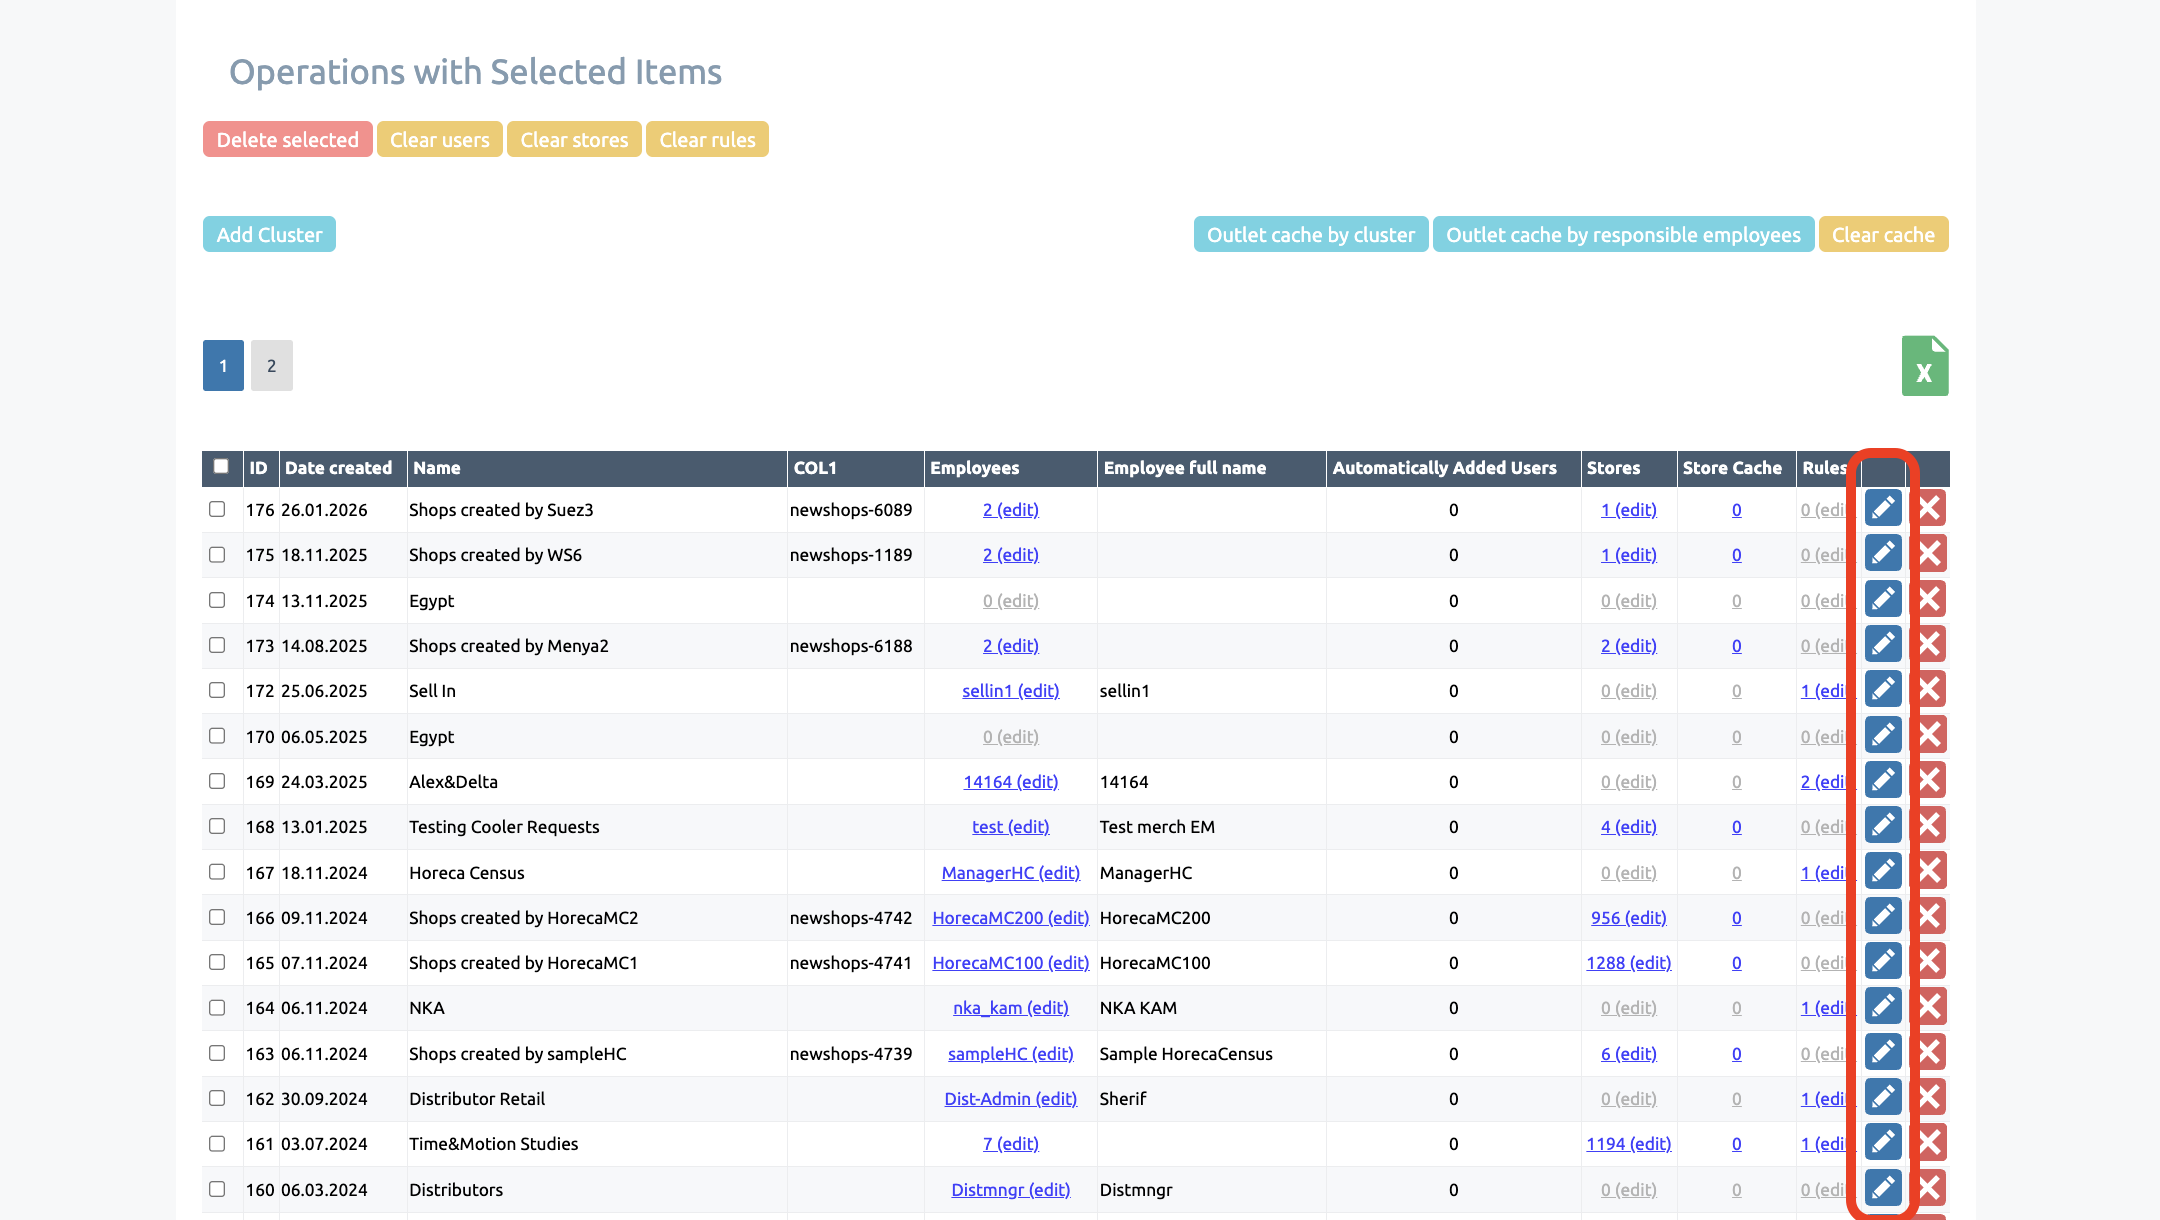
To delete a cluster, you can click the delete icon, or to delete multiple clusters at once, tick the relevant clusters and click ‘Delete selected’
Employees
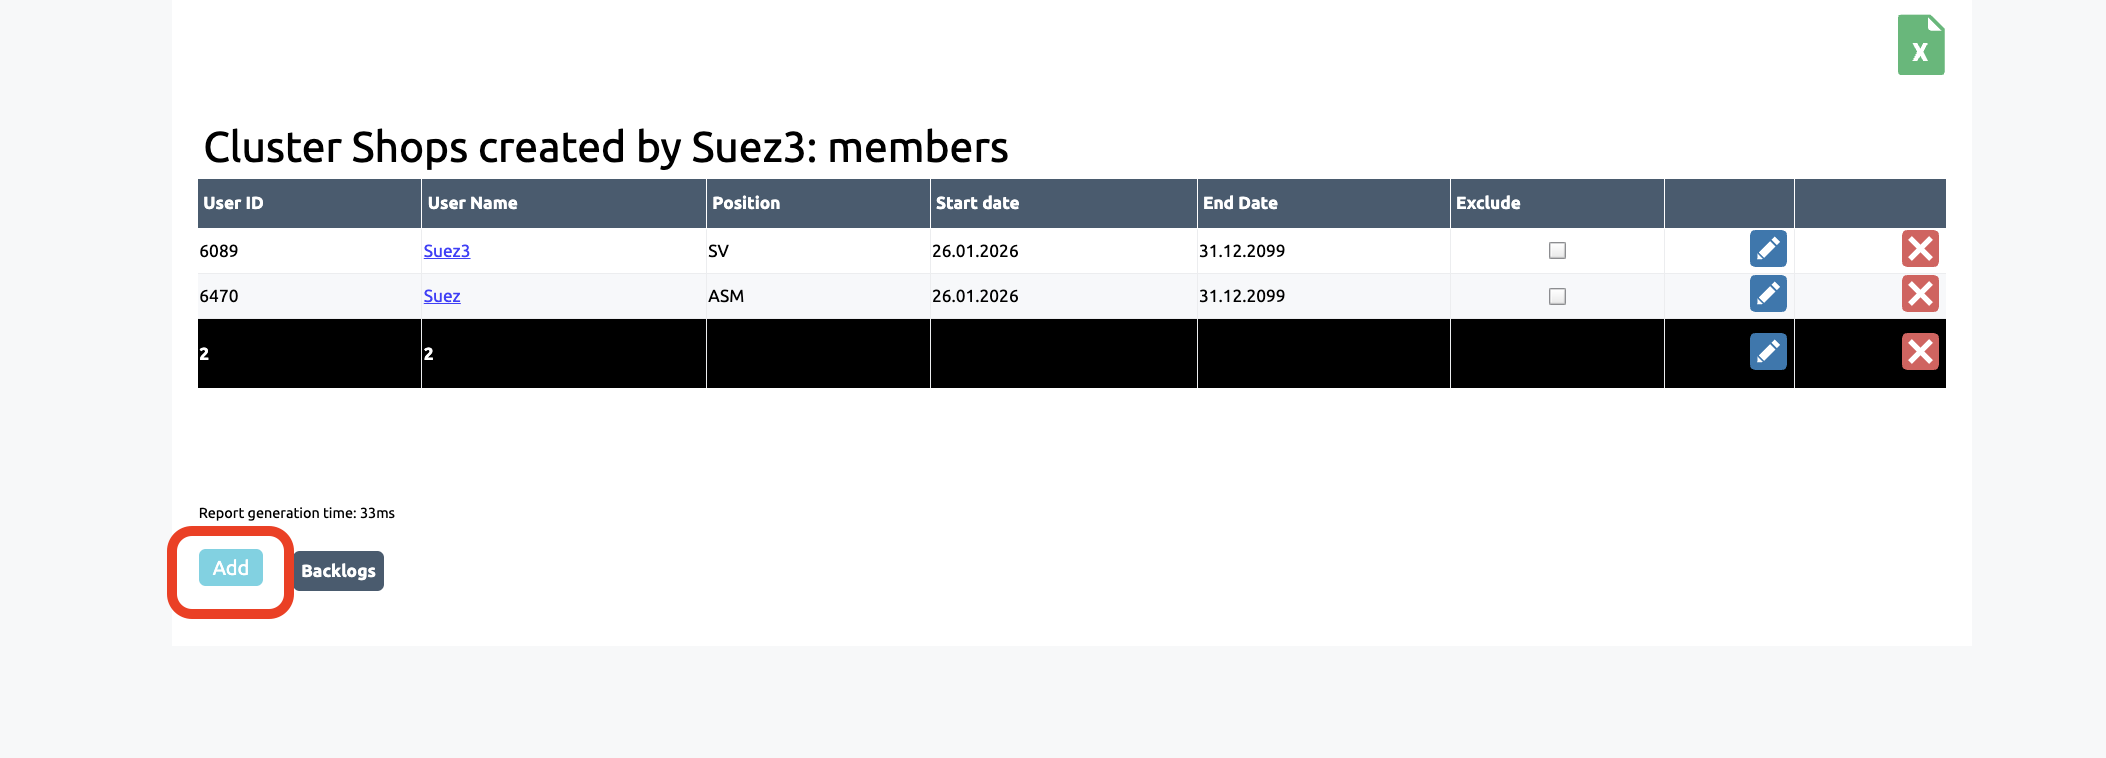
To add employees to clusters, go to the ‘Clusters’ section via the ‘Shops’ section
In the ‘employees’ column, select the relevant cluster and click on the ‘employees’ field to view the list of employees in that cluster

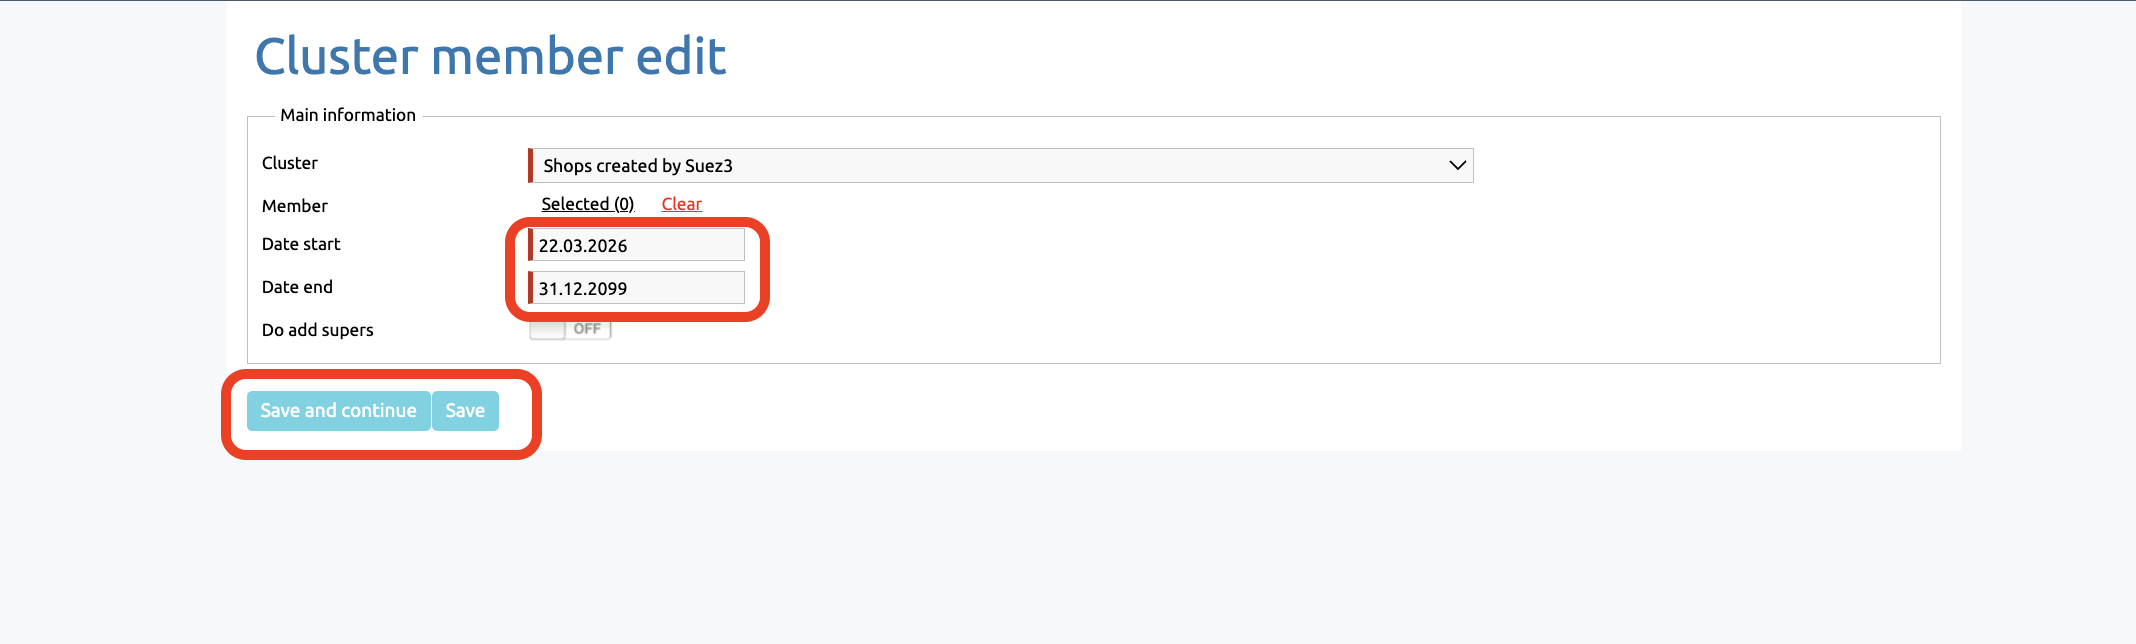
In the ‘Member’ field, select an employee, then specify the start and end dates for the employee’s assignment to the cluster. Reports for a location generated before or after the assignment period will not be displayed to the employee
The ‘Do add supers’ setting allows shops from the cluster to be displayed across the entire chain of responsible employees who have this cluster with the setting enabled
If you need to configure the display of points from the cluster so that only a specific user group with the appropriate permissions can see them, you must disable the ‘Do add supers’ parameter and grant the permission ‘Display all points from their own clusters and subordinates’ visit plans (up to 300 items)’ to the relevant user permission group
Click ‘Save’
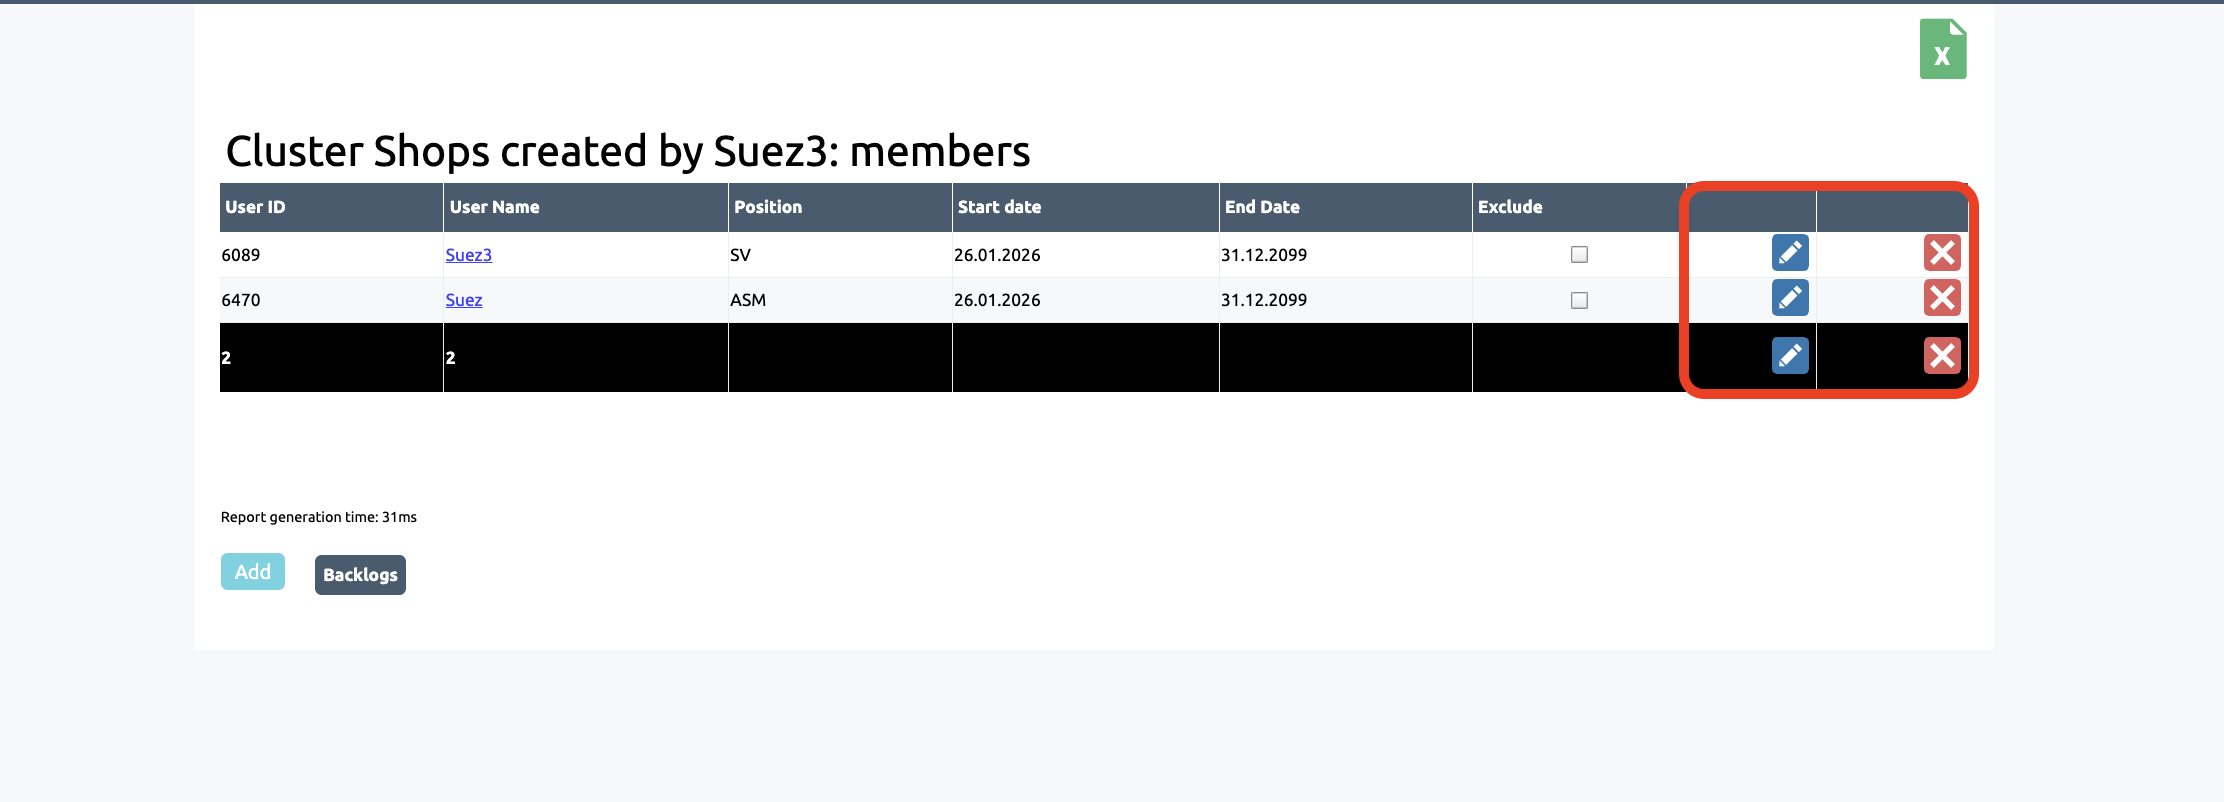
You can also edit existing employee assignments to a cluster
To do this, return to the previous page (the ‘Clusters’ section – ‘Employees’ list) and click on the pencil icon to edit
Editing assignments allows you to grant access to shops (and their reports, if authorised) for earlier dates by editing the start date of the assignment, as well as to remove an employee’s assignment or change the end date of the assignment
Once you have finished editing, click ‘Save’
Rules
Once you have created a cluster, you can add rules to it that determine which shops are displayed within the cluster
The rules ensure that only those outlets specified by them are displayed in the cluster. If a rule is changed or updated, the shops in the cluster are automatically updated as well
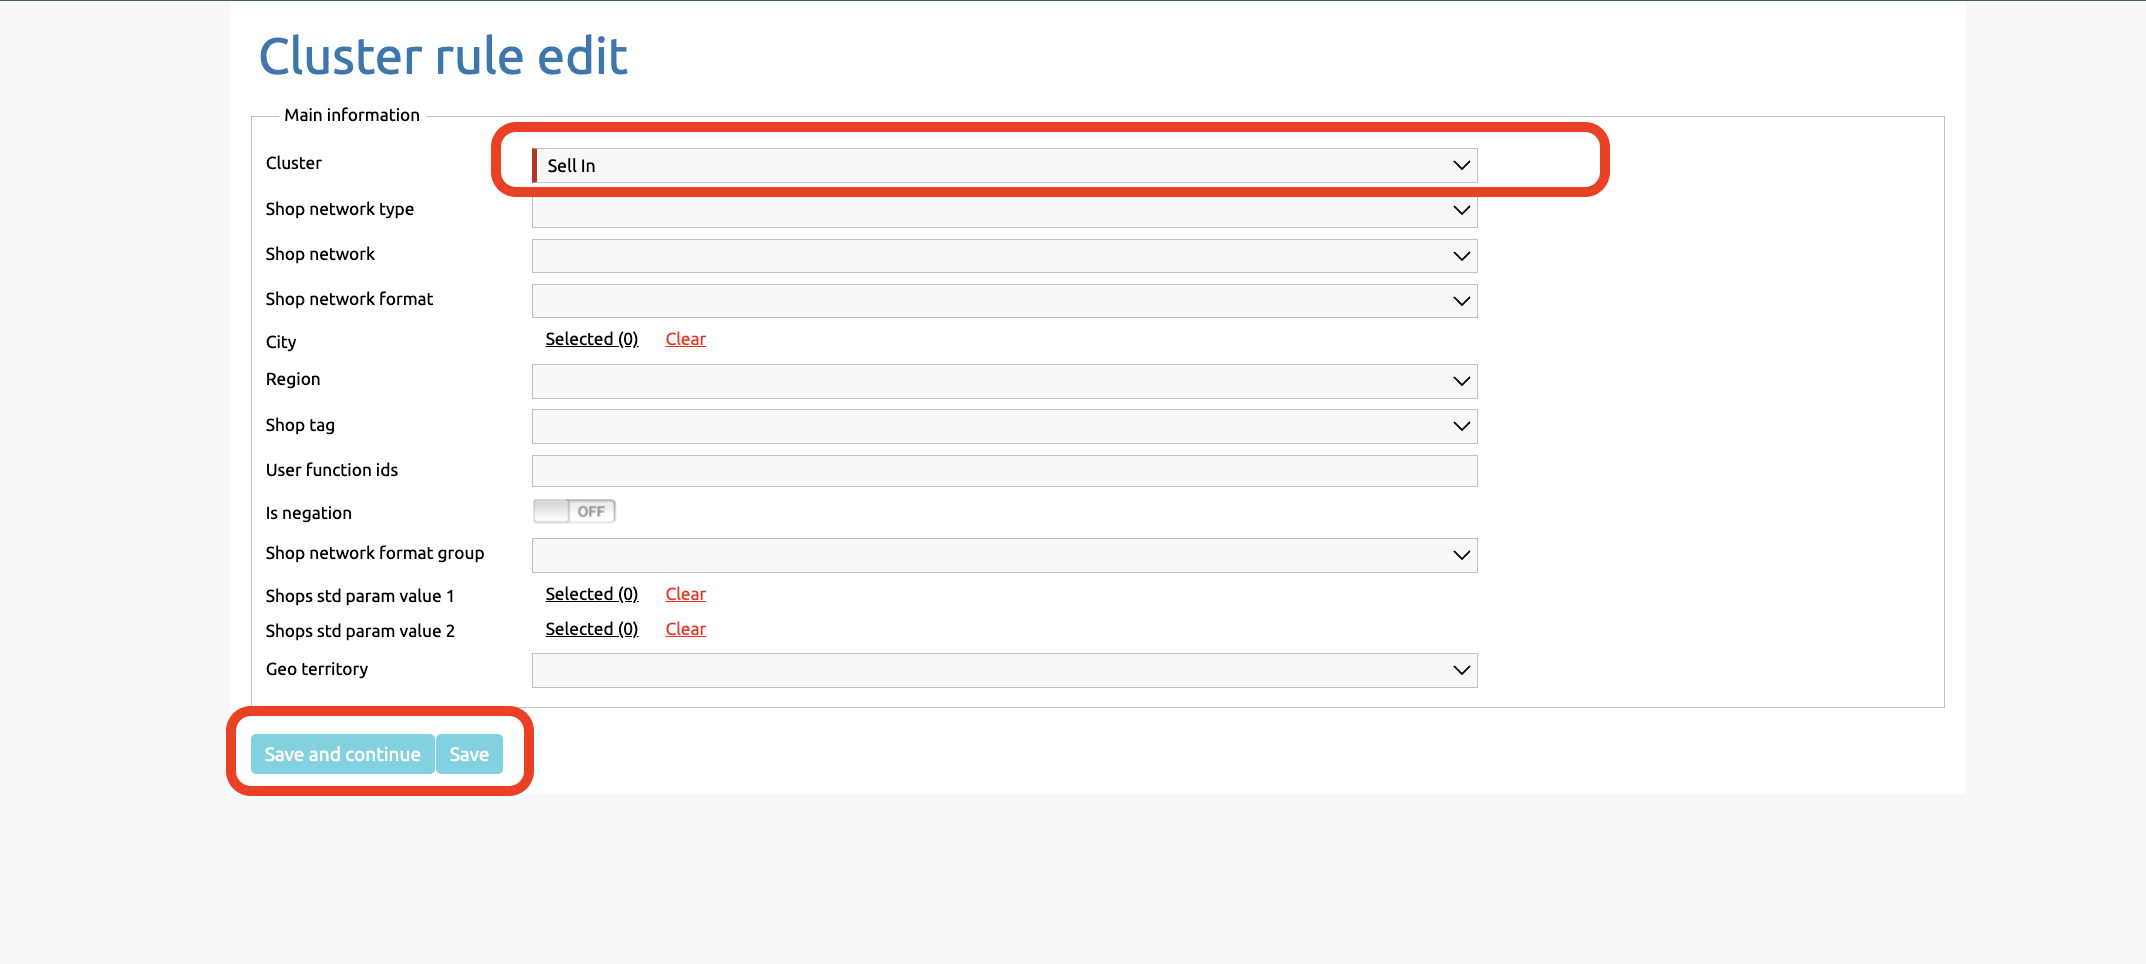
In the ‘Clusters’ section, click on ‘Rules’ for the relevant cluster to view existing rules or add new ones
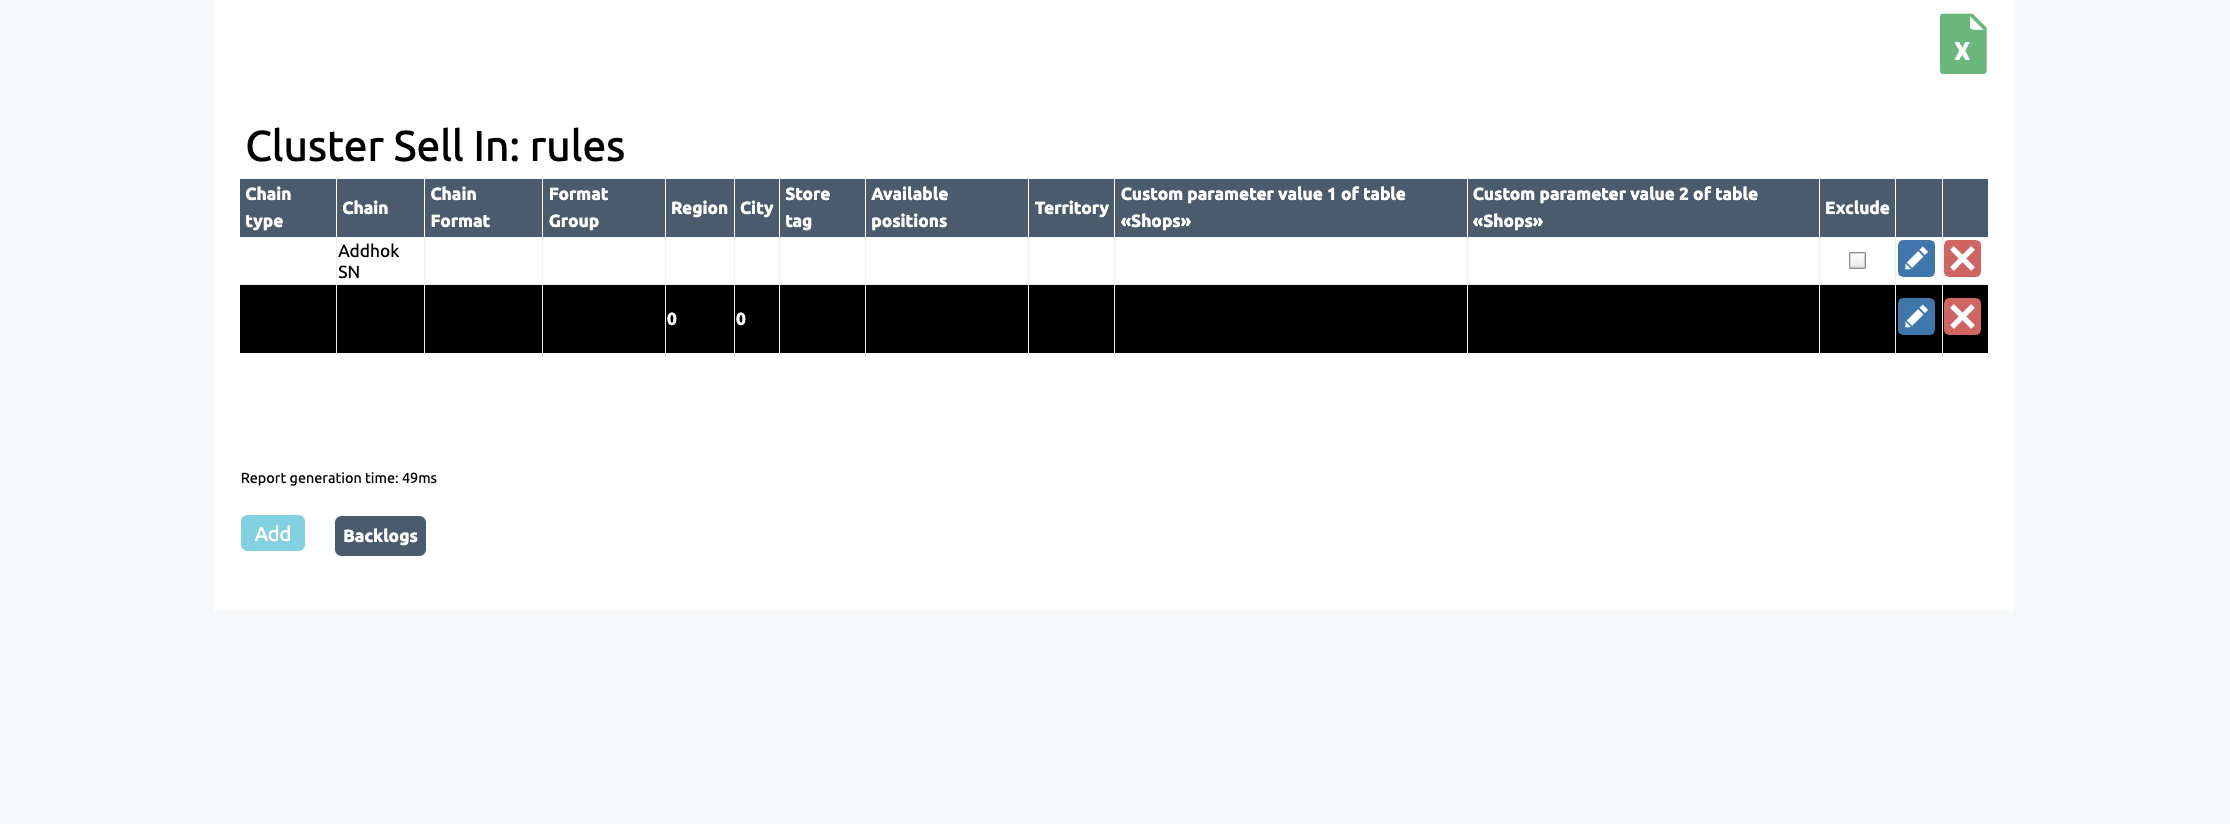

Please fill in all the required information
The following rules are available:
— Shop network type
— Shop network
— City
— Region
— Shop tag
— Shop network format
— Custom parameters
The "GEO territory" field allows you to display all retail outlets within the polygonal territory of your server selected from the list
Click ‘Save’
To add multiple entities (for example, two chains), you need to create two separate rules: for example, a cluster with the rules "Chain - Agat" and a cluster with the rule "Chain - 25 Hours." A cluster with these rules will contain all the points in these chains

You can also edit existing rules in the cluster
To do this, return to the previous page (the cluster rules section) and click on the pencil icon to edit
Once you have finished editing, click ‘Save’
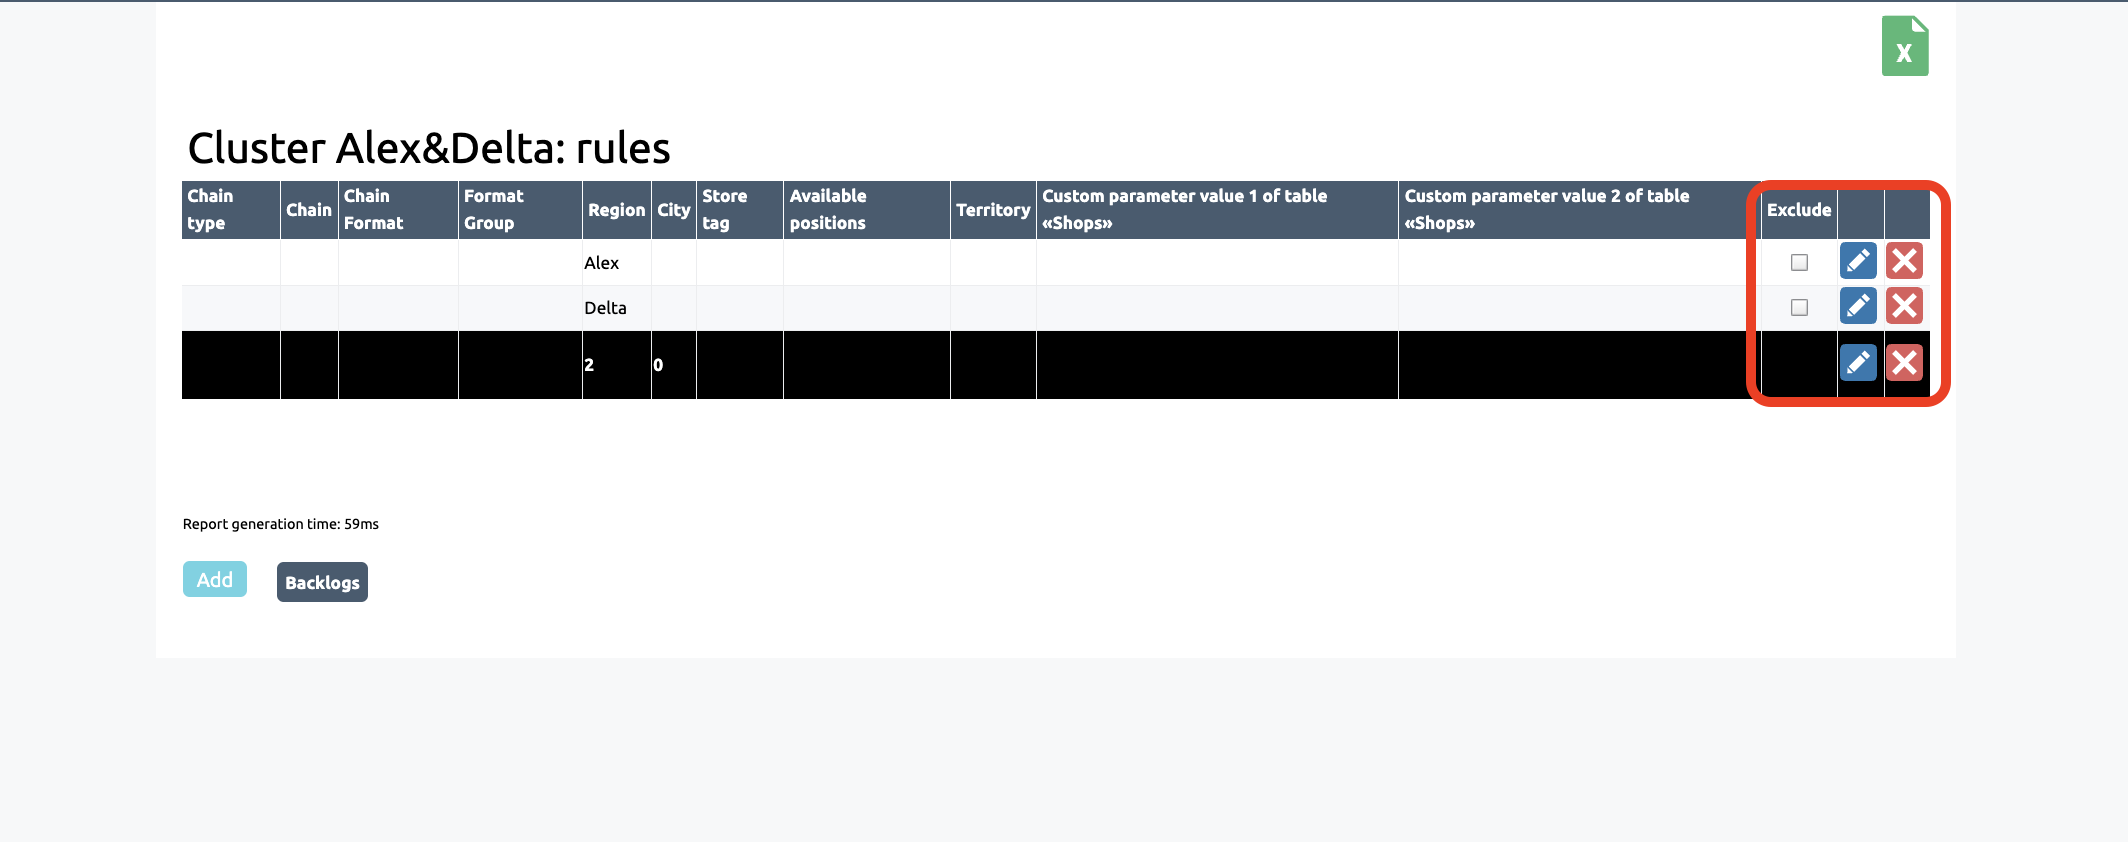
Checking the "Exclude" box allows you to disable the display of retail outlets for the specified rule in the cluster. For example, if you exclude a rule for the "Magnet" chain, the stores in that chain will not be displayed to the user
To set an exception, select the outlet or rule you want to exclude. Edit by clicking the pencil icon. Toggle the "Is negation" option to active
Save changes

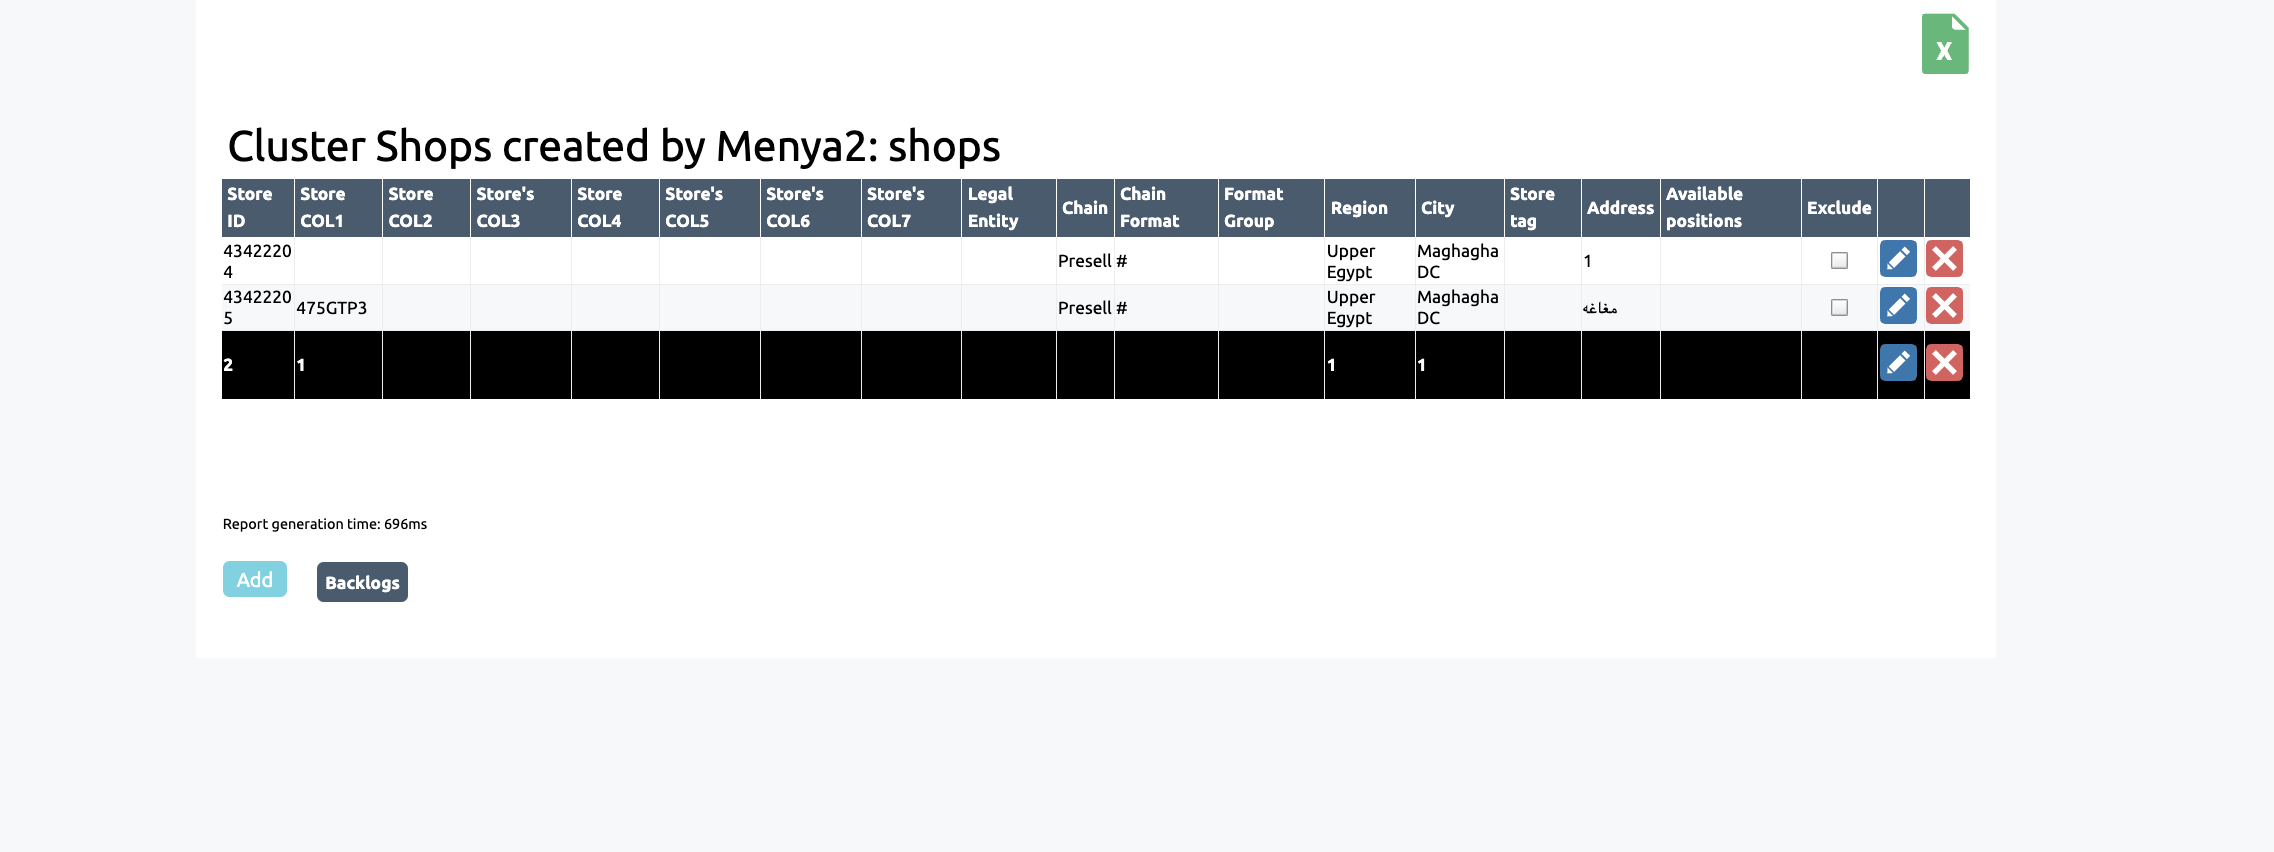
To add individual shops to a cluster, go to the ‘Clusters’ section via the ‘Shops’ section
In the ‘Clusters’ section, click on ‘Stores’ for the relevant cluster to view existing outlets or add new ones

In this section, you can view a list of all shops added to the cluster, as well as add a shop or edit its association with the cluster
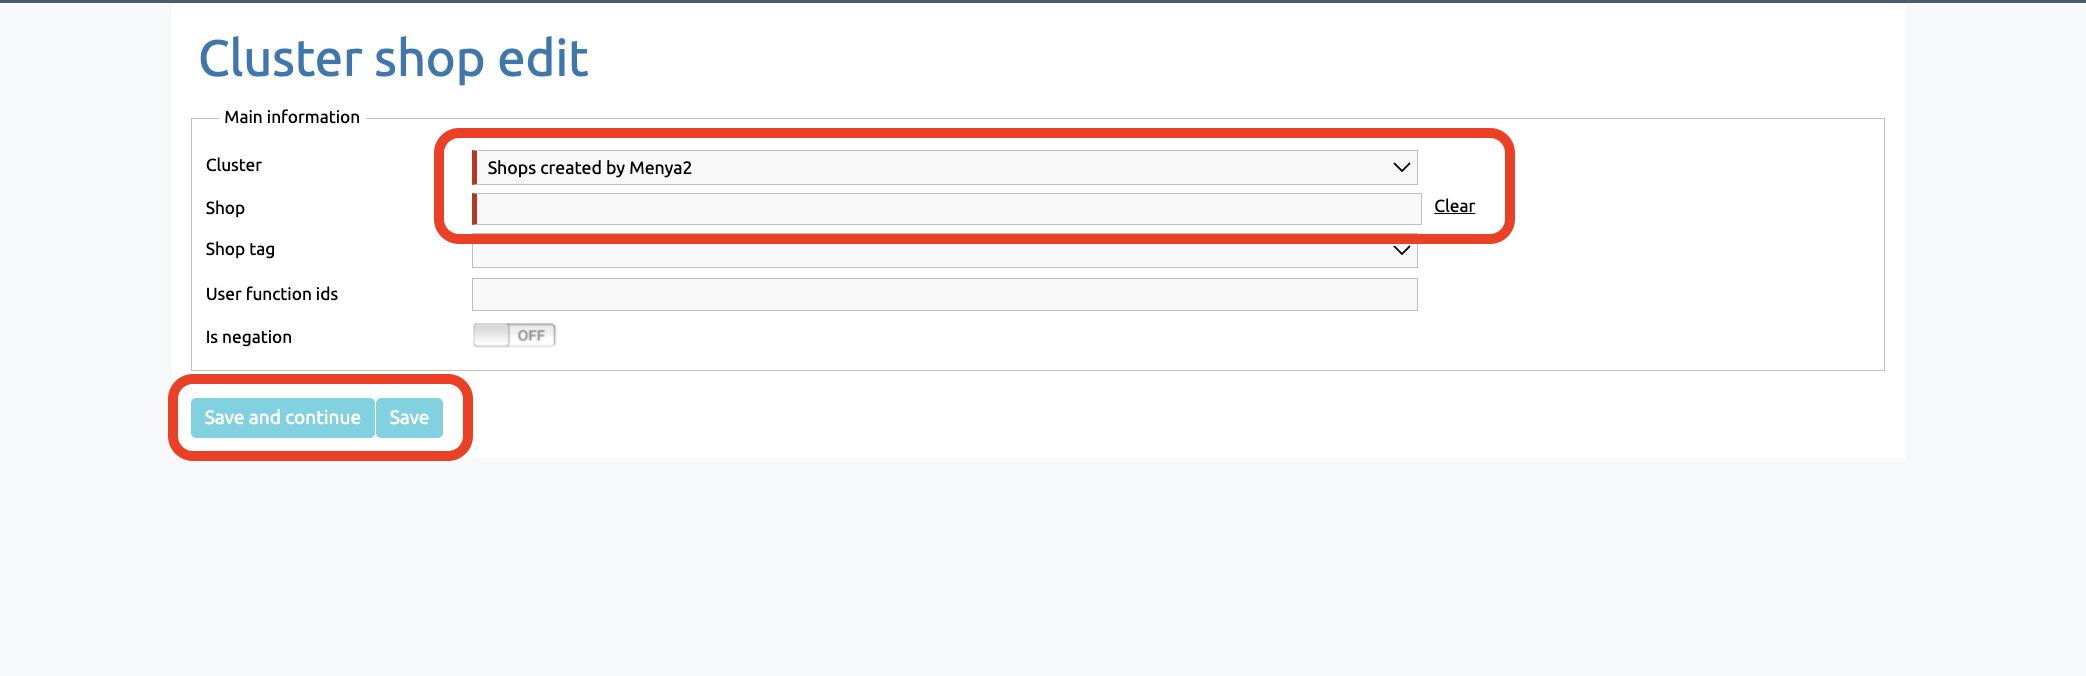
You can also edit existing store links within the cluster
To do this, return to the previous page (the cluster stores section) and click on the pencil icon to edit
Once you have finished editing, click ‘Save’
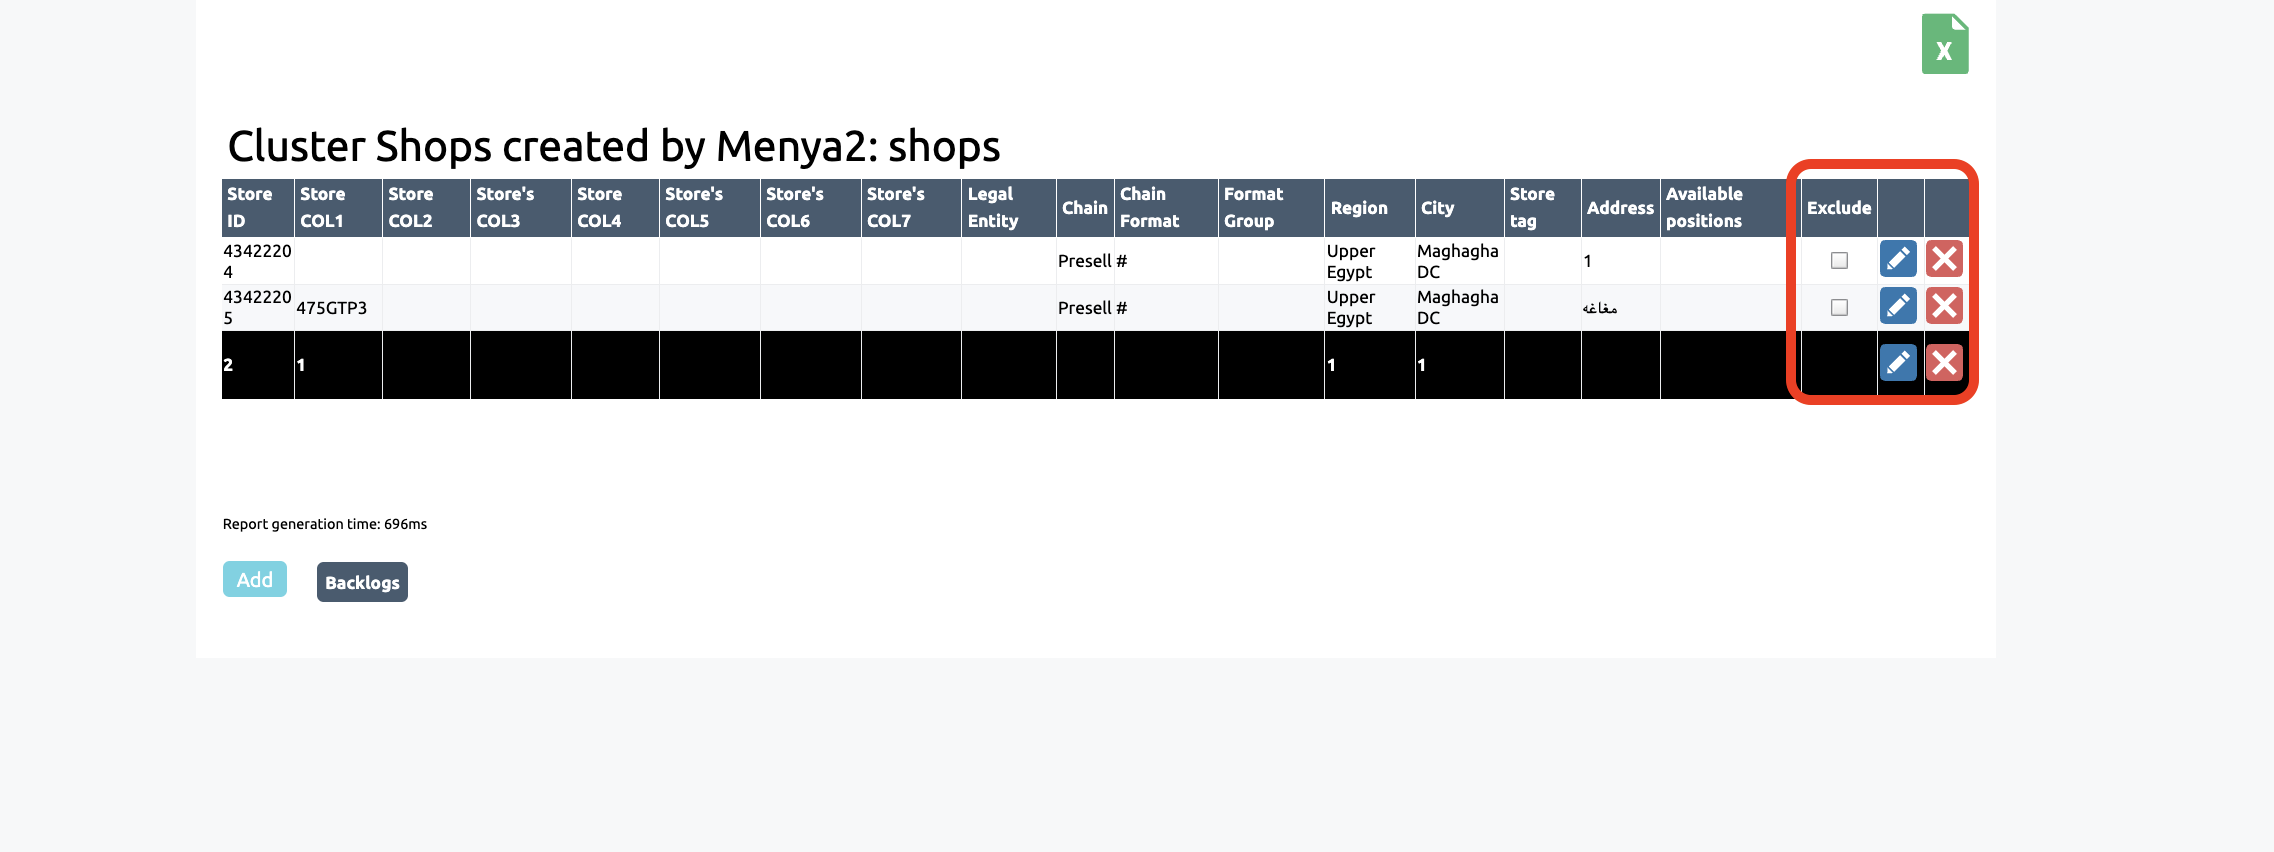
Checking the "Exclude" box disables the display of retail outlets based on the specified rule in the cluster. For example, if you exclude the Agat retail outlet with COL1 12345, this retail outlet will not be displayed to the user
To set an exception, select the retail outlet you want to exclude. Edit the item by clicking the pencil icon next to the point. Toggle "Is negation" to active
Save your changes

Alternative adding
Alternatively, you can access the ‘Clusters’ section via the ‘Clusters’ tab on the user page
To do this, navigate to the employee for whom you wish to edit or add a cluster
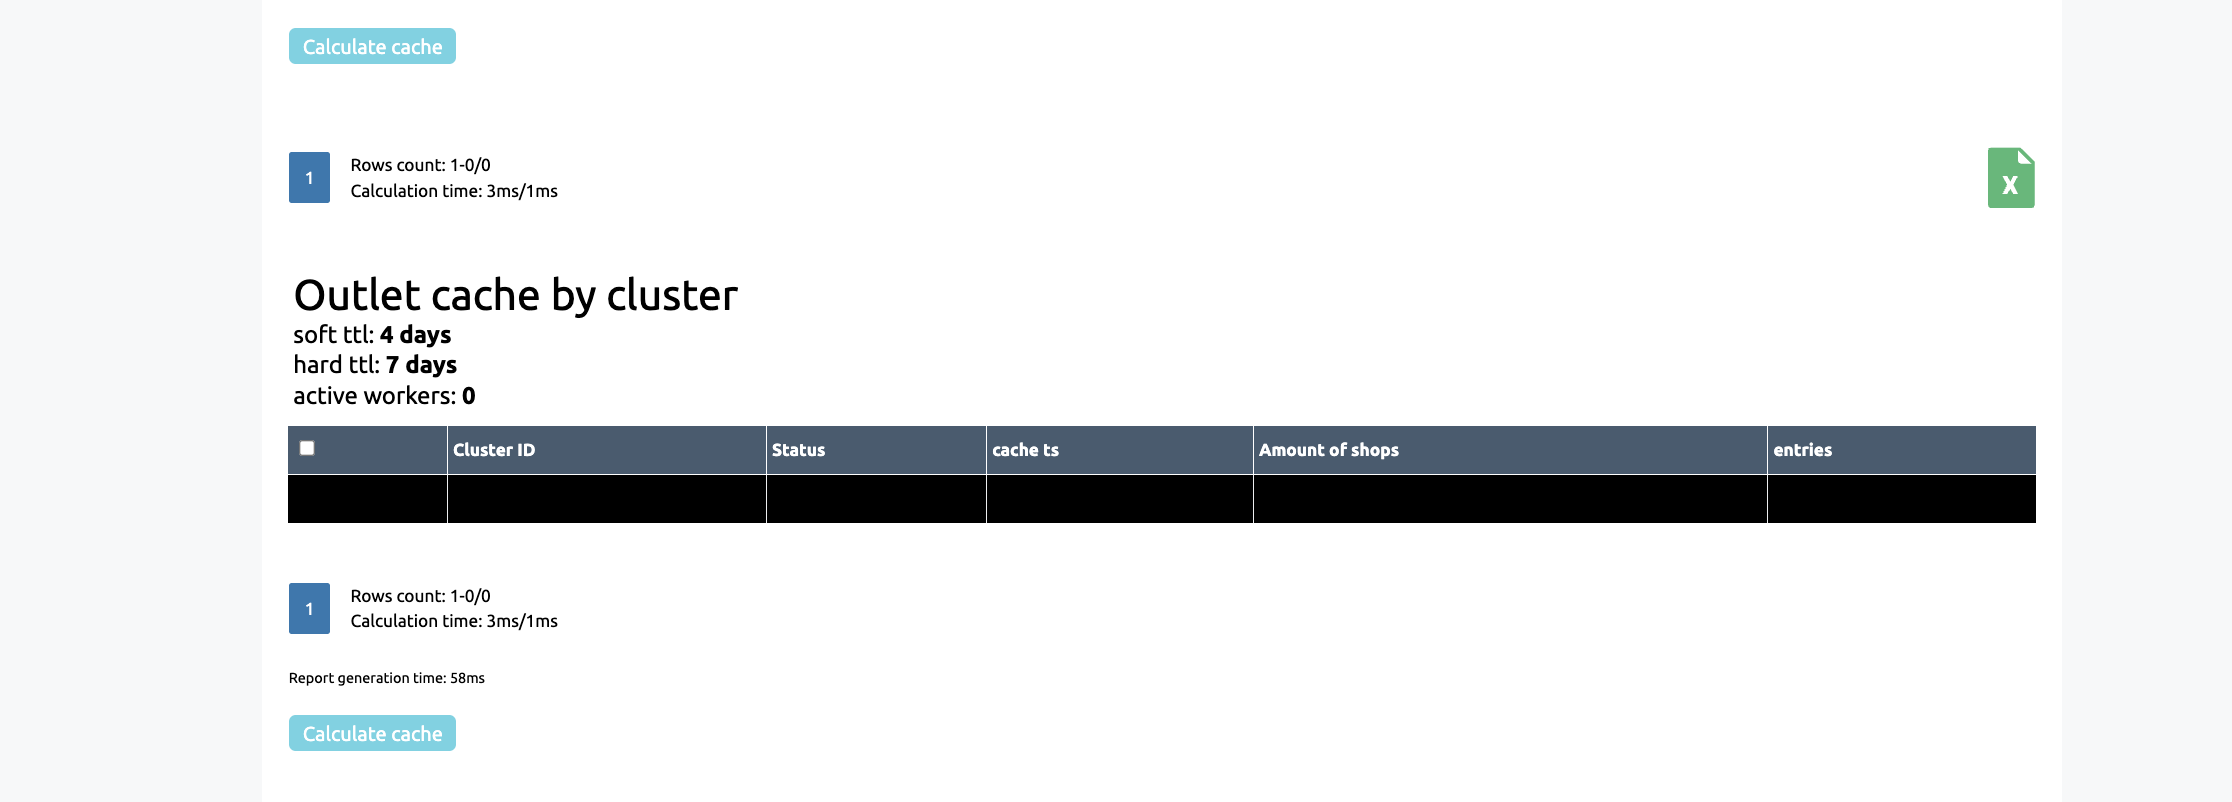
Cache by Clusters
Caching clusters allows you to work with a specific volume of data without overloading the system and speeds up the data loading process
Caching affects the visibility of shops to employees prior to recalculation: employees cannot see new shops until the cache has been recalculated
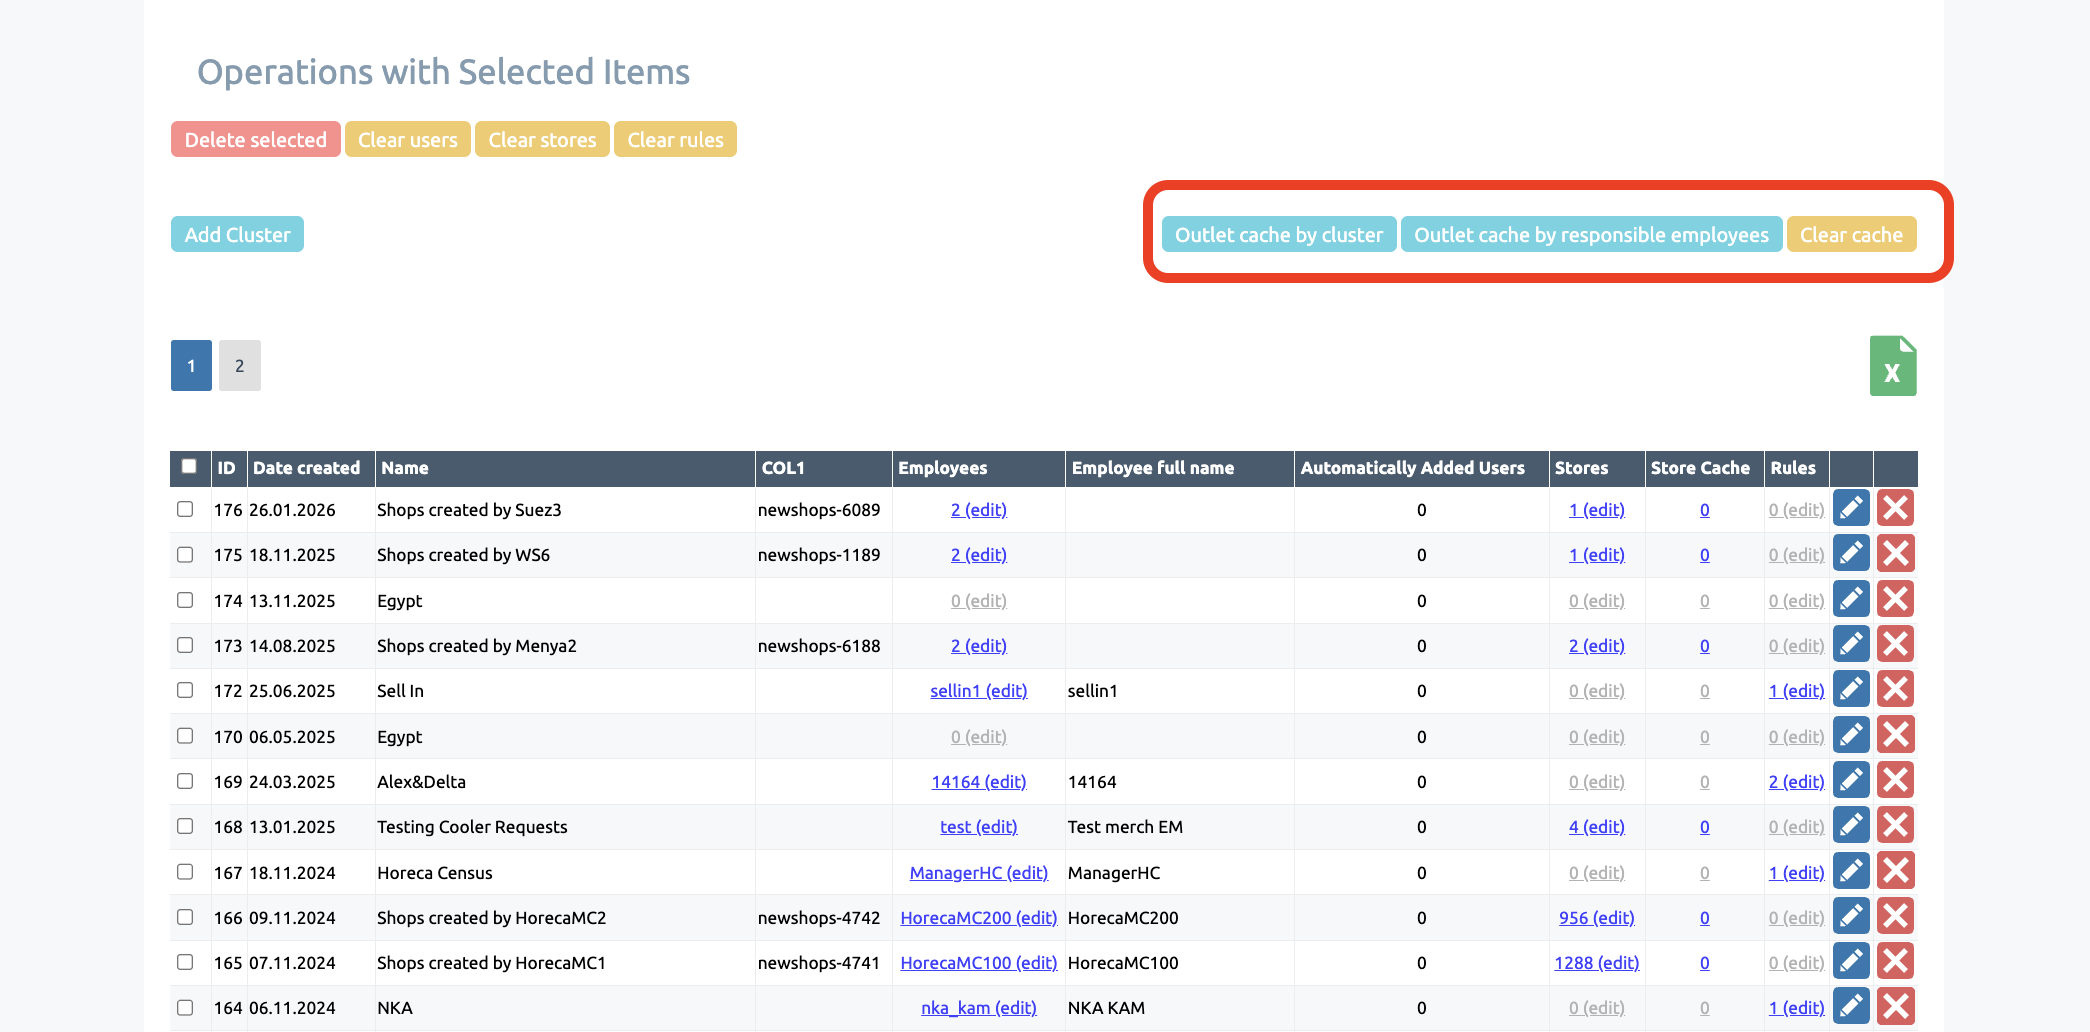
The cache is automatically recalculated at regular intervals, but you can trigger a manual recalculation in the ‘Outlet Cache by Clusters’ or ‘Outlet Cache by Responsible Persons’ sections. In the ‘Cache by Clusters’ section, select ‘Recalculate Cache’ and enter the cluster ID to initiate a request for a manual cluster recalculation. In the ‘Cash by Manager’ section, select ‘Recalculate Cash’ and enter the IDs of the managers (employees) for whom you need to recalculate the clusters. The recalculation will cover all clusters of the manager and their subordinates
During the recalculation, all sales outlets that have been added to the cluster since the last recalculation will be added to the application for employees to work with
Clusters can be cached in three different ways:
— By a specific selected cluster
— By a specific employee and all their clusters
— By a specific user permission group and all clusters belonging to employees in that permission group
Go to the ‘Outlet Cache by Clusters’ or ‘Outlet Cache by Responsible Persons’ section to view the current cache by clusters or responsible persons