Set Tasks
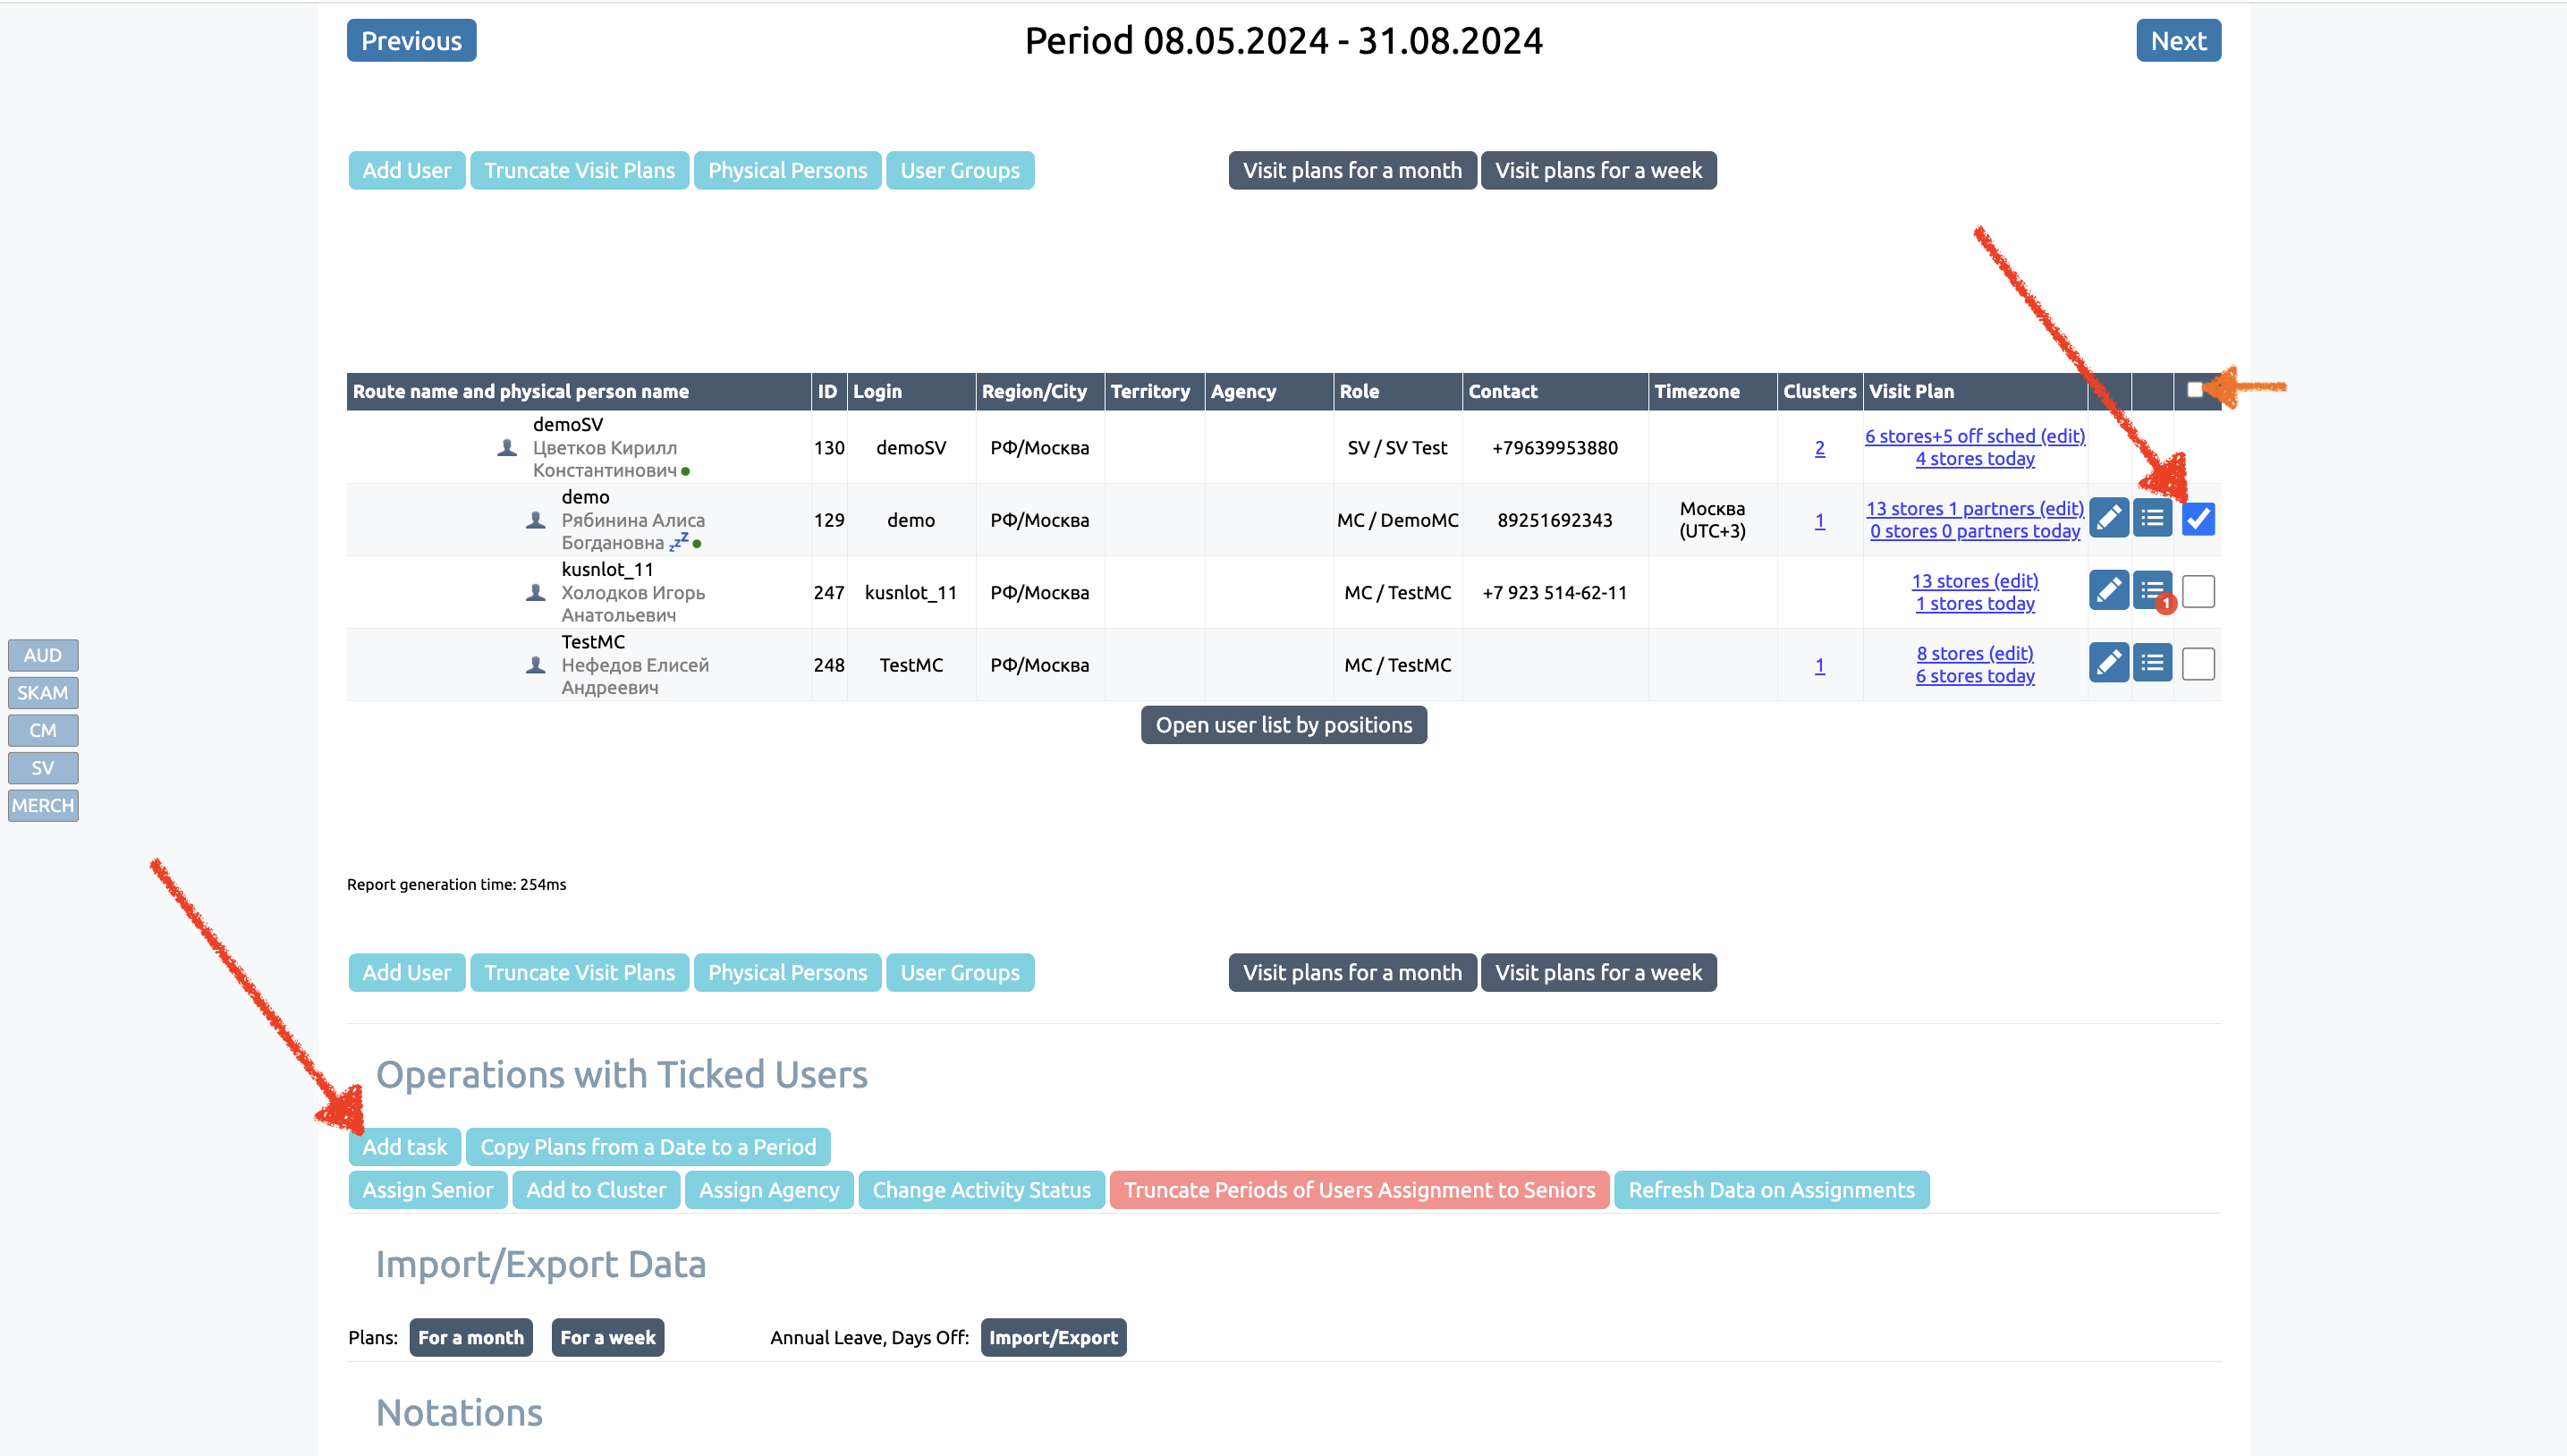
There is also a second method of tasking. It is also used when it is necessary to set a task for several employees at once. To do this:
Go to the “Employees“ tab. Check the box next to the employee you want to assign a task to and select “Add task” in the “Operations with Ticked Users” block
You can set a task en masse by clicking on the checkbox at the top, selecting all employees at once.
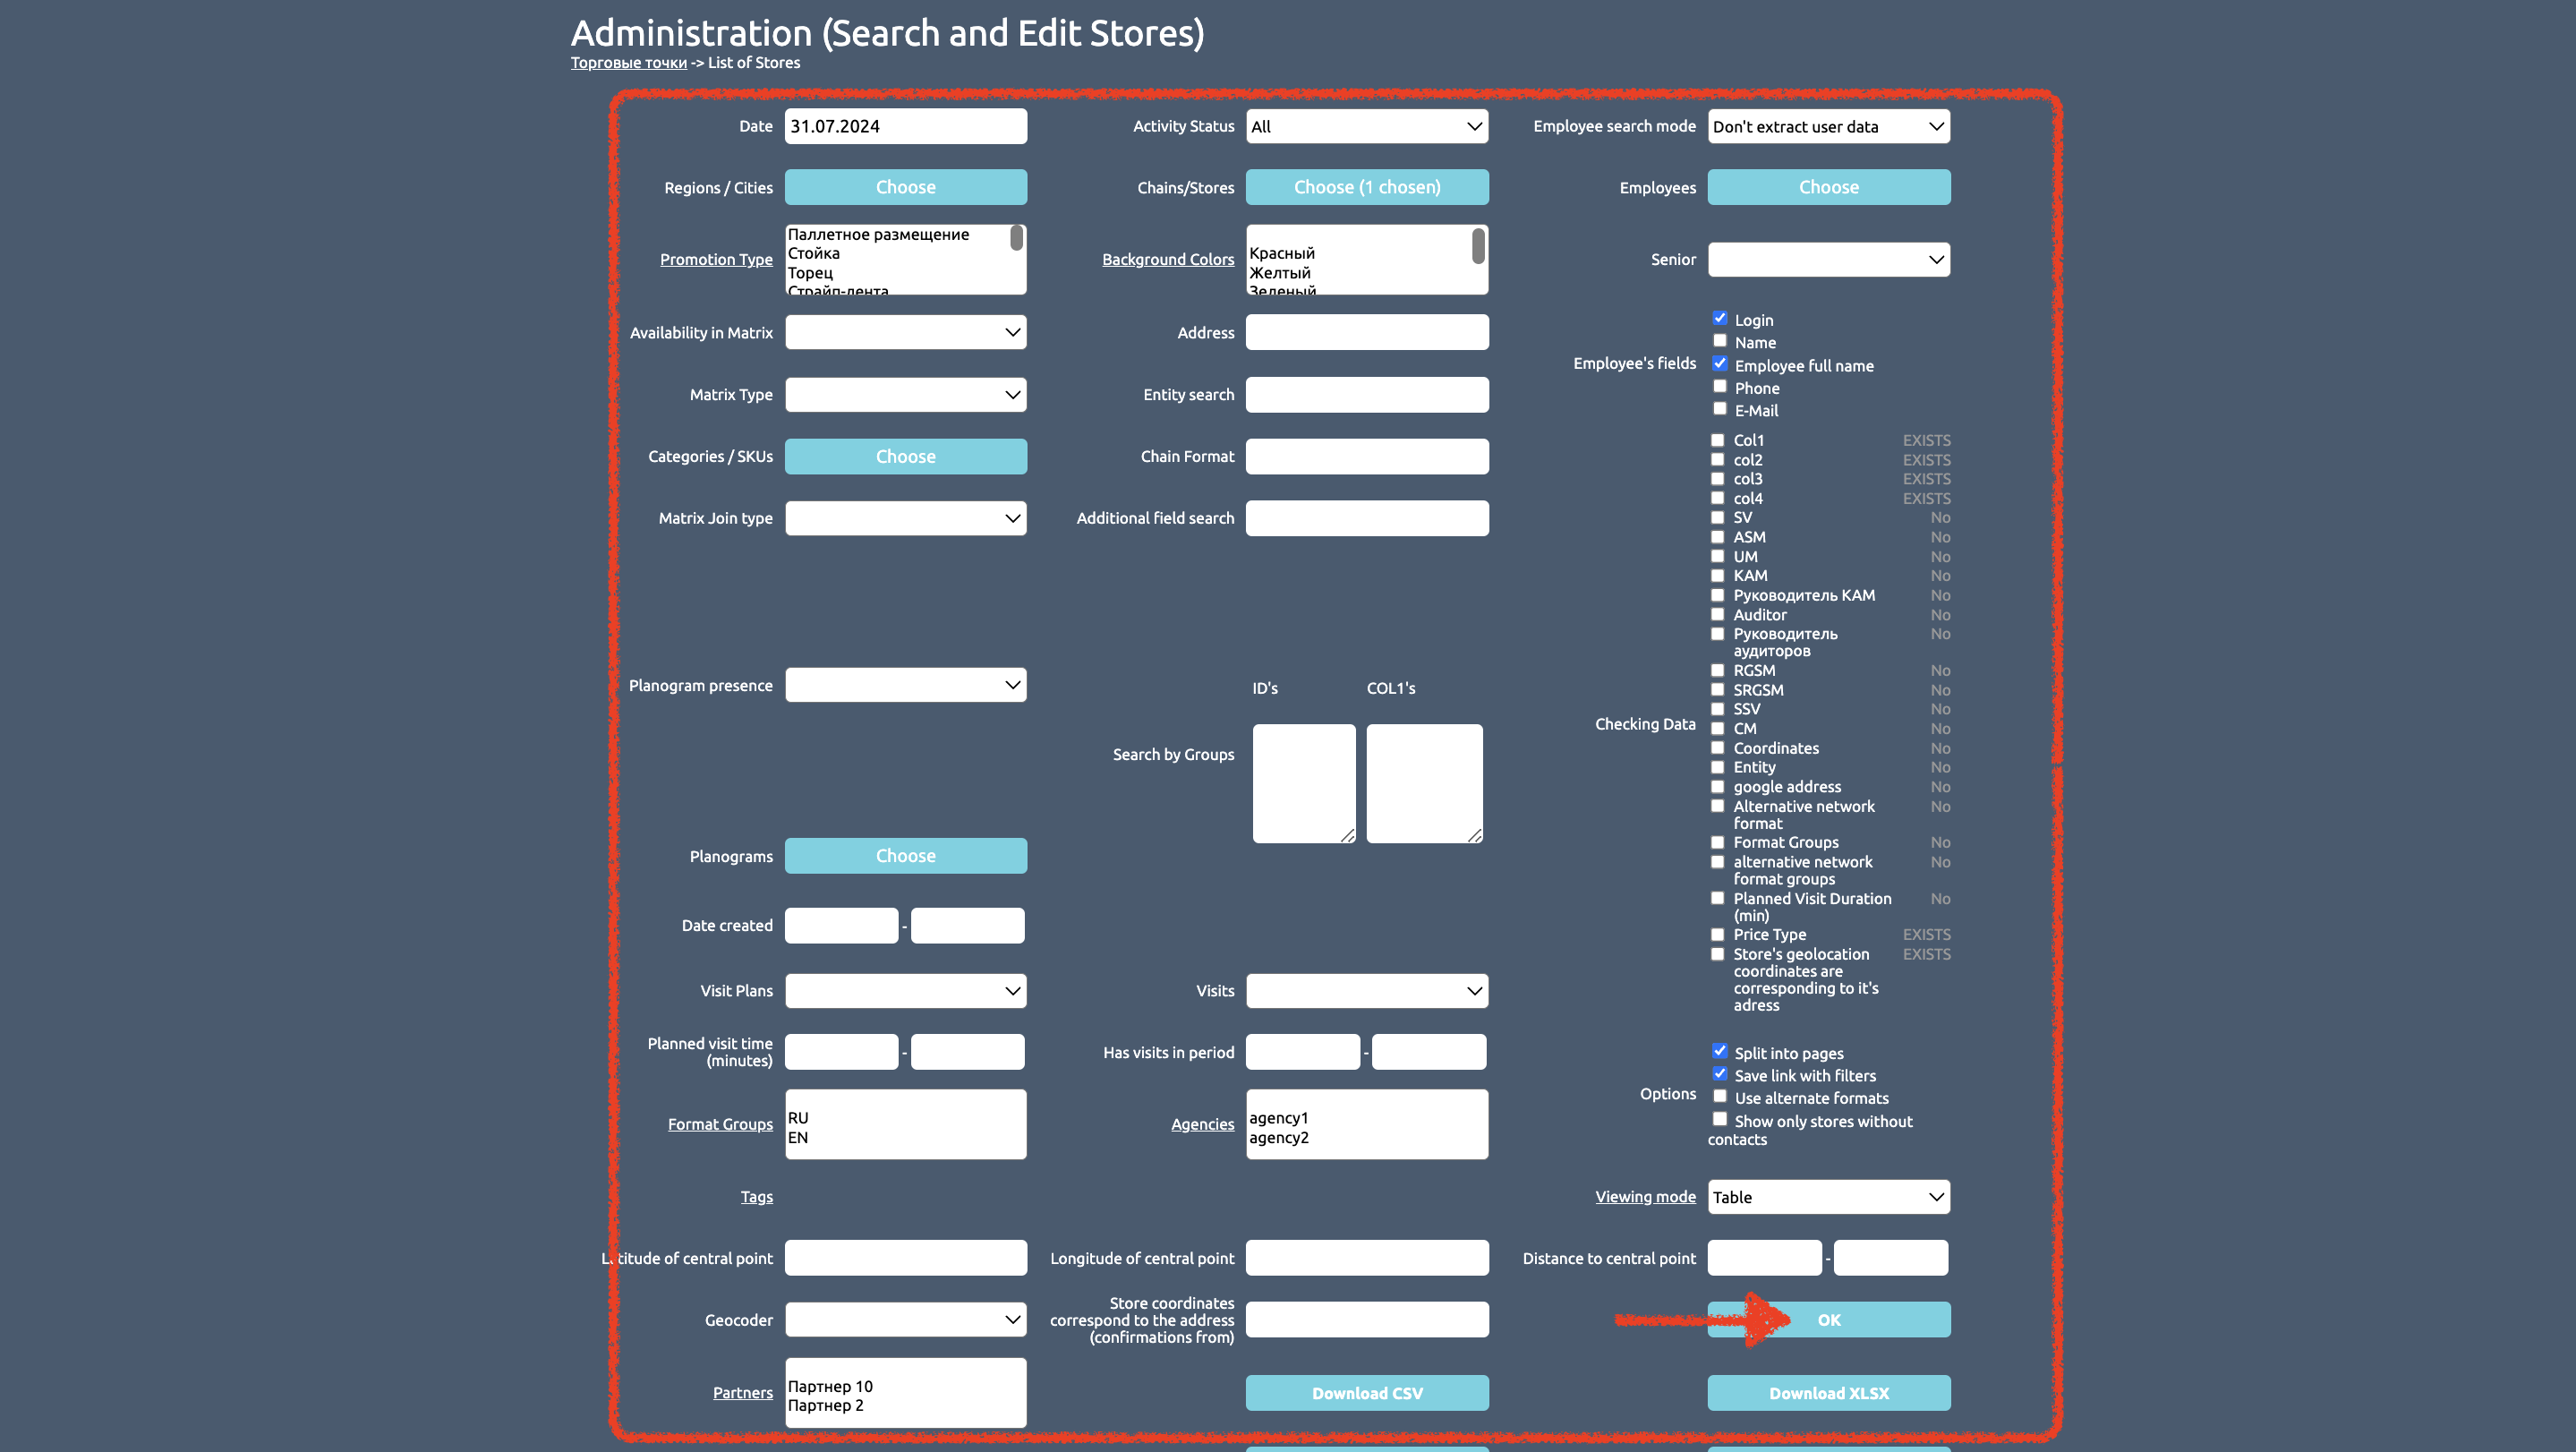
The third way is through the “Administration (Search and Edit Stores)” cabinet, which is located in the “Employees” tab.
*This method is more convenient for cases when the task setter has a list of Stores for different users
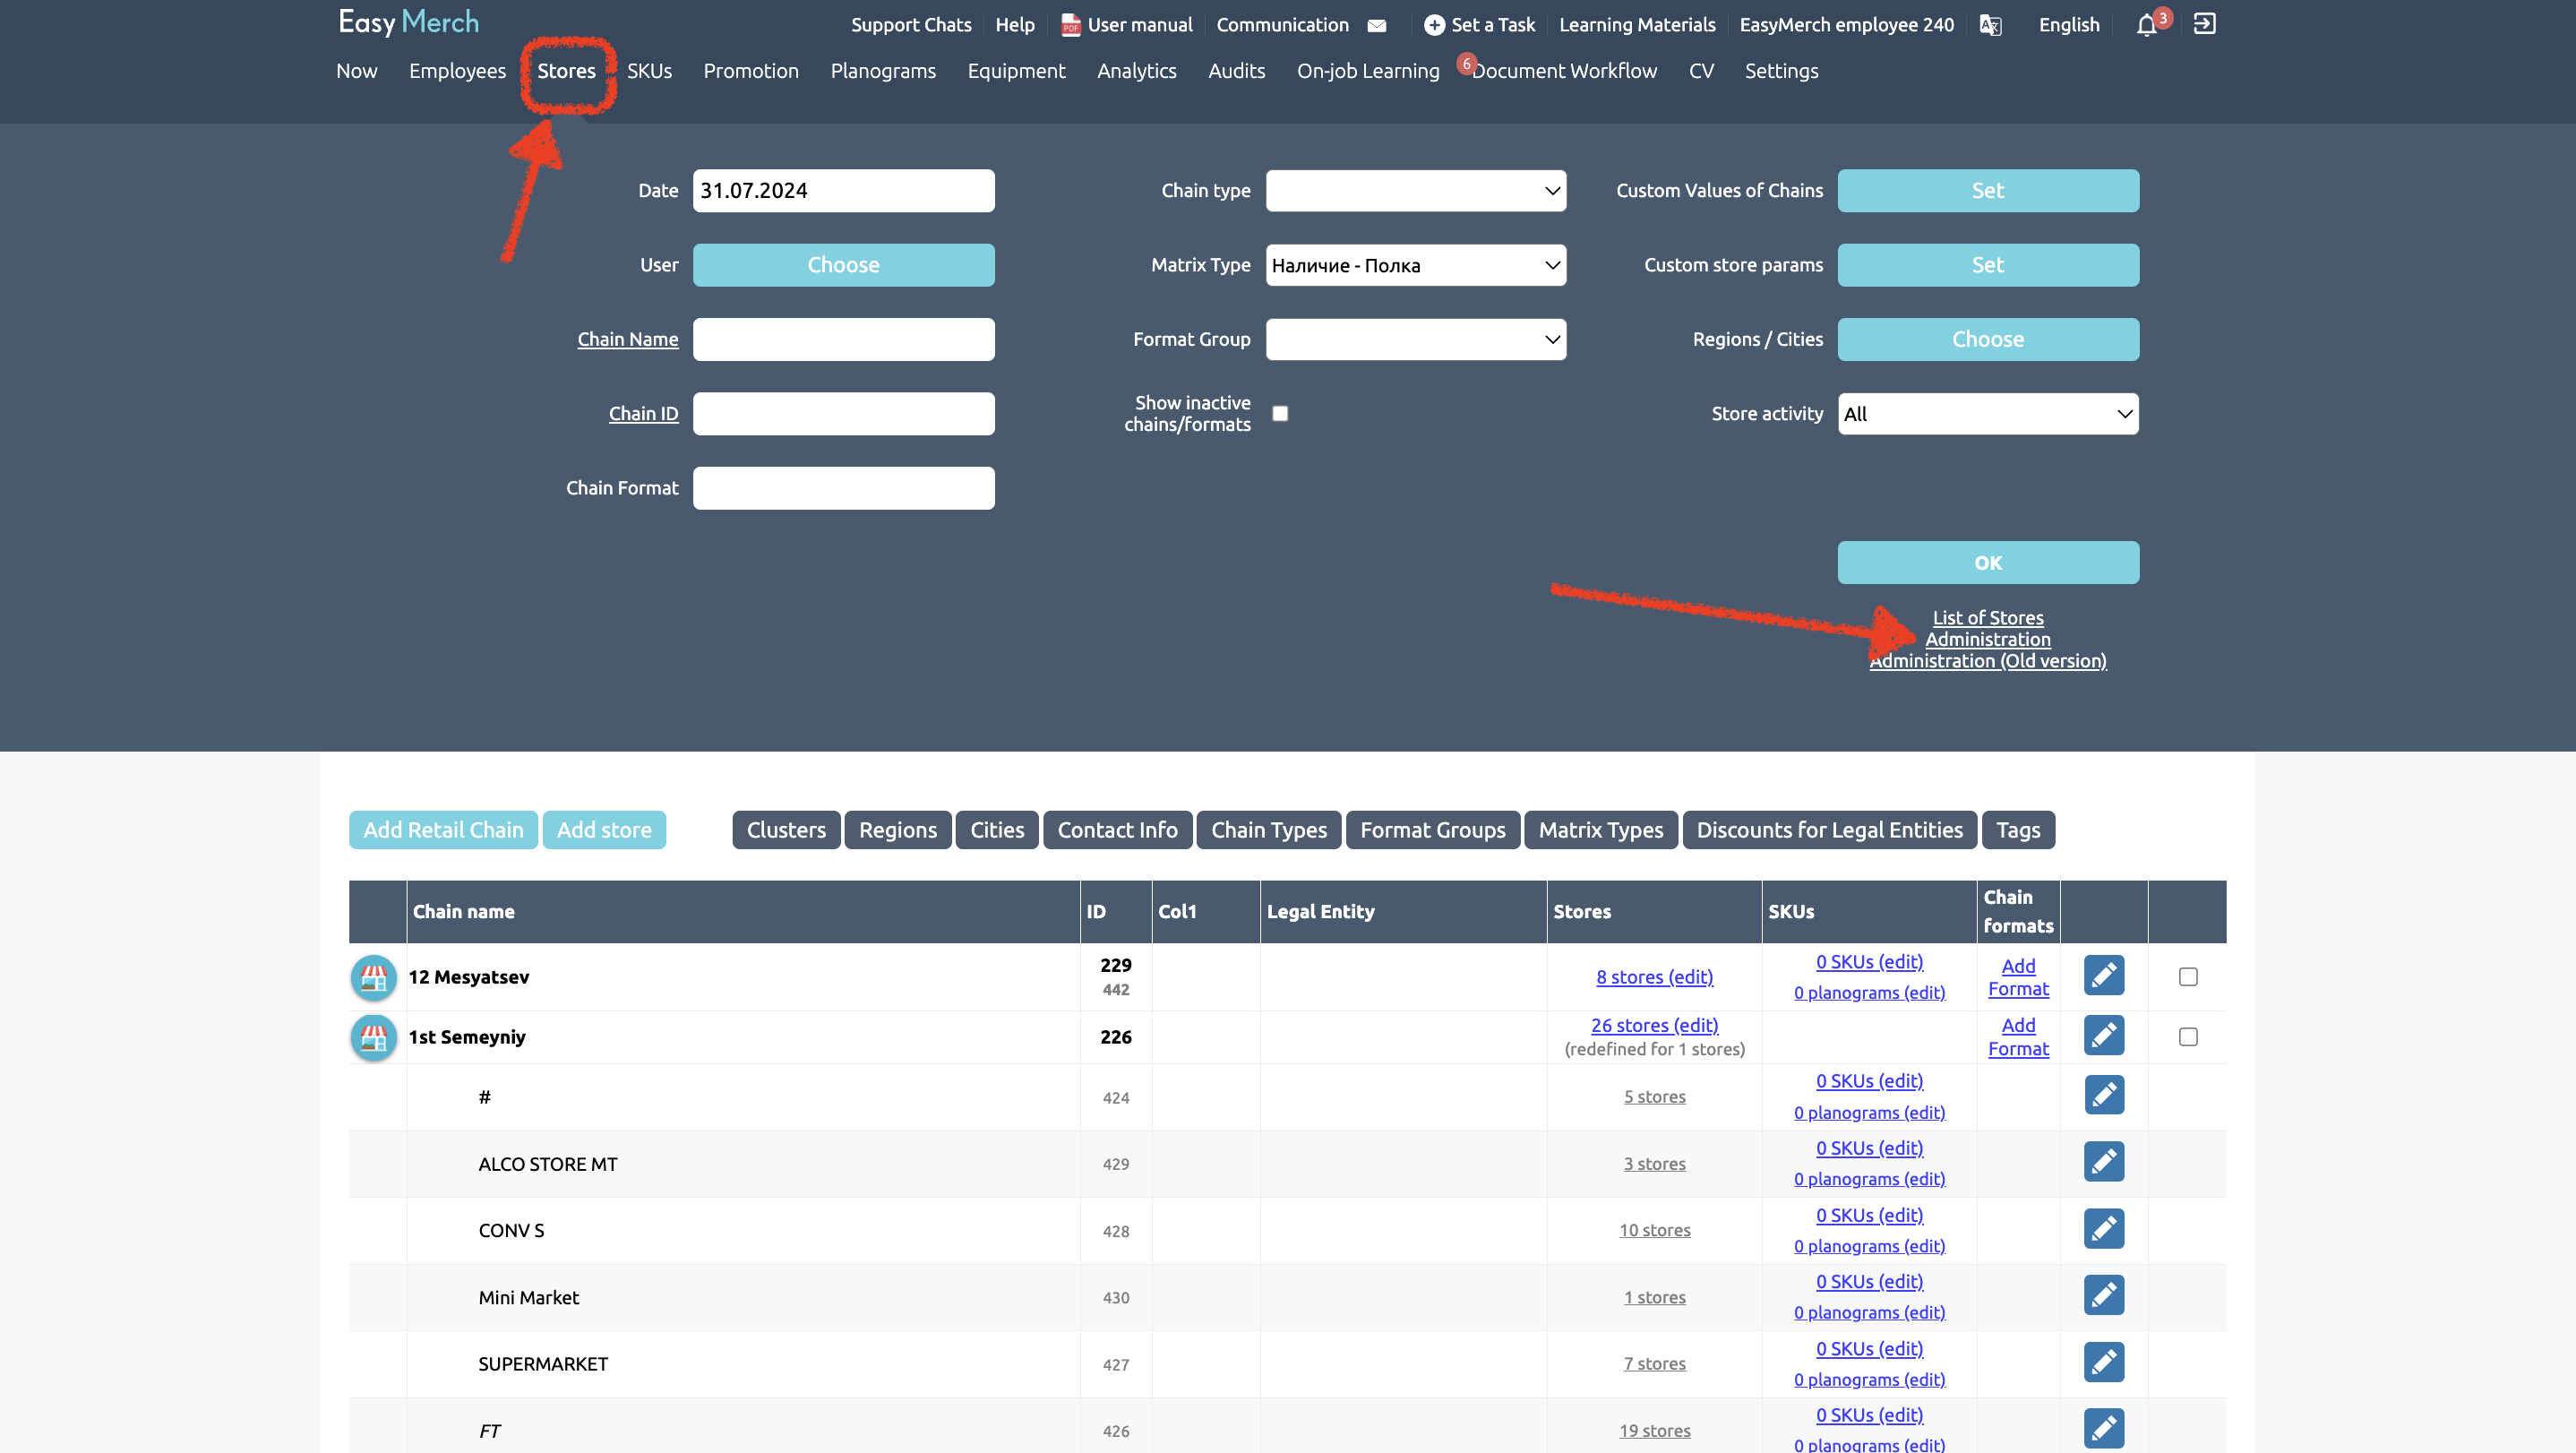
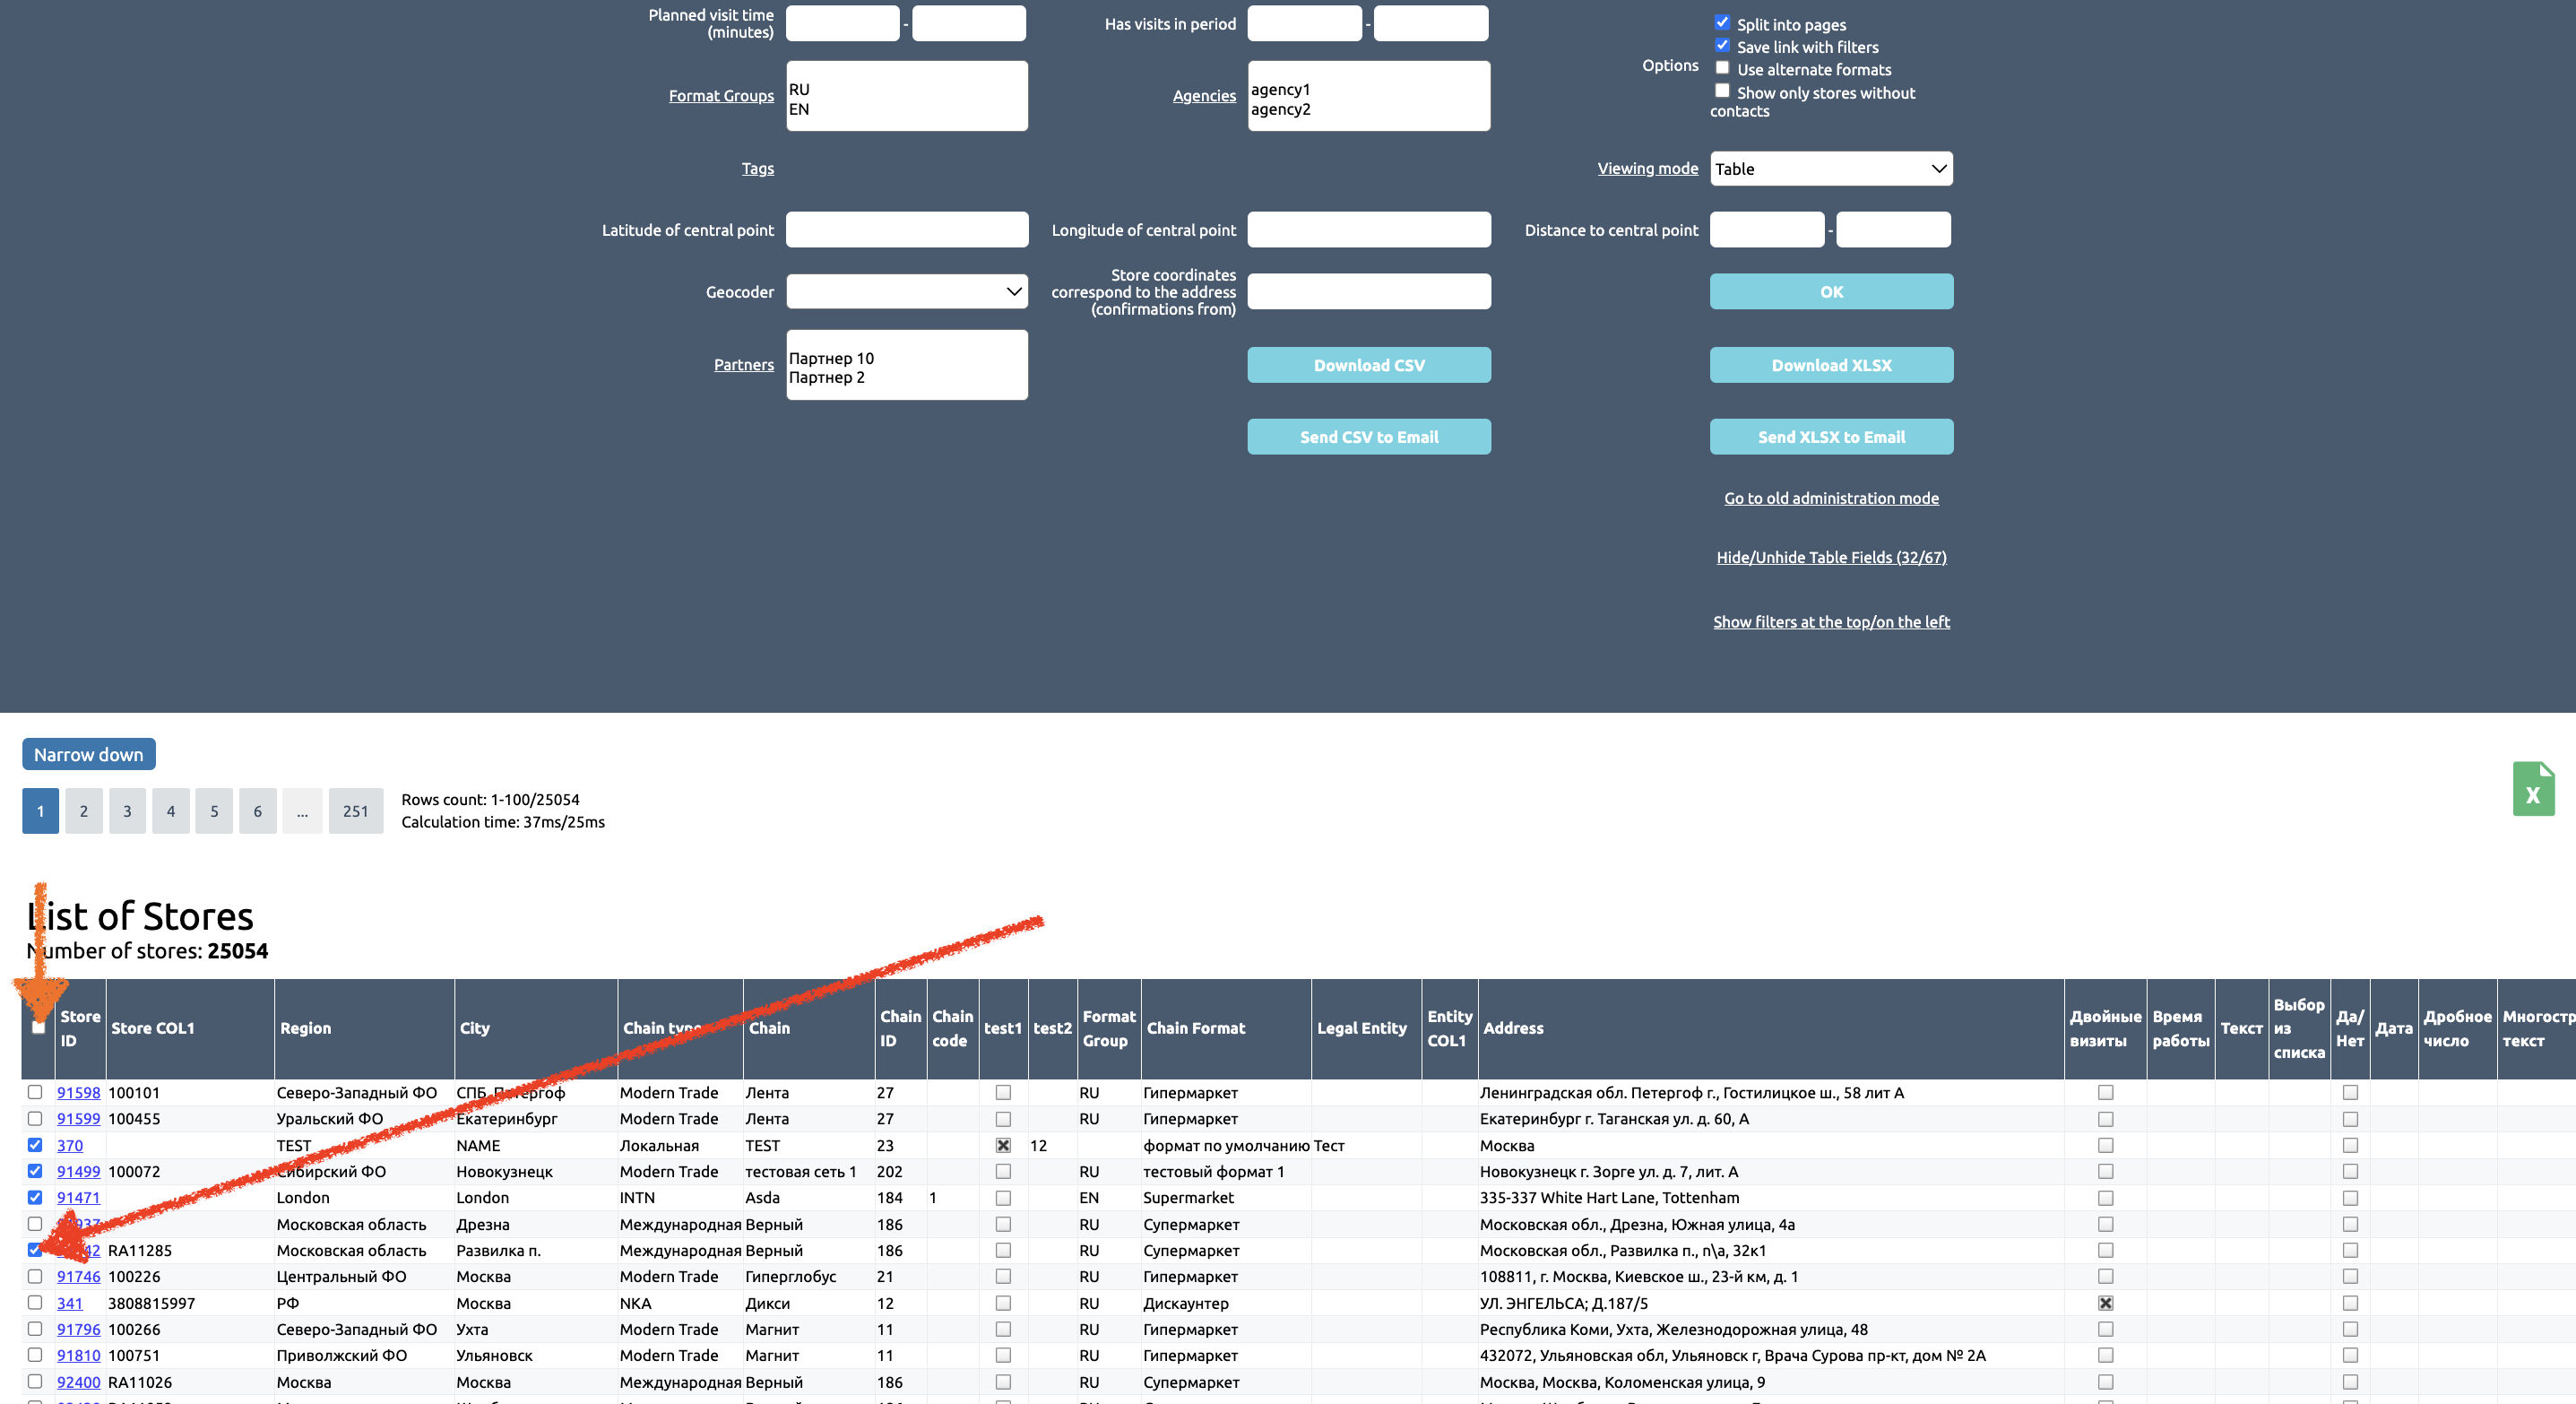
In the list, select the stores to which you want to assign a task.
You can select all tasks at once by clicking on the checkbox above
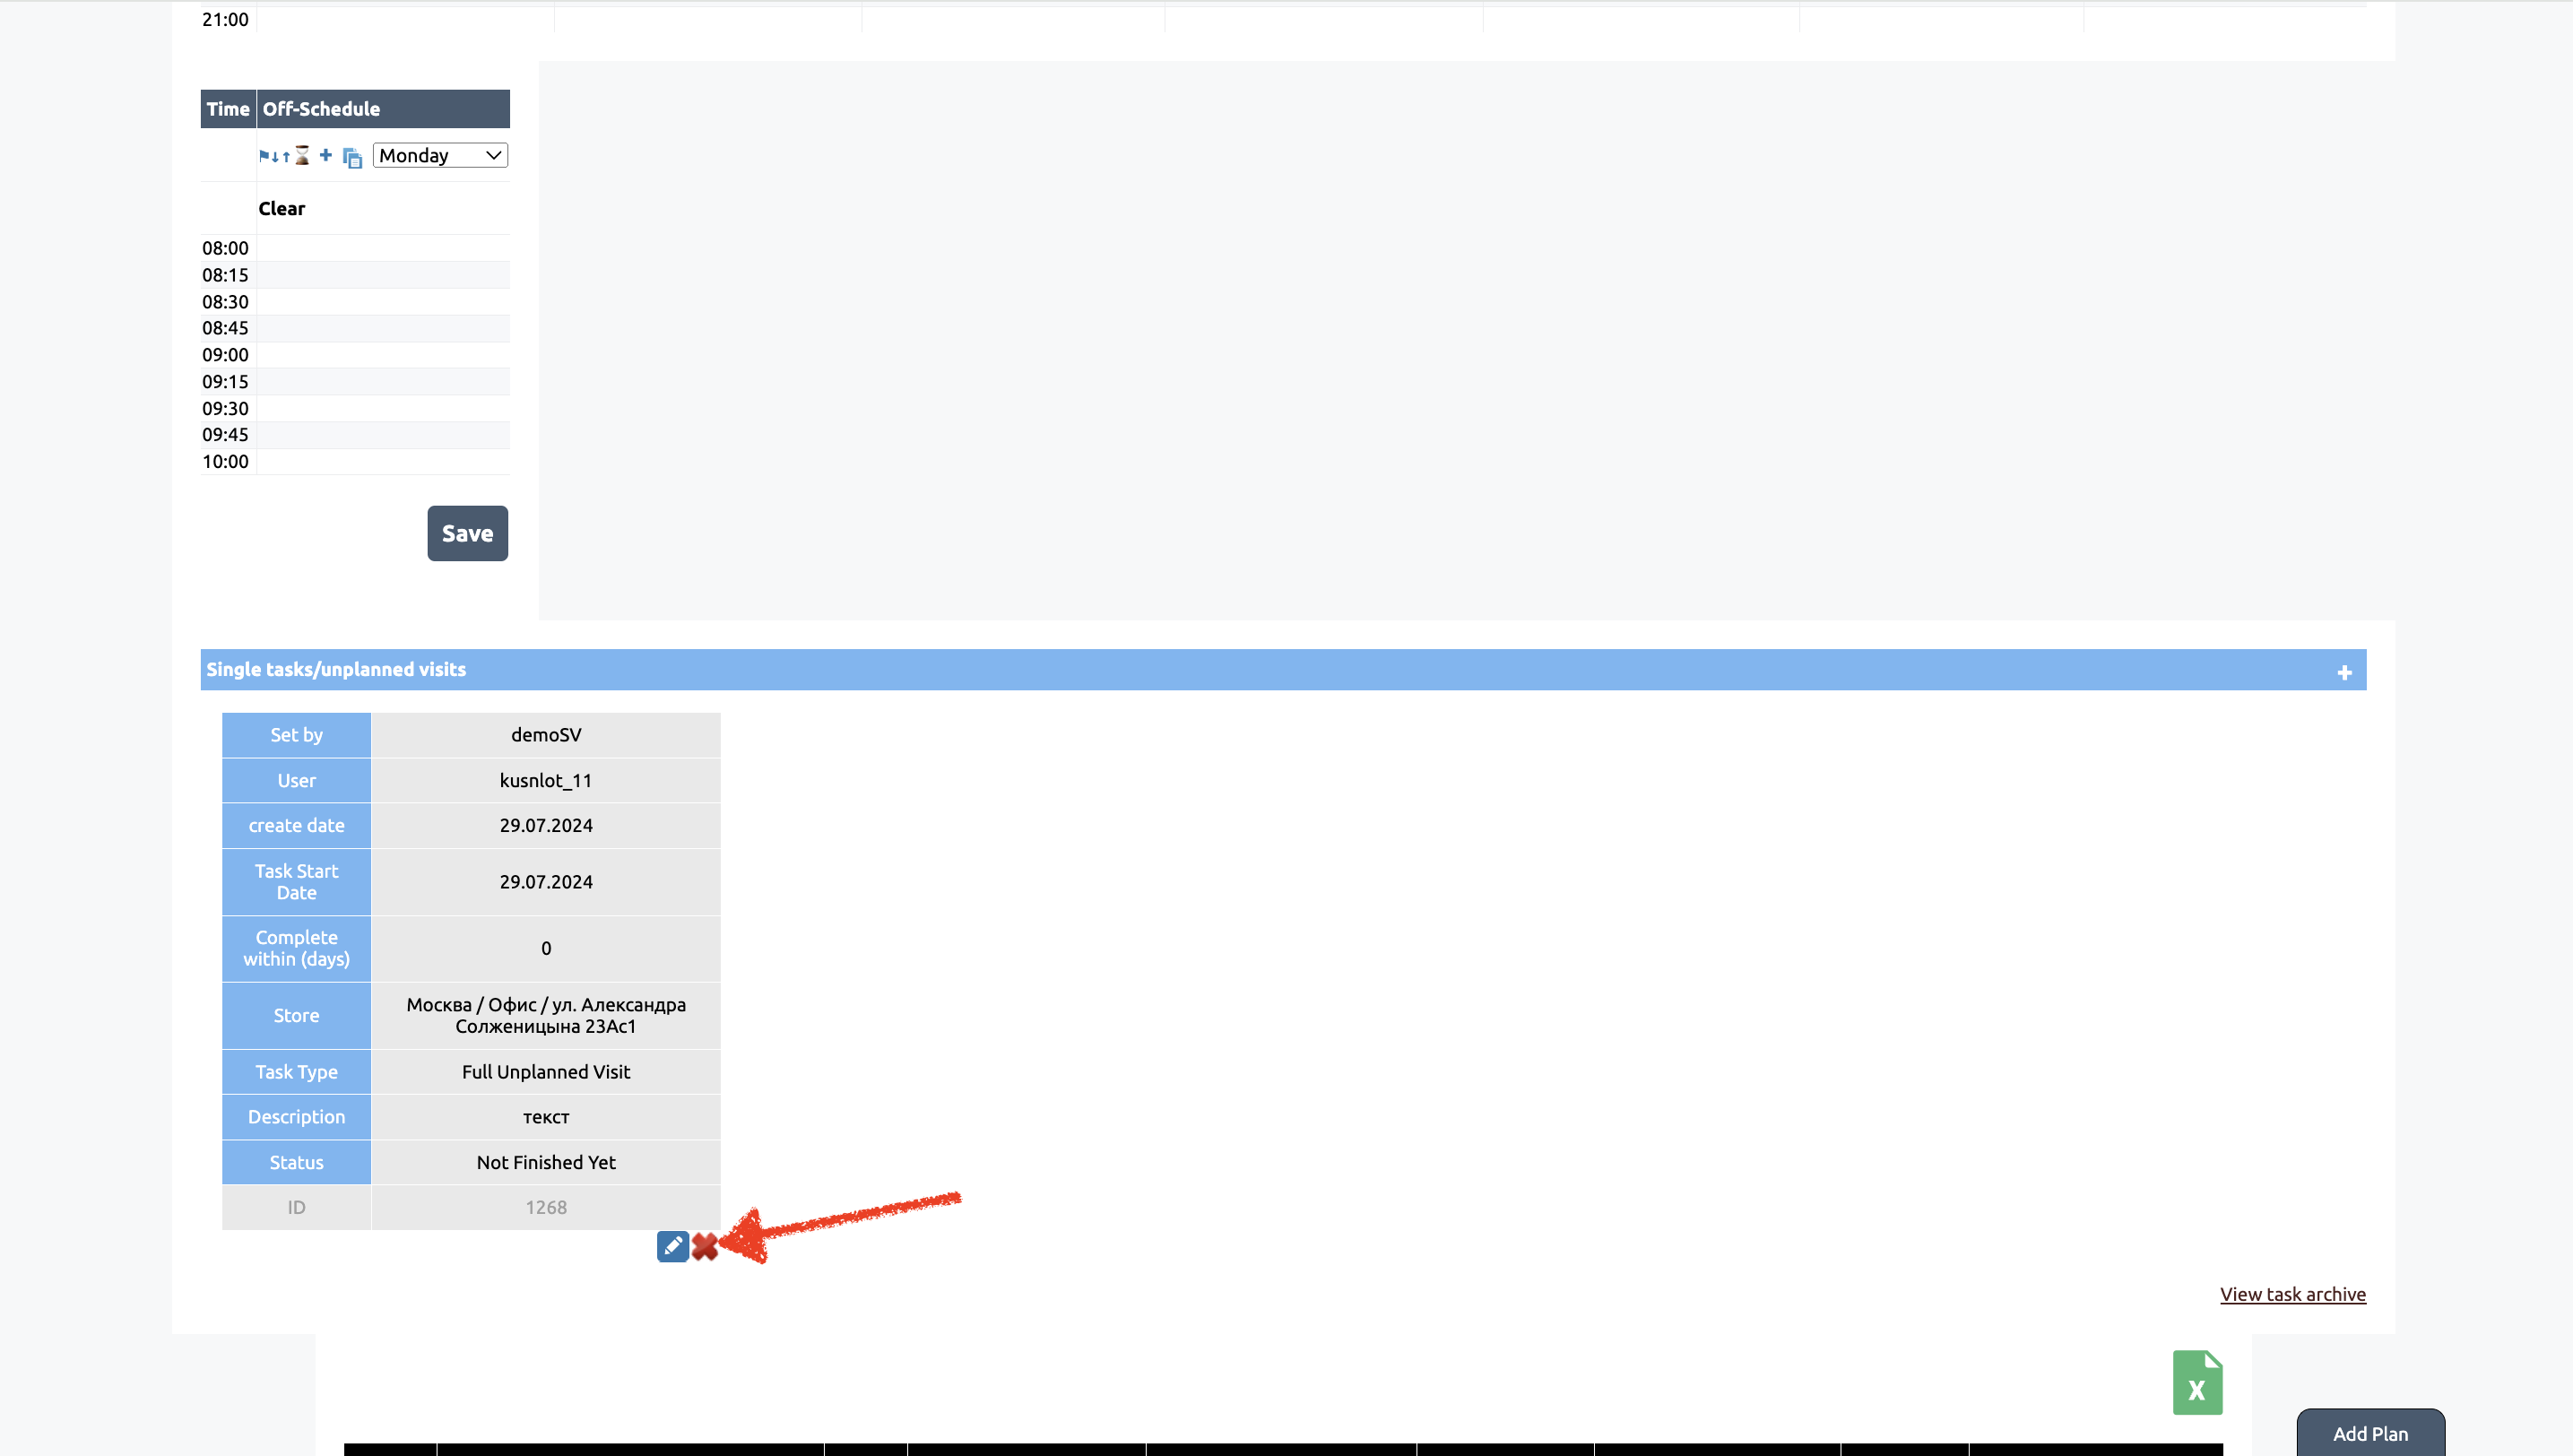
If you want to delete a task for only one user - go to the visit plan of the user you want to delete the task for and in the “Single tasks/unplanned visits” block click on the “cross” and confirm the deletion.
The second method is suitable for both single and mass deletion of tasks.
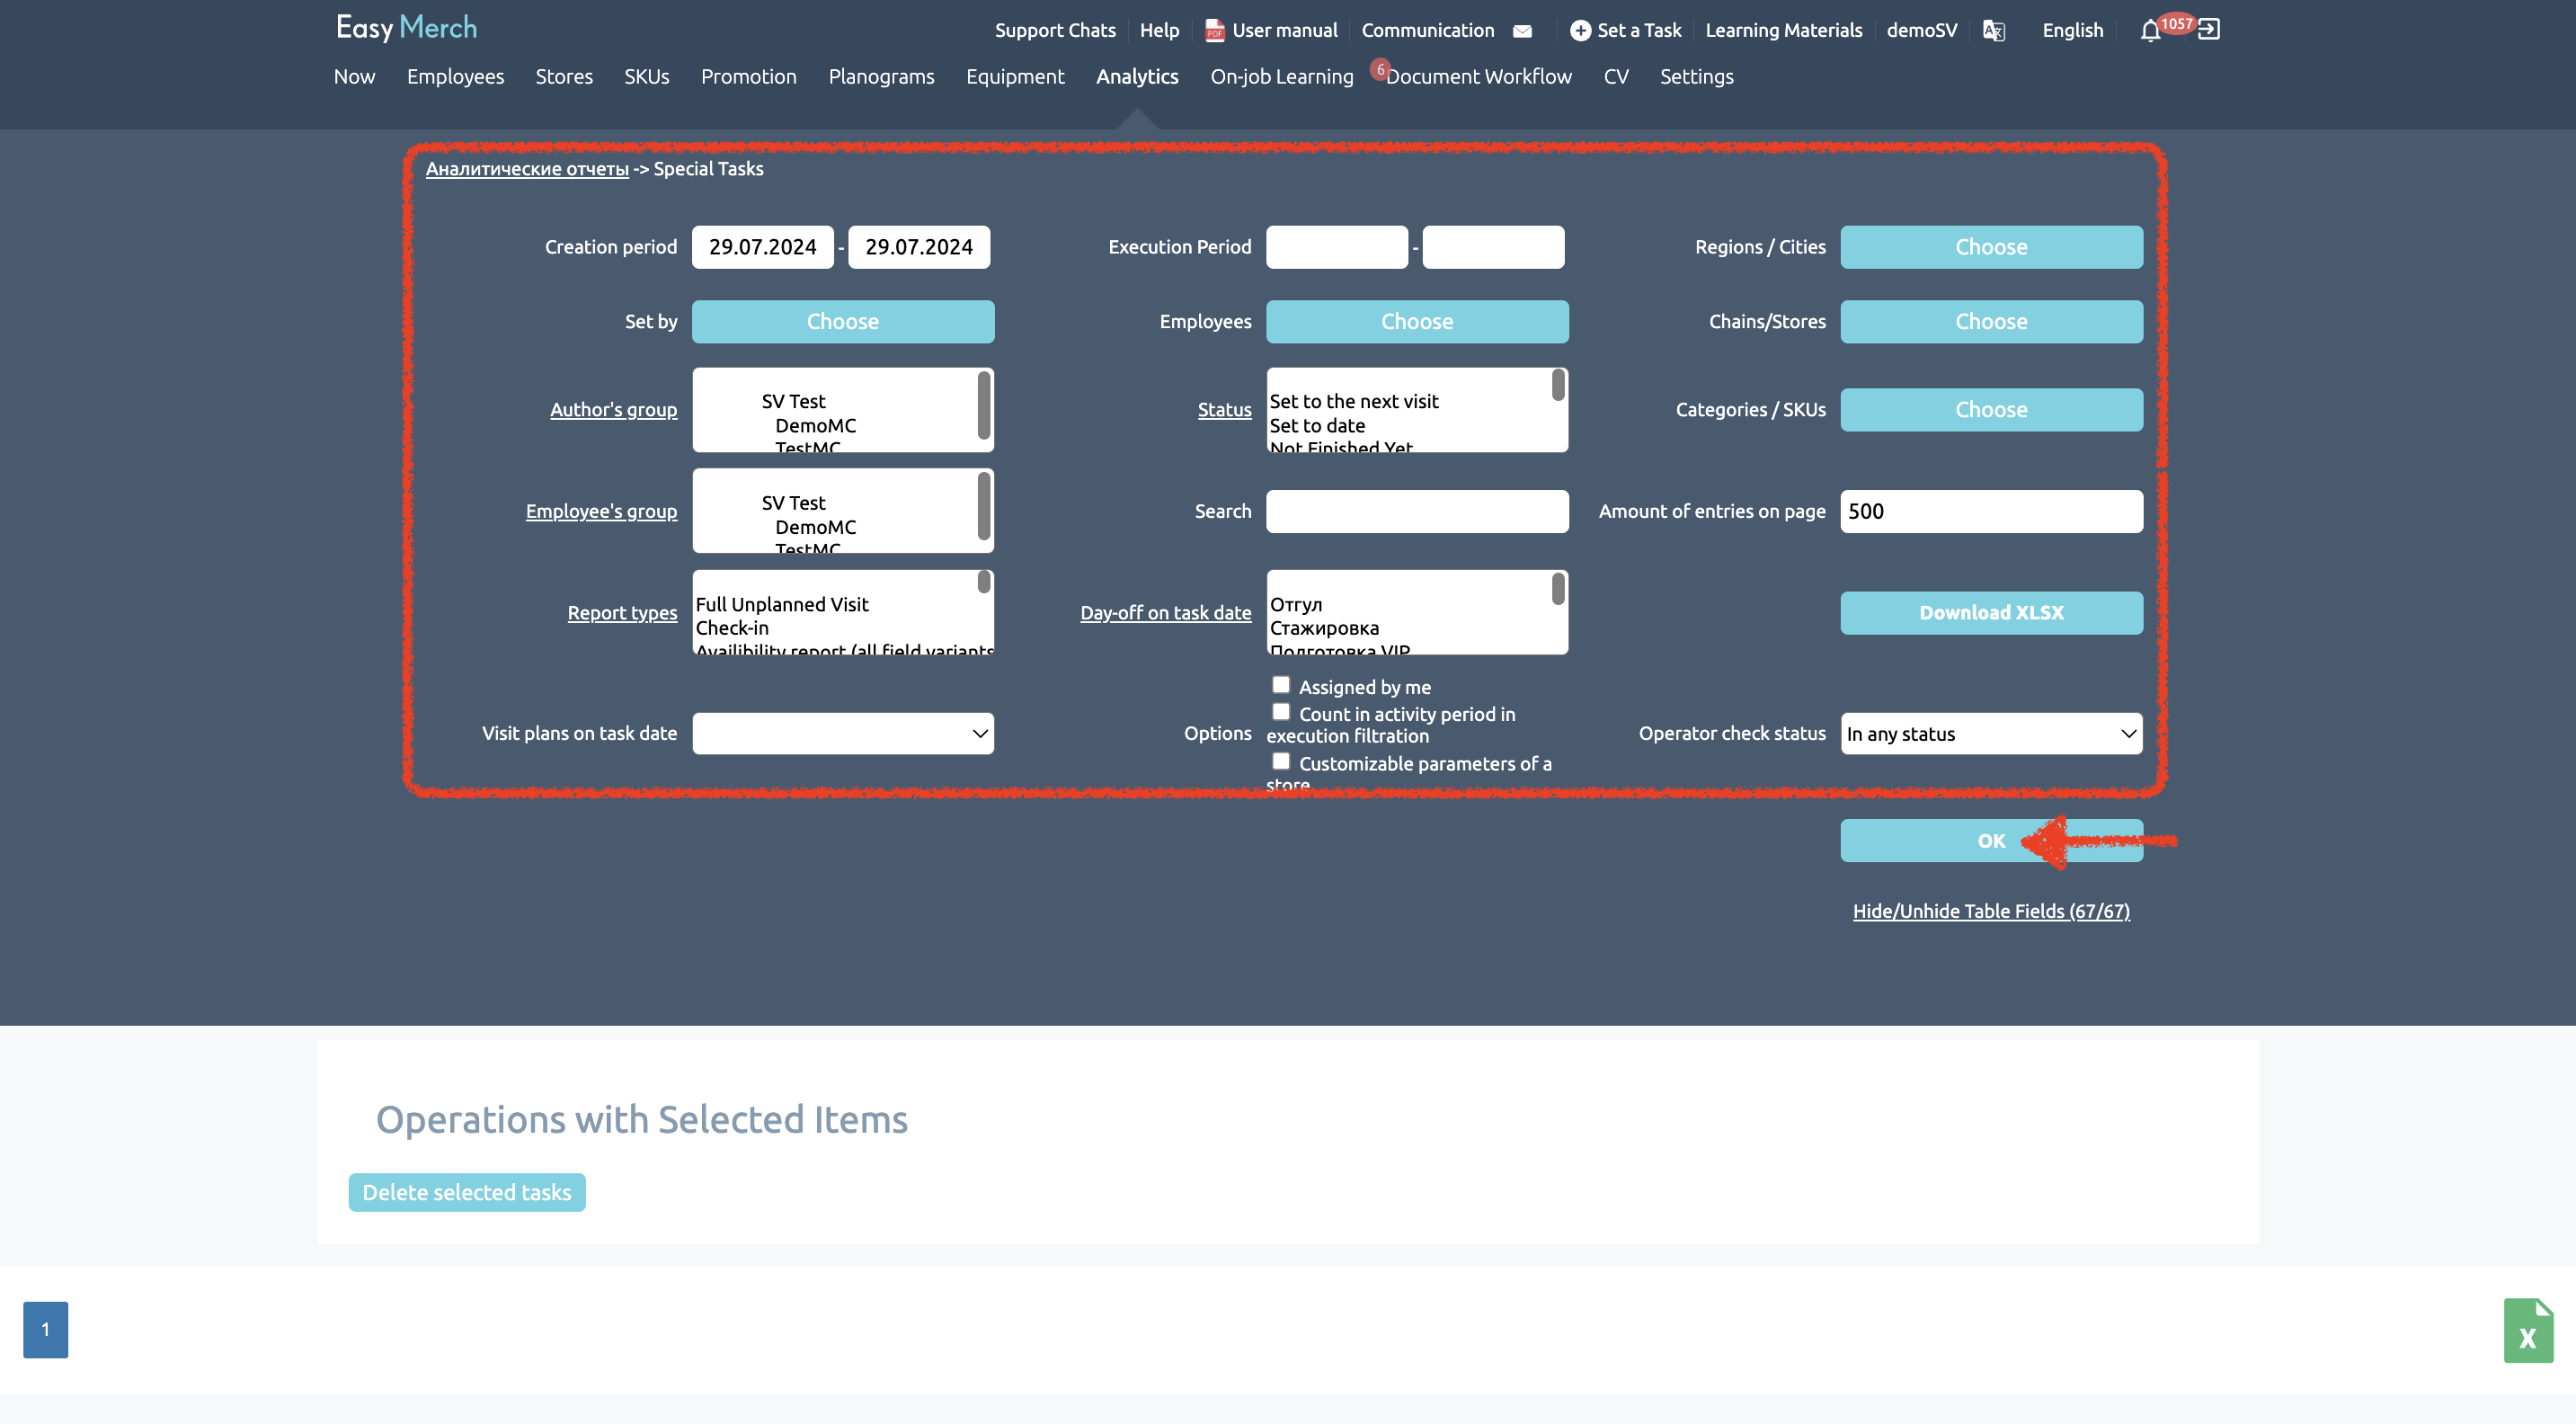
Go to “Analytics” - “Special Task Report”. Set the task search parameters and click OK
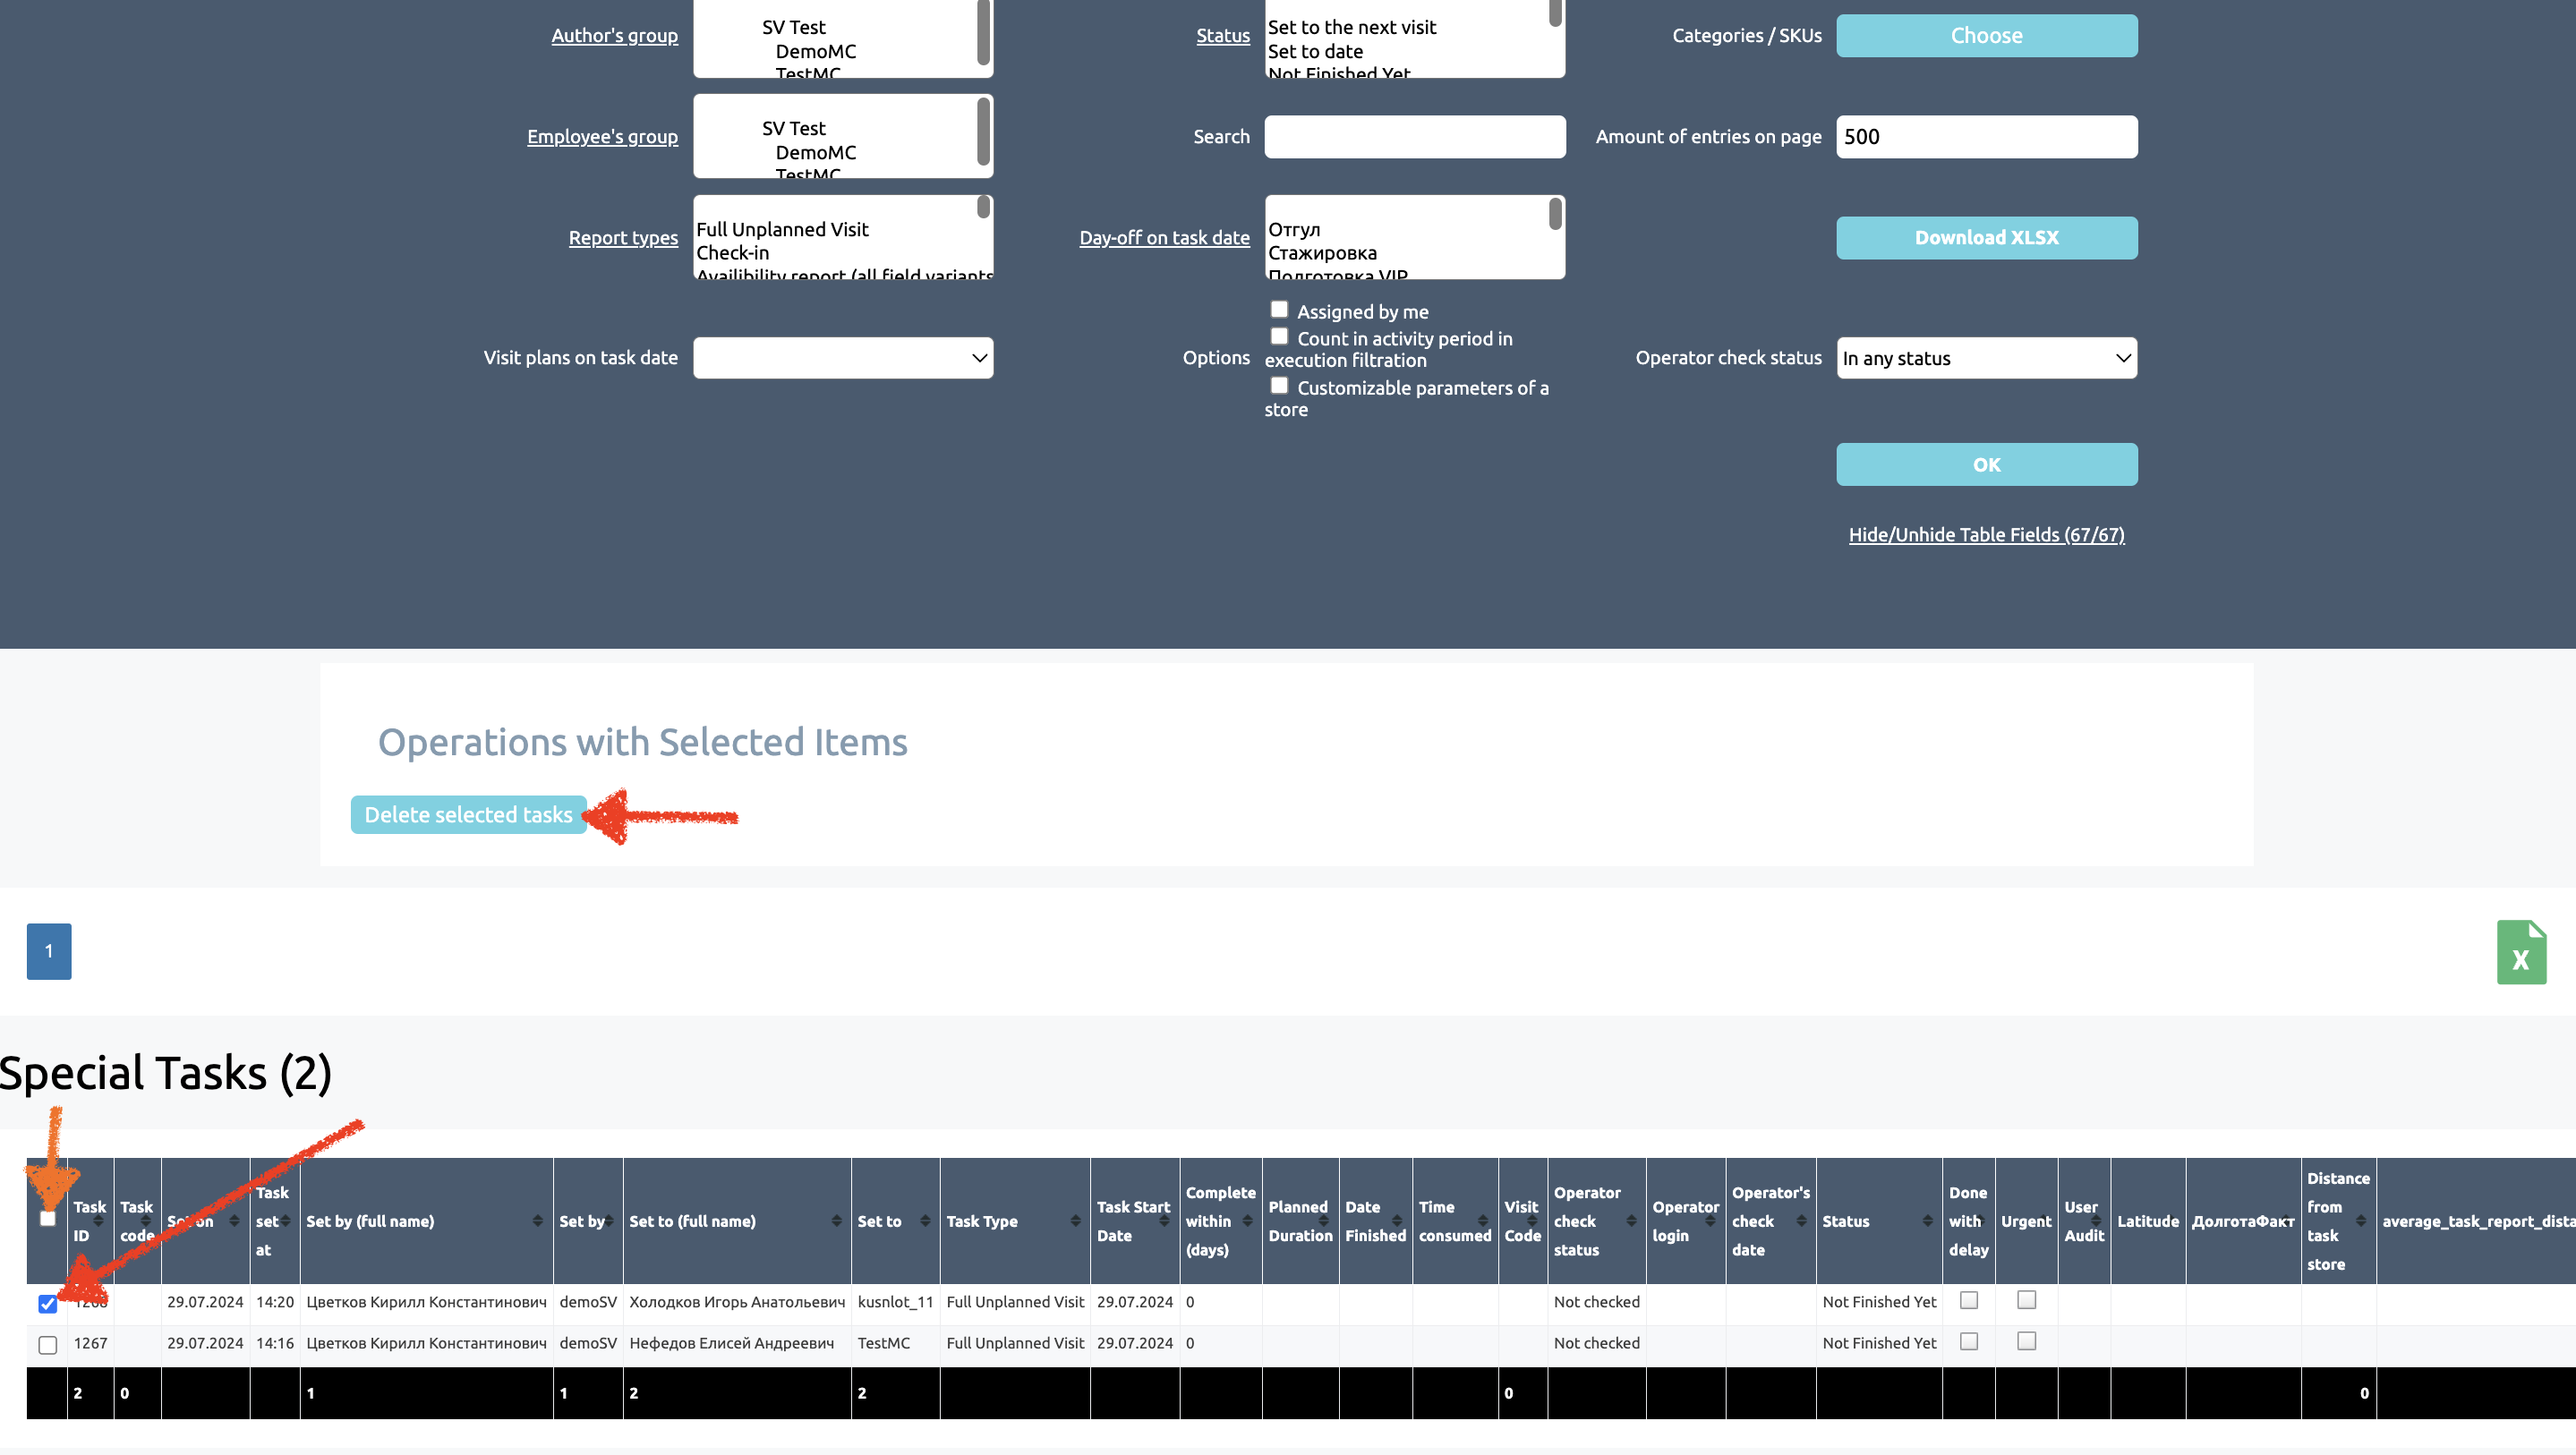
In the displayed result, tick the required tasks and click “Delete selected tasks”
You can select all tasks at once by clicking on the checkbox above
*The right “Multiple deletion of single tasks” is required
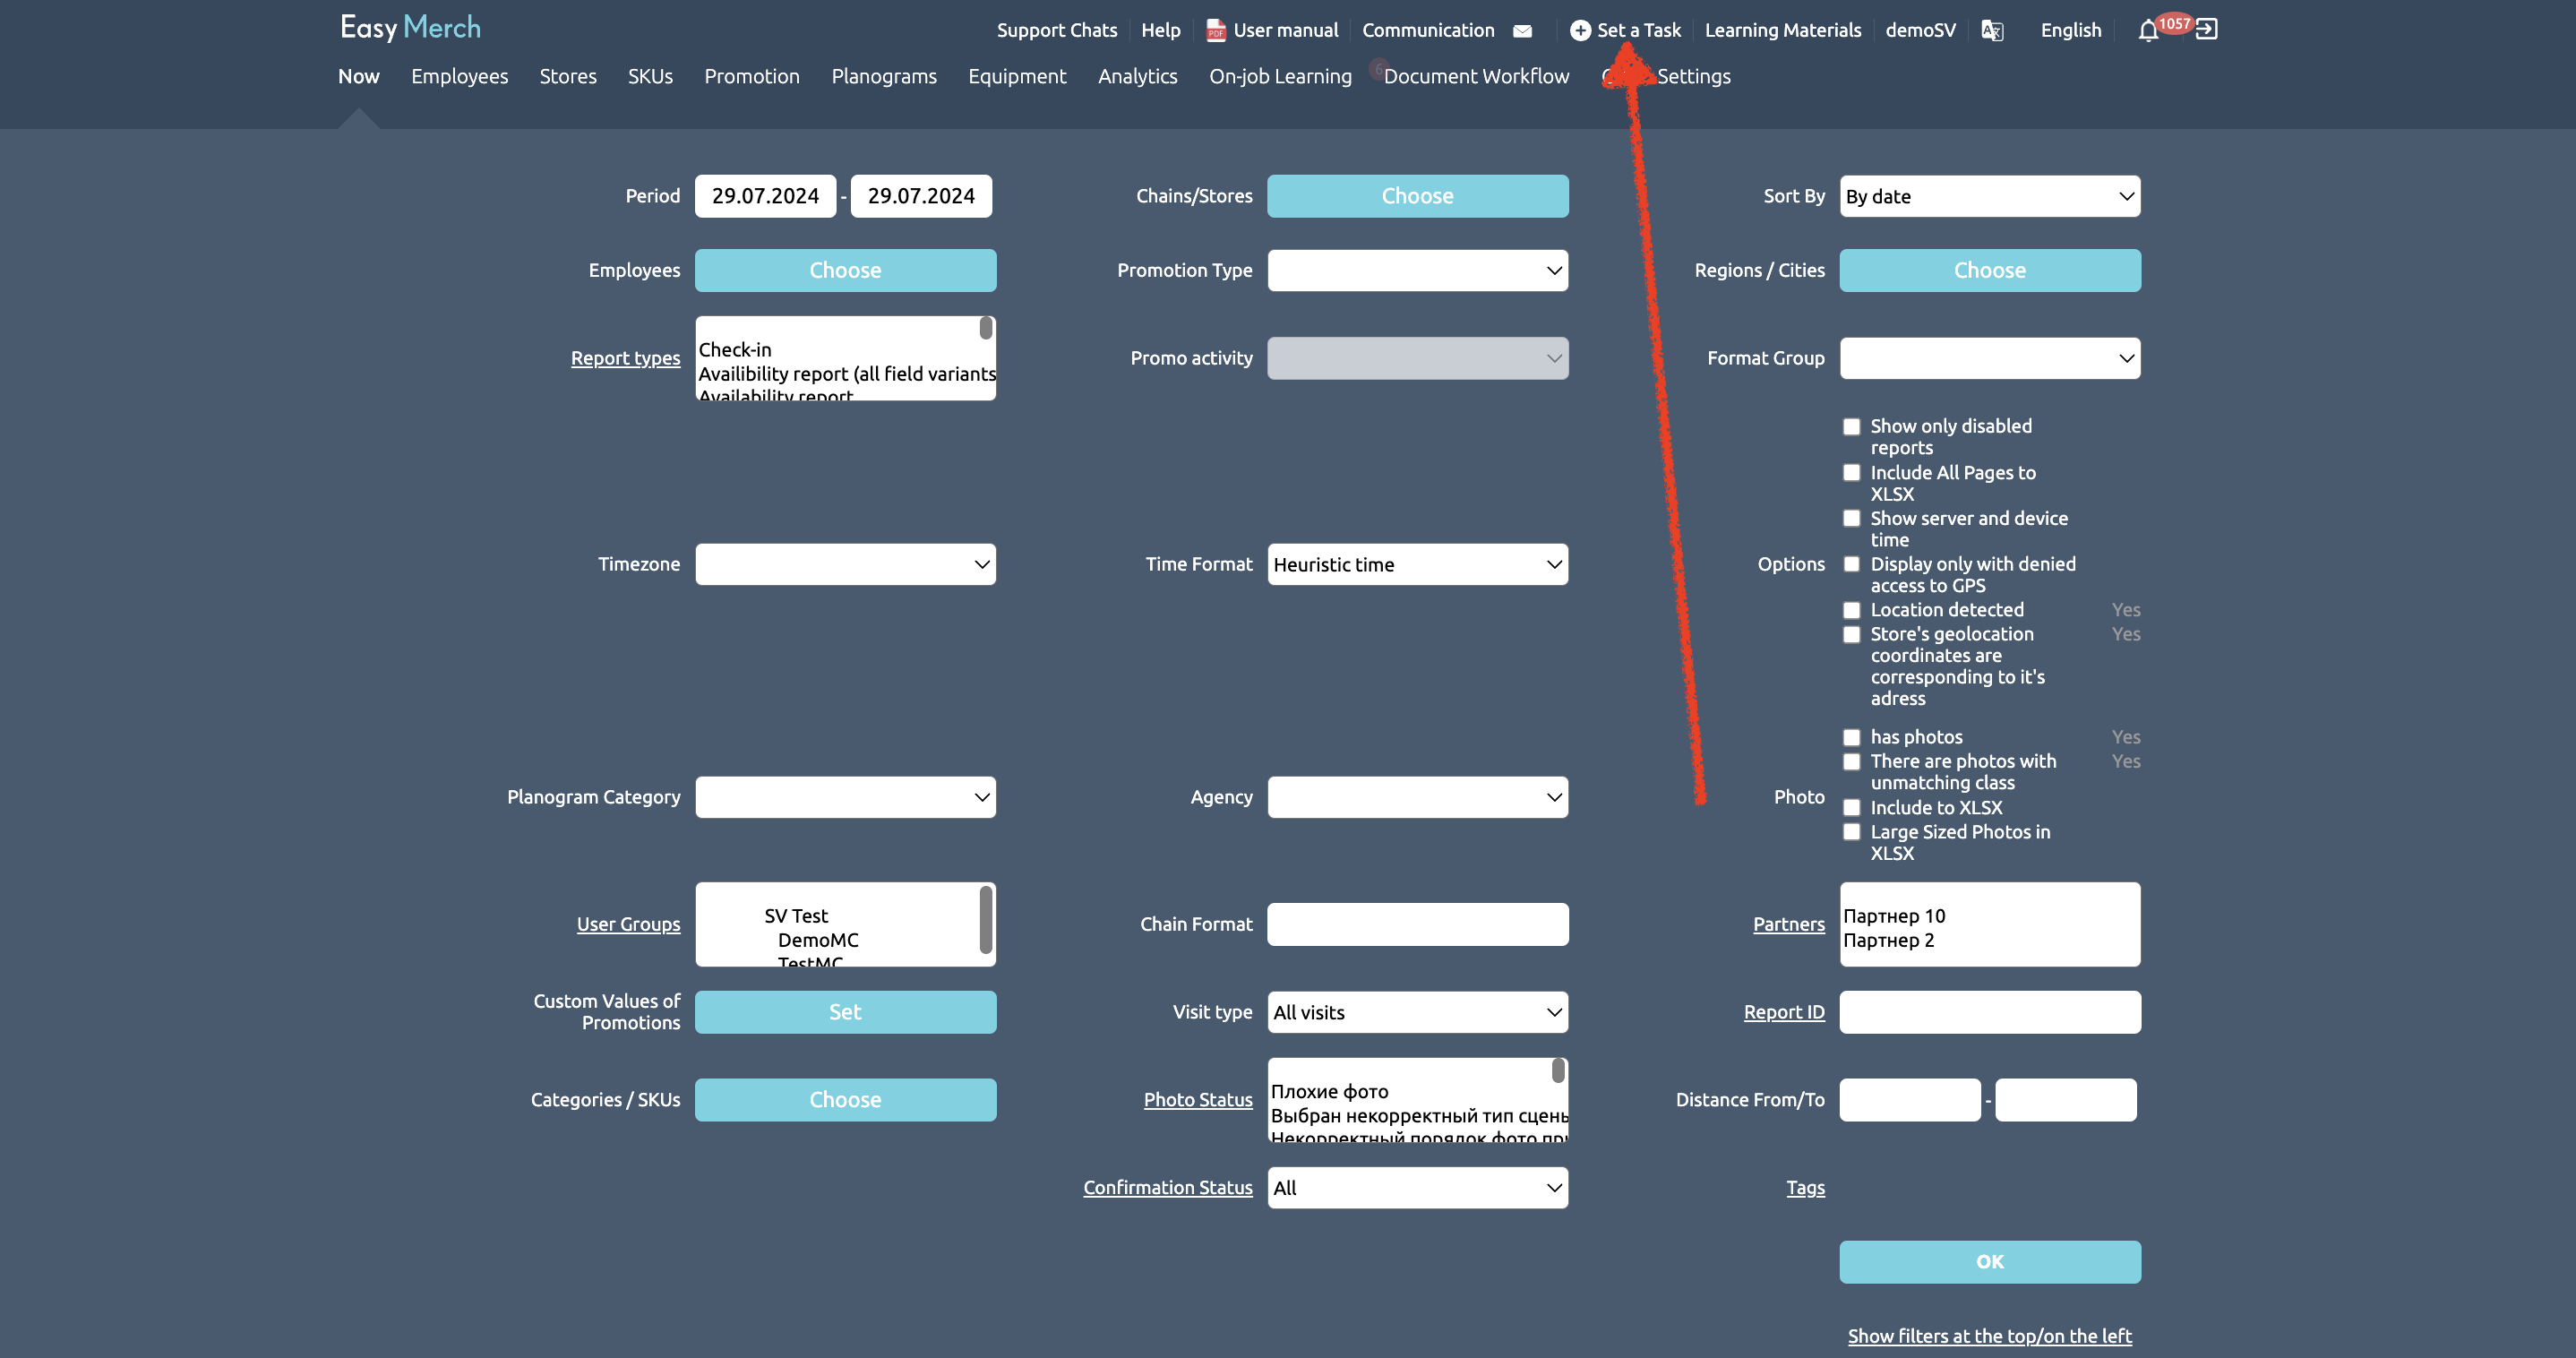
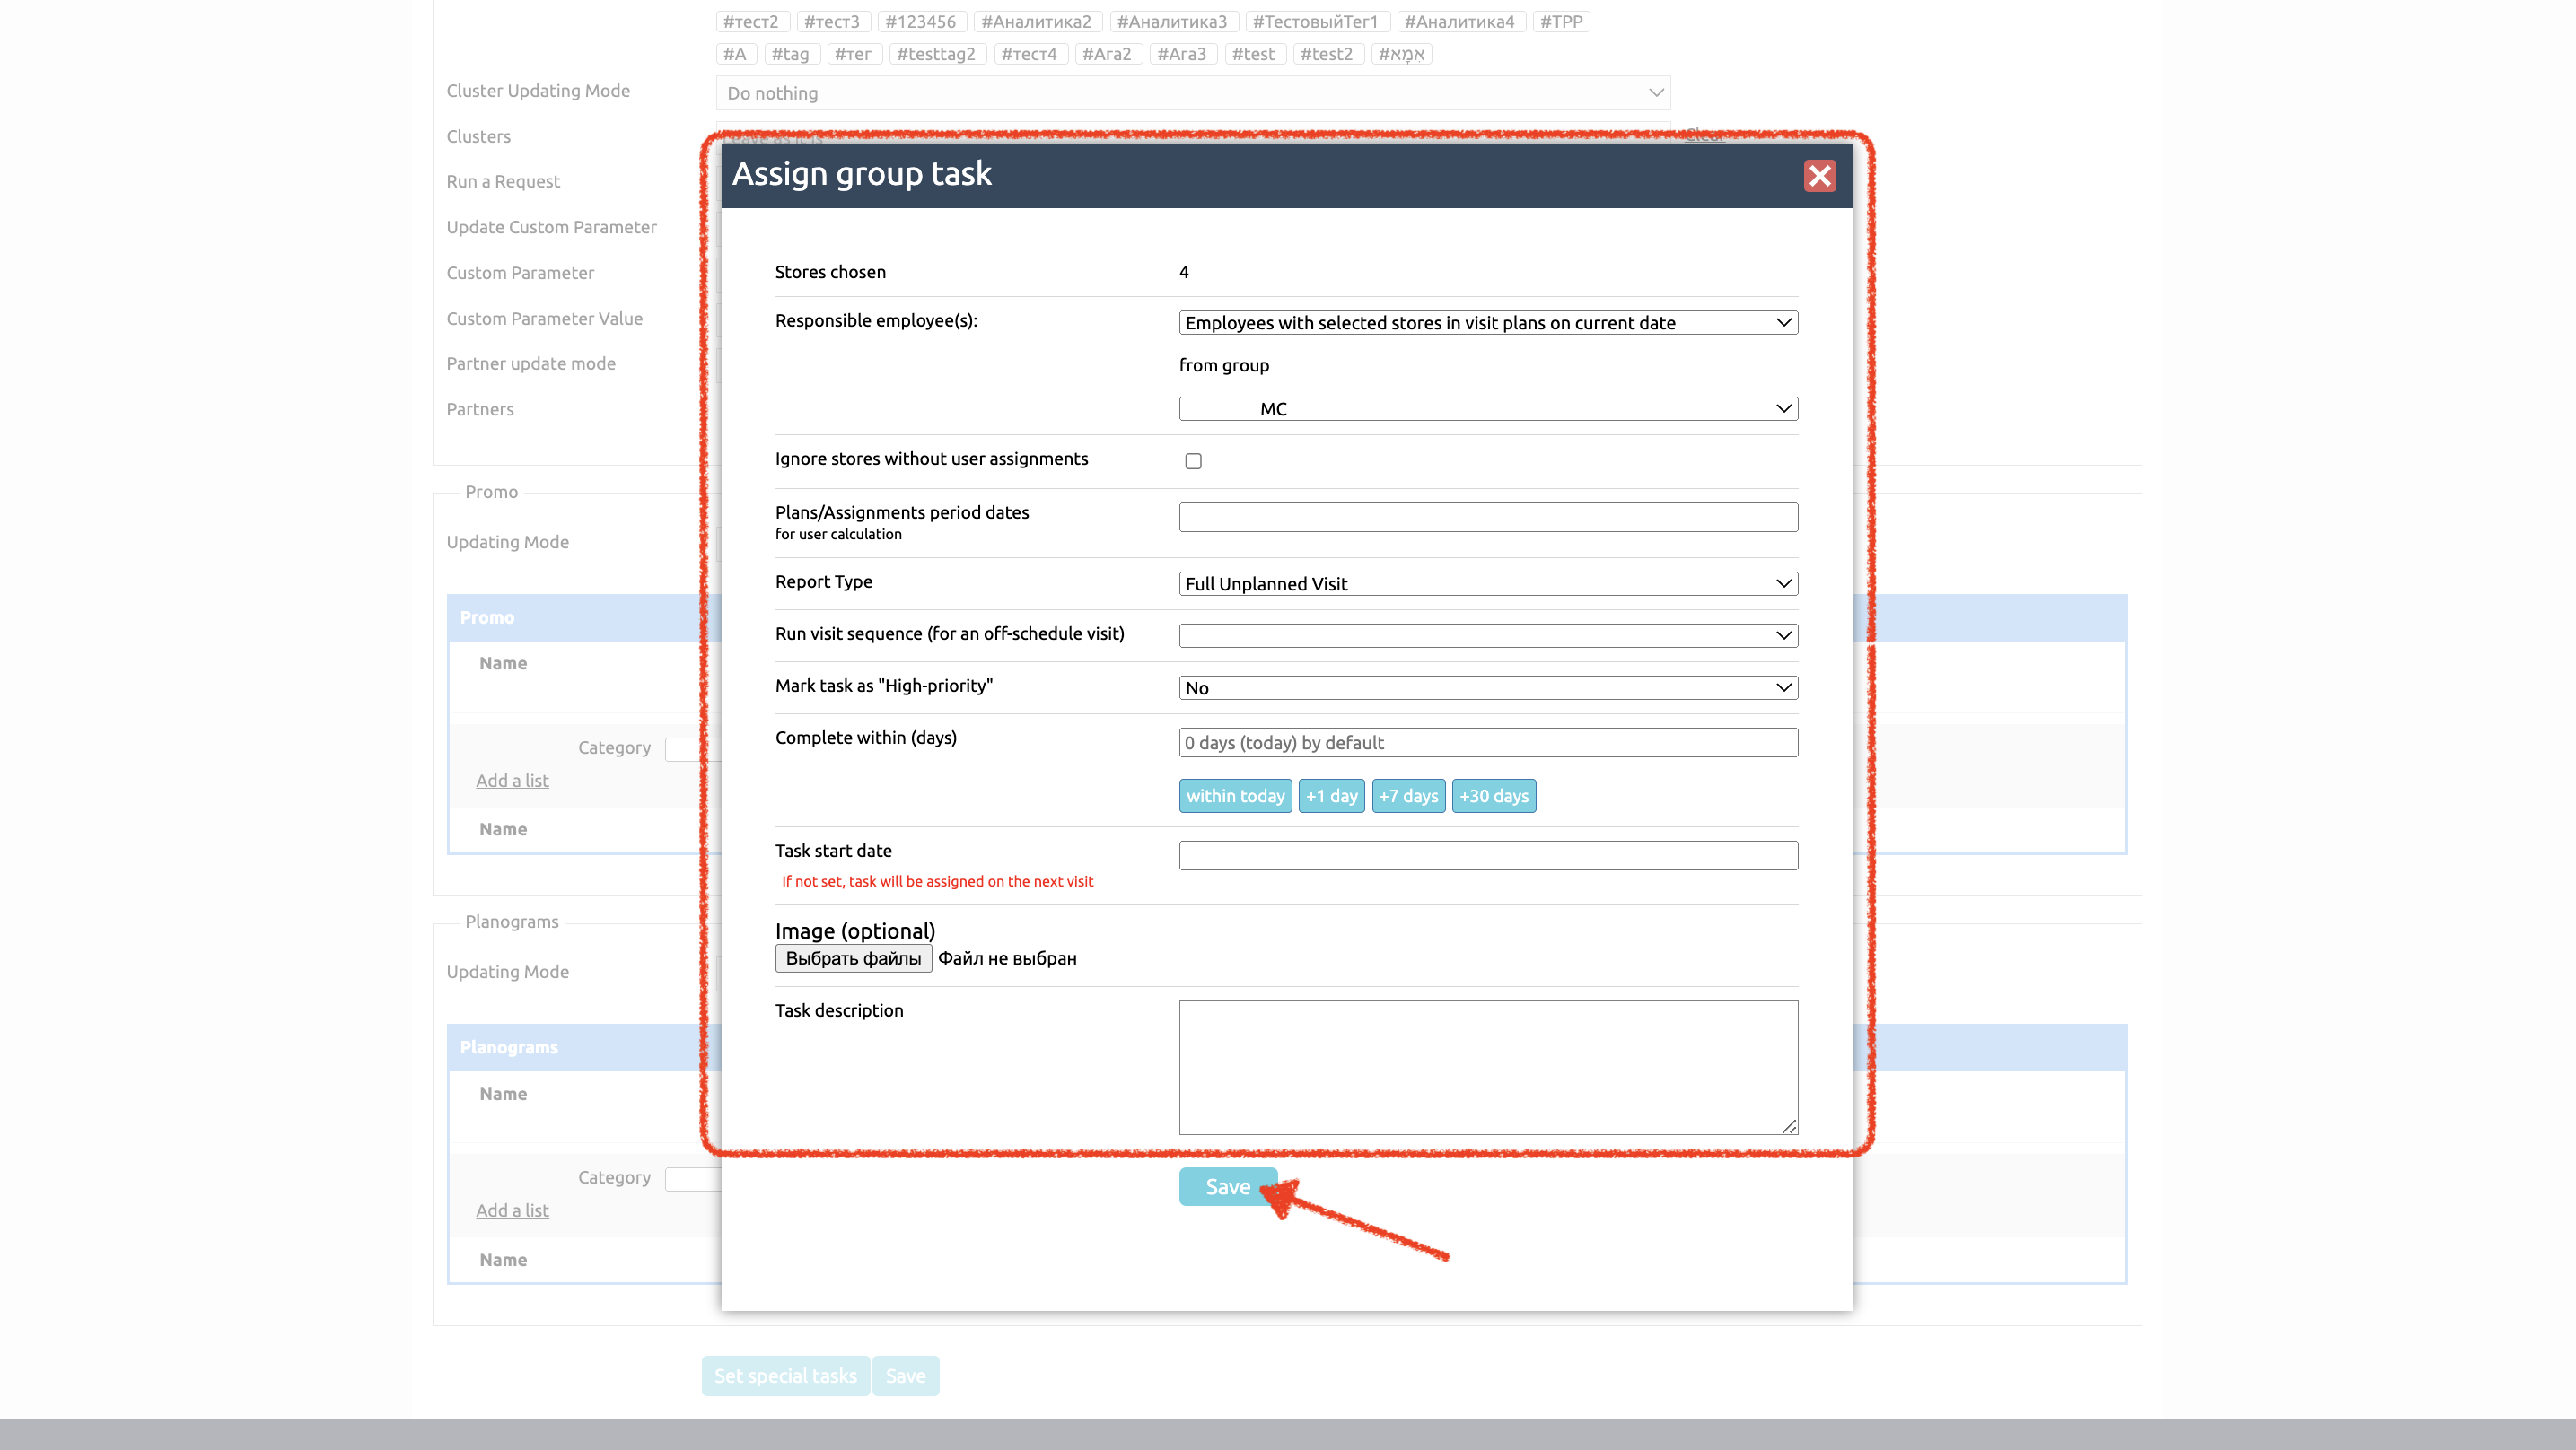
In order to Set a Task you need to fill in required fields
- Task Type Here you choose the type that suits you best. It can be a full unplanned visit or a special task, depending on the purpose of the task itself.
- Task start date This is where you select the date when the task can be started.
- If your project uses partners, they can also be specified. This field is optional
- Stores Here you select the store or stores where the task will be available
- Employee in charge Select the employee or employees who will complete the task. You can set the task to:
- Yourself
- an employee visiting the store
- an employee assigned through clusters
- Choose an employee from your subordinates
- Select multiple employees
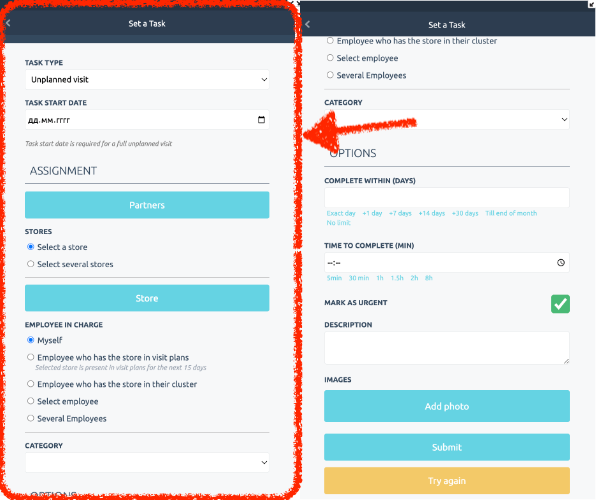
- You can choose a specific SKU category ,for which you are setting a task. This field is optional
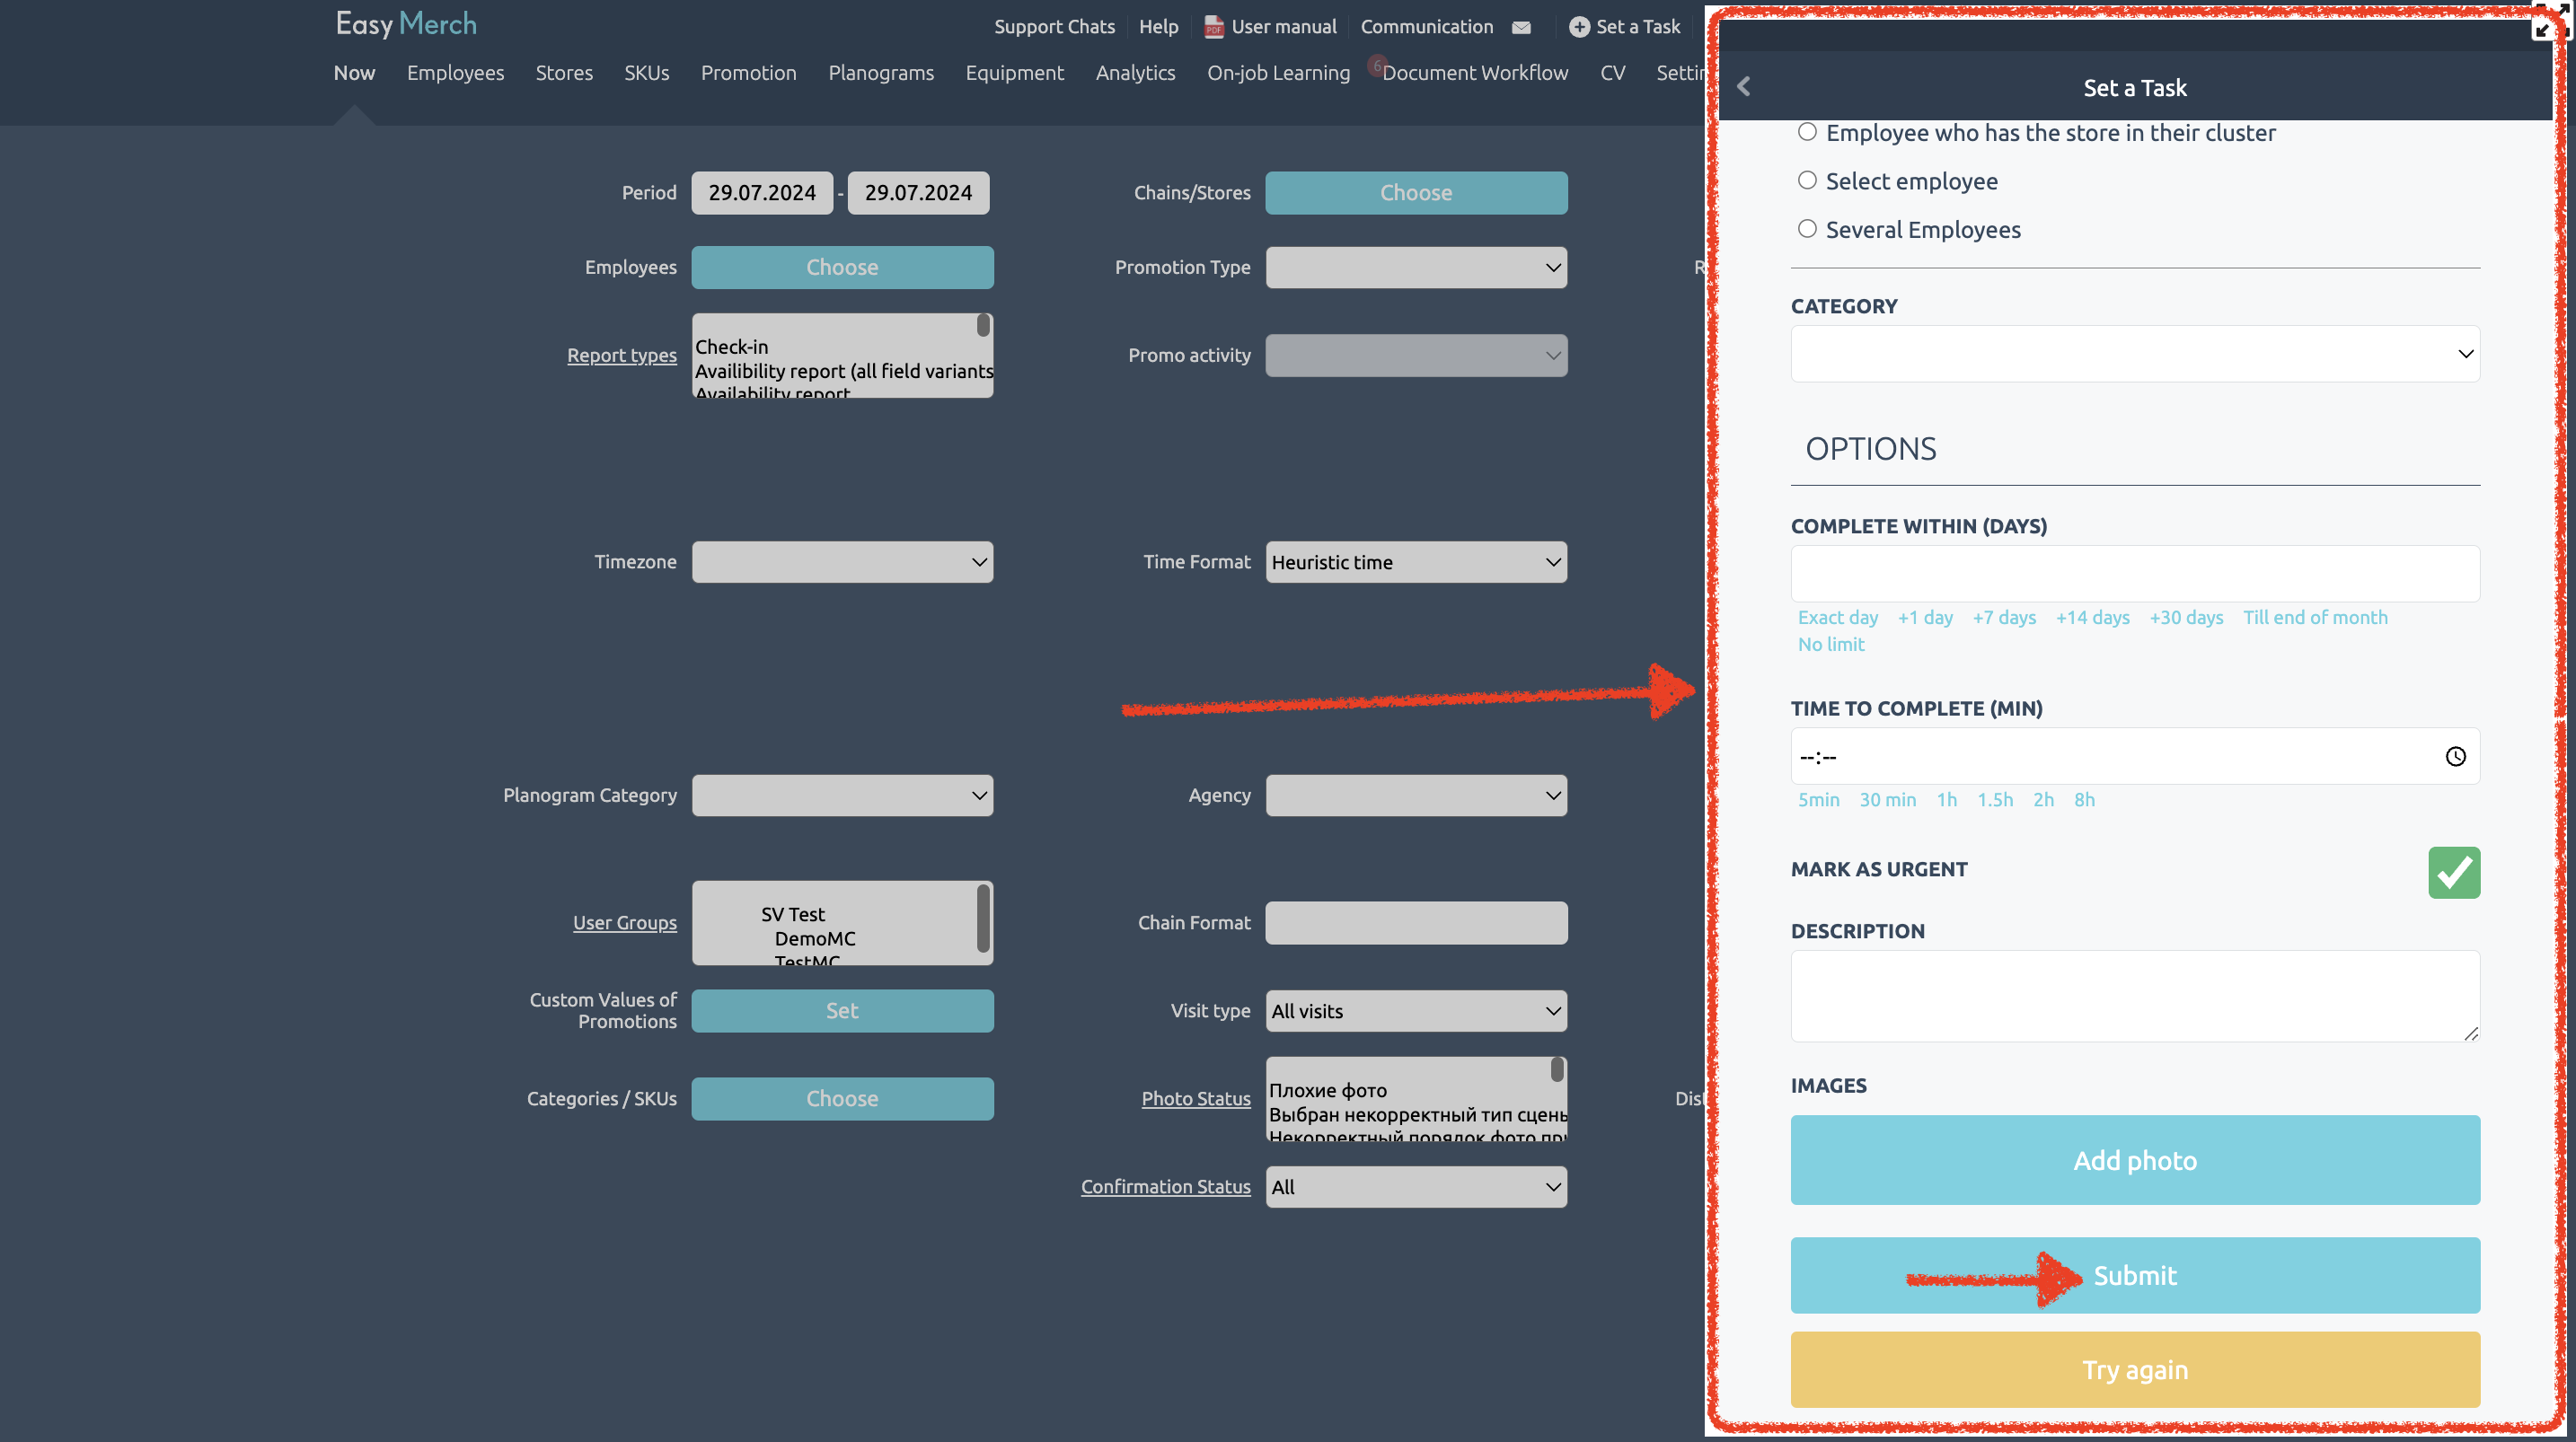
- Complete within Here you specify the deadline after which the task will be considered overdue. The possible deadline options can be customized for your project. You can make it in the form of a drop-down list, you can also add a "for next visit" option
- Time to complete Here you can specify the time that the employee should spend on the task. This field is optional.
- Your task can be Marked as urgent Urgent task means that if an employee has a task for a specific store, he/she will not be able to complete the visit without completing the task.
That is, a situation may arise where an employee has been assigned an urgent task during a visit, and he/she will not be able to complete it until he/she completes the task. We recommend to pay attention to this field when setting a task
- In the Description you can specify additional information about the task for an employee. This field is optional
- You can also Add photo to your task. This step is optional
After filling in the task information, press Submit. The assigned task will be displayed on the main screen of the executor with all the information about the task.

